
User's Manual
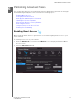
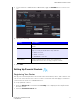
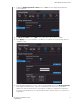
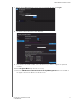

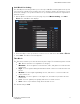
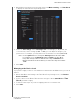
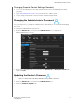
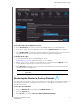
Table Of Contents
- WD® Service and Support
- Important User Information
- Product Overview
- Getting Started
- Basic Settings and Tasks
- Advanced Settings
- Performing Advanced Tasks
- Installing and Using WD Print Share
- Troubleshooting
- Regulatory and Warranty Information
- Appendix: Technical Specifications
- Index

PERFORMING ADVANCED TASKS
54
MY NET N900 CENTRAL ROUTER
USER MANUAL
1. On the Device List View screen (see page 52), below Master Setting, click Time Block
to display the Time Block Policy Setting screen.
2. Select the Time Range and the Filtering Level it should apply to. By default, the
screen shows a 24-hour range (12AM - 12AM); you can adjust the range to your
preferences. For example, you may want to block all web access from (8AM-5PM).
Note: Use the Update button to change the Filtering Level for the whole table.
For example, if you click Maximum and then Update, the Time Block
Policy table changes all times within the time range to Maximum. The
filtering level affects the whole table if you set the time range from 12AM -
12AM.
3. Click Save.
Managing at the Device Level
If you prefer to apply controls to selected devices rather than at the Master level, you can do
that too.
1. On the Safe Block List Setting or the Time Block Policy Setting screen, click Back to
Device List View.
2. Select a device in the Device Table and click the type of block (Safe/Block or
Time
Block) you want to apply.
3. Follow the same steps as you do for applying a block on a master level.
4. Click Save.