
Installation & Assembly
MOUNTING THE HEATER
Note: You may decide to mount your heater to the back panel at this point. However, you may wait to do this until your electrician arrives to
connect the heater to the power source.
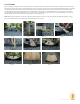
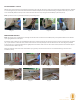
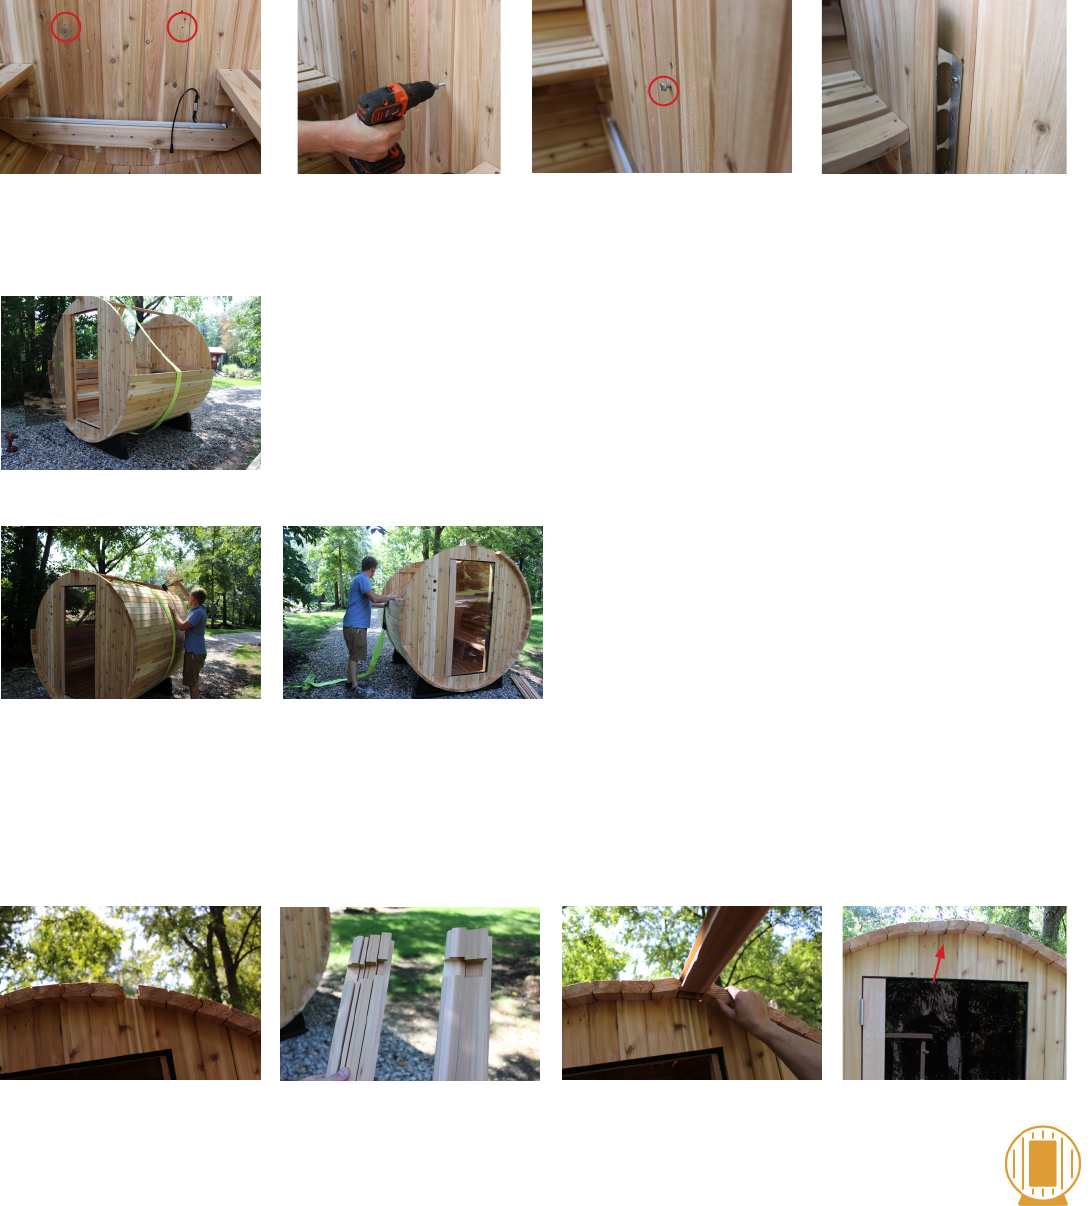
There is a set of four lag bolts to mount the heater, two long and two short. These are found in the heater box with the “caution” signs. Drill two
holesonthebackpanelofyoursaunacenteredbetweenthetwobenches,sothatthebaseofyourheatersits5-7”ooftheoorofyourbarrel
sauna.Mountthelongboltsinthepredrilledholesonthebackpanel(34-35).Donotfastenthemushagainstthepanel,ratherletthemextend
out of the panel approximately ¼” in order to hang the heater on these (36). Hang the heater on these bolts using the top holes on the mounting
bracket on the back of the heater (37). Once your electrician has connected your heater to the power source, fasten the shorter bolts into the
bottomholesontheheater’smountingbracketushagainstthepanel.
ROOM ASSEMBLY…CONTINUED
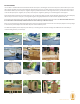
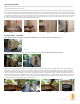
Note: at this point in the installation, you may nd it helpful to tie a loose rope or strap around your sauna. (38)
Continue placing staves, tapping them in place with a rubber mallet (39-40). Do not nail the remaining staves in place.
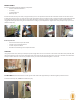
When you arrive to the point of closing the room, you may nd that the remaining space will not accommodate a full-size stave (41). We have
provided a set of ller staves cut into various widths (42). Choose the necessary combination of ller staves to provide the tightest t. Install
the ller staves by tilting the adjacent staves up, inserting and mallet in the ller staves, and push them all back into place (43). It is important
that you use as many staves and llers as you can prior to tightening the stainless-steel bands in order to ensure the tightest seal possible. It is
recommended that you insert enough ller staves so that some of the staves between the 10 – 2 position actually “lift o” the front and rear end
panels. In other words, the radius of that the staves create will actually be slightly larger than the radius of the barrel end panels (44). This will
ensure the tightest seal possible when the bands are tightened.
BARREL SAUNA INSTALLATION MANUAL
page 5
Image 34 Image 35 Image 36 Image 37
pre-drilled
holes
leave
extended out
1/4”
Image 38
Image 39 Image 40
Image 41 Image 42 Image 43 Image 44
Staves slightly
lift o the ends
of the barrel