AVT GigE Installation Manual AVT GigE Vision Cameras V2.0.0 70-0062 26 July 2011 Allied Vision Technologies Canada Inc.
Legal notice For customers in the U.S.A. This equipment has been tested and found to comply with the limits for a Class A digital device, pursuant to Part 15 of the FCC Rules. These limits are designed to provide reasonable protection against harmful interference when the equipment is operated in a residential environment.
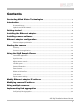
Contents Contacting Allied Vision Technologies ............................................................. 5 Introduction .................................................................................................................. 6 Document history ...................................................................................................... 6 Symbols used in this manual ........................................................................................ 7 Getting started .............
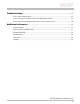
Troubleshooting ......................................................................................................... 36 Is the camera getting power? ...................................................................................... 36 Is the camera powered, but not detected in GigE Sample Viewer? ....................................... 36 Is the camera listed in GigE Sample Viewer but can’t acquire images?.................................. 38 Additional references .................................
Contacting Allied Vision Technologies • Technical information: http://www.alliedvisiontec.com • Support: support@alliedvisiontec.com Allied Vision Technologies GmbH Taschenweg 2a 07646 Stadtroda, Germany Tel.: +49.36428.677-0 Fax.: +49.36428.677-28 e-mail: info@alliedvisiontec.com Allied Vision Technologies Inc. 38 Washington Street Newburyport, MA 01950, USA Toll Free number +1-877-USA-1394 Tel.: +1 978-225-2030 Fax: +1 978-225-2029 e-mail: info@alliedvisiontec.
IIntrod ductiion This AVVT GigE Installation Manu ual provides iinstructions for first timee use of AVT G GigE Vision cameras. c Po owering up th he camera, innstalling AVTT drivers and related softtware, enablin ng the user to get up and d running aree the focus foor this docum ment. For info ormation on camera dimeensions, featture overview w, I/O definition, triggerr timing waveforms, frame rate r performaance, pleasee refer to the AVT Techniccal Manuals uunique for each camera fam mily.
S Symbo ols us sed in this manua m al ghlights impportant inform mation Thiis symbol hig ghlights impportant instruuctions. Follow these insstructions Thiis symbol hig to avoid malfun nctions. Thiis symbol hig ghlights URLLs for furtherr information n. The URL itsself is sho own in blue. Exaample: htttp://www.alliedvisiontecc.com AVTT GigE Installlation Manuual V2.0.
G Getting sttarted d The following comp ponents are required r for yyour camera system: Ethern net adapteer GigE Vision camerass can operate on 10/1000, or gigabit sspeed Ethern net adapters. In order to take advan ntage of maximum camerra frame ratees a gigabit speed adapteer is requireed. A list l of tested Ethernet ad apters is avaailable on thee AVT websitte. htttp://www.allied dvisiontec.com m/fileadmin/content/PDF/Suppport/Applicatiion_Notes GigE_Cameras..
Opticss AVT cam meras are sold without leenses. The caameras offerr C-mount, CSS-mount or FF-mount mechan nical interfacces for installling a lens. Lenses can bbe purchasedd directly froom the lens maanufacturer, from AVT or from an AVTT distributor.. Users will n need to selecct the desired d focal length h and approp priate opticaal format for the target caamera modell. AVVT offers a nu umber of lensses to choosee from. htttp://www.alliedvisiontecc.com/us/prroducts/acceessories/lensses.
Insta alling the Ether E rnet a adap pter If your host computter has an avvailable Etheernet port, thhis can be useed with AVT G GigE c Wee recommend d that your c amera system m use a dedicated Ethern net port Vision cameras. not shaared with internet or locaal area netwoorks. If moree ports are needed, or yoour existing Ethernet adapter isn’t able to operaate at gigabiit Ethernet speeds, installing additio onal hardwarre may be req quired.
Insta alling camera softw s ware Instrucctions for sofftware installation presennted below aare specific to Windows 77. AVT GigE Vision camerass can be operated under earlier versions of Windoows including XP. Suggesstions specifiic to Linux, QNX Q and OSX are also offeered when appplicable.
Download camera drivers Do ownload the GigE G Samplee Viewer or PvvAPI SDK. htttp://www.alliedvisiontec.ccom/us/produucts/software//avt-pvapi-sddk.html Allternative to AVT softwarre, AVT GigE ccameras will work with an ny GigE Vision compliaant software package. Coontact the sooftware provider for installation in nstructions. A listing of reecommendedd software paackages: htttp://www.allieedvisiontec.com m/us/products//software/3rd--party-solution ns.
[Linux] Æ Precompiled versions of GigE Sample Viewer are available in the AVT GigE SDK/binpc directory. Æ Run as root, e.g. “sudo ./SampleViewer”, allowing the OS to boost the priority of the AVT driver thread, the driver to bind directly to the NIC adapter, and minimize dropped packets. Users who feel running as root compromises their system security may find the following implementation satisfactory: - set the executable owner as root.
E Etherrnet adap a pter config c gurattion After in nitial Etherneet adapter haardware insttallation connect the Ethernet adapteer directlyy to the cameera. The defaault configurration will asssign an IP aaddress autom matically using the t Link-Locaal Address raange of 169. 254.xxx.xxxx or an address defined th he by the DHCP server, if pressent. Users can c fix the ad dapter address to minimizze the time rrequired for a camera to be recognized by the host h applicattion.
Adjust camera packet p sizee [Windo ows 7, Intel Gigabit CT] Æ Æ Æ Æ Æ Æ Æ Æ Start S , Controll Panel Hardware H andd Sound Device D Managger Network N Adappter riight click Addapter device name Properties P Advanced A tab Settings: S Jum mbo Packet Value: V 9014 Bytes B [Linuxx] T sudo gedit Æ Terminal: /etc/network / k/interfaces Æ Add: A mtu 822 28 to approp priate interface.
Adjust buffers and a moderration ratee [Windo ows 7, Intel Gigabit CT] Æ Æ Æ Æ Æ Æ Æ Æ Æ Start S ,Control Panel Hardware H andd Sound Device D Managger Network N Adappter riight click Addapter device name Properties P Advanced A tab Performance P Options O Settings: S Inteerrupt Moderaation Rate R Value: V Extrem me Æ Settings: S Tran nsmit Bufferss Value: V 256 byytes Figure 8: Inttel adapter peerformance opptions.
S Startting the ca amerra P Powerr up A cameera power adaapter is availlable from AVVT. Please coonsult the caamera techniical manual for connecttor definition n, voltage sppecifications and related part numberr informaation. AVVT Product litterature htttp://www.alliedvisiontecc.com/us/suupport/down nloads/produuctliteerature.htmll C Conne ect to host applic a cation Use a Cat C 5E or Cat 6 rated Ethernet cable too connect thee camera to tthe host adaapter.
Using g the e GigE E Sam mple View wer This application is used u to streaam live view iimages from the camera,, adjust the ccamera parameeters and tesst functionaliity. Thee GigE Sample Viewer cann be downloaaded from th he AVT websitte witthout registrration. htttp://www.alliedvisiontecc.com/us/prroducts/softw ware/avt-pvapisdkk.html Laun nch the e applic cation he GigE Samp ple Viewer ap pplication. W Wait for the ccamera to apppear listed uunder Start th Host.
Adju ust cam mera con ntrols Select the desired camera fro om the camerras window of the GigE Sam mple Viewer. Click the wrencch icon. The con ntrols window w is used to configure the cam mera frame raate, exposurre time, colorr balancee, imaging mode, m strobe functio onality, pixell format, and d much more . A detailed explanattion of camera controls can be found in thee AVT GigE Caamera and A Do ocument. Driver Attributes AVVT GigE Camera and Driverr Atttributes dow wnload link: http p://www.
Even nt chan nnel Select the desired camera ffrom the cam meras window w of the GigEE Sample Vieewer. Click the film icon,, shown left. T is a tool used to monnitor in-cameera events suuch as The Eveents window will open. This AcquisiitionEnd, Exp posureStart, ExposureEn d, etc. The ffactory defauult settings ddisable all even nt notificatio ons. Use thee camera con ntrols to seleect which eveents to monittor. View thee EventID to understand the disp play format in i the Eventss window.
RS232 communicattion can be used for interrfacing the caamera to mootorized lenses, temperrature and prressure senso ors, camera pposition mottors, and oth her applicatioons. Figuree 14: GigE Sam mple Viewer SSerialIO. Seek k came era Select the desired camera ffrom the cam meras window w of the GigEE Sample Vieewer. Click the seek icon , shown left.. The seeek camera window will ap ppear.
Expo ort cam mera setttings Select the desired camera ffrom the cam meras window w of the GigEE Sample Vieewer. Click the floppy dissk icon, show wn left. dow will appeear requestinng a downloaad location ffor the camerra setup A file explorer wind file. Th his file captures the curreent camera seettings and ccreates a sim mple text file. This file can n be uploaded to other caameras allow wing both uniits to utilize the same camera setting gs.
Modify Etthernet ad dapte er IP a addre ess The “Ob btain an IP address autom matically” prrocess can taake up to onee minute for the approp priate IP addrress to resolvve and for a ccamera to bee recognized on the adappter. It is possible to speeed up this reecognition process by fixxing the IP adddress of thee adapter l address range of 169.254.xx.x.
[OSX] Æ Æ Æ Æ System Preferences Network Select Ethernet, click Advanced TCP/IP tab, Configure IPv4: Manually IPv4 Address: 169.254.100.1 Subnet Mask: 255.255.0.0 Router: Blank Figure 20: Network property window, OSX Snow Leopard AVT GigE Installation Manual V2.0.
Modifying g cam mera IP ad ddres ss AVT Gig gE Vision cam meras supporrt a number oof IP addresssing modes. Cameras shiipped from th he factory aree configured to DHCP. Iff a DHCP servver is not present, the cam mera uses th he AutoIP con nfiguration mode. m Config guration Mo ode DHCP Descriiption Obtain n an IP addreess automatiically using D DHCP (Fallbaack to Autto-IP) AutoIIP Obtain n an IP addreess automatiically using A Auto-IP (169.254.xxx.
S the cam mera(s) you wish to Æ Select alter, a select Change C Æ You Y are preseented with th hree different d addressing modes. To manually m assiign an IP add dress, select use thee following IPP address: Æ Select S cameraa, click Change Æ Select S Use thee following IPP address. Æ Enter E desired d IP, subnet mask, m and gateway. g Figure 22: Setting fixed camera IP address. Non Auto-IP rrange.
Using g multiple e cam meras s There are a a numberr of different methods forr configuringg a multiple ccamera systeem. Most of these can be diffferentiated in nto two arch itectures: Single Etherneet port and M Multiple Etherneet port. In order o to determine which architecturee is needed, start by calculating the amount of band dwidth required from thee cameras based on the desired resoluution, pixel fo ormat, framee rate and number of cam meras.
Singlee Ethernet port Multiplle cameras arre connected d to a switch . The switch is connectedd to a single Ethernet port. This T is the sim mplest multip ple camera innstallation. The camerass can be man naged using Auto-IP, A no additional a co onfiguration on the switcch is necessary. Fig gure 24: Multii camera netw work configuraation using a sswitch and sin ngle Ethernett port This arcchitecture co ombines bandwidth comiing from each camera onto a single cable conneccted to the ho ost.
Multip ple Ethernet ports Each caamera is conn nected directly to an Eth ernet port. No switch is used. This configu uration is mo ore complex and a requiress the user to manage host and cameraa IP addresssing however it allows eaach camera tto use the entire gigabit iinterface ban ndwidth.
Fix ho ost adapterr IP addresss Æ Refer R to Chap pter Modify Ethernet E adaapter IP addrress on page p 23. Æ Select S Use thee following IPP address: a Adapter A 1 IP Address: 169.254.100..1 Subnet S mask:: 255.255.25 55.0 Adapter A 2 IP Address: 169.254.200..1 Subnet S mask:: 255.255.25 55.0 FFigure 28: IP cconfiguration n window for A Adapter 1 ddress Fix camera IP ad Æ Refer to Chaapter Modifyy camera IP address a on page p 25. t following IP Æ Select Use the address: Camera1 IP Address: 169.254.100.
Imple emen nting link aggre egatiion The GX series camerras offer two o Gigabit Etheernet ports ffor image datta transfer an nd c one or both portts on the GX tto Ethernet aadapter portts on a controll. Users can connect host co omputer. Thee dual port approach req uires the hosst computer to configuree a Link Aggreg gate Group (LLAG). A LAG configuratio c n combines m multiple Ethernet ports iinto a single data d channel.
Example 2: 0C using YUVV422 pixel format and outtputting 1000 fps GX1050 Bandwiidth usage = 1024 x 1024 4 x 2 (2 byte for YUV422)) x 100 ~ 210 MBps Percentage off single port GigE bandwiidth ~ 168 % %, r to operate o the GX1050C G at 1100 fps usingg YUV422 LAG is required C Config guring g Link Aggre egatio on The GX camera conn nected to host using LAG G will requireed two host EEthernet adappter ports.
Æ Select S the desired adapteers corresponnding to the ports to be uused by the PProsilica GX G camera, cllick Next Figure 32: Team wizzard adapter selection. Æ Select S team type: t Static Link Aggregattion click c Next Figure 33: 3 Team wizaard team type selection. The T team willl now configu ure and a new w adapter wiill appear in the Networkk Connections C window.
[Linuxx] Link Ag ggregation iss referred to as bonding iin Linux. Thee following in nstructions aare for Ubuntu u Linux 10.04 4 or newer. Forr full installattion instructioons on Ubuntuu, see: http ps://help.ubunttu.com/communiity/UbuntuBondding http ps://help.ubunttu.com/communiity/LinkAggregattion Æ Download D ifenslave modu ule.
[OSX] Forr full installattion instructioons on OSX, seee: http p://docs.info.ap pple.com/article..html?path=ServverAdmin/10.6/een/asa7873dc0.html Note these instructions are foor OSX server, but apply to OSX also. Æ System S Preferrences Æ Network N Æ Select S Ethernet, click gear icon, Manage M Virtuaal Interfaces… Æ Click C the Add (+) button, and select New N Link Aggrregate. Æ Select S the ports to bond from f the liist, click Creaate, Done. Figure 355: Manage Virttual Interfacees. OSX.
T Troub blesh hootin ng IIs the camera c getting g powerr? The RJ4 45 Ethernet connector c on n the back foor the cameraa contains LEEDs, one of w which will illumin nate when the camera is powered. p If uunlit, check the power addapter. If poossible, test thee adapter witth a working camera to vverify its operration. If usiing a custom m power adapter, be sure the adapter an nd wire gaugee is rated to 200 – 500 m mA.
[Linuxx, OSX, QNX] In AVT GigE SDK/bin-pc// directoory: Terminal: sudo ./CLLiPConfig –l Possiible resullts: Cameraa is listed Your caamera and NIIC must be on n the same s ubnet. A sam mple IP conffiguration forr the cameraa and adapter is shown beelow. IP addrress: Subnett Mask: Ad dapter 16 69.254.23.2 25 55.255.0.0 Cameera 169..254.43.3 255..255.0.0 Cameraa is not listeed This can happen if the t IP addresss of the ada pter is not oon the same ssubnet as thee cameraa.
Is the cam mera listted in Gig gE Samplle Viewerr but can n’t acquirre images s? Reset your y camera settings s to faactory defau lt: with ConffigFileIndex = Factory, cllick the ConfigFFileLoad buttton. While streaming, chheck your Staats. Figure 38 8: GigE Samplee Viewer. Statts reporting. StatFraamesCompleeted/StatPacketsReceivved = 0. • • Likely L a firew wall is blockin ng incoming traffic. Disabble your firew wall on Ethernet adapter a conn nected to cam mera.
Additional references Product webpage http://www.alliedvisiontec.com/us/products/cameras/gigabit-ethernet/prosilica-gc.html Product manuals and CAD models http://www.alliedvisiontec.com/us/support/downloads/product-literature.html AVT GigE PvAPI SDK http://www.alliedvisiontec.com/us/products/software/avt-pvapi-sdk.html Knowledge base http://www.alliedvisiontec.com/us/support/knowledge-base.html Case studies http://www.alliedvisiontec.com/us/products/applications.html Firmware http://www.