
Manual
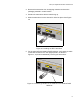
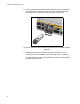

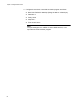


Table Of Contents
- Contents
- List of Figures
- List of Tables
- Preface
- Chapter 1
- Overview
- Chapter 2 :
- Chapter 3
- Chapter 4
- Chapter 5
- Troubleshooting
- Power LED is Off
- Twisted Pair Port Link LED is Off
- SFP or XFP LED is Off
- Transceiver is Installed but the Status is “Not Present”
- System Fault LED is Blinking
- System Fault LED is Steadily On
- Cannot Establish a Local (Out-of-Band) Management Session
- Switch Functions Intermittently
- Issues with Virtual Stacking Chassis Configuration
- Troubleshooting
- Appendix A
x600 Layer 3 Gigabit Ethernet Switch Installation Guide
81
2. Remove the transceiver from its shipping container and store the
packaging material in a safe location.
3. Position the transceiver with the label facing up.
4. Slide the transceiver into the slot until it clicks into place. See Figure
40.
Figure 40. Installing an SFP Transceiver
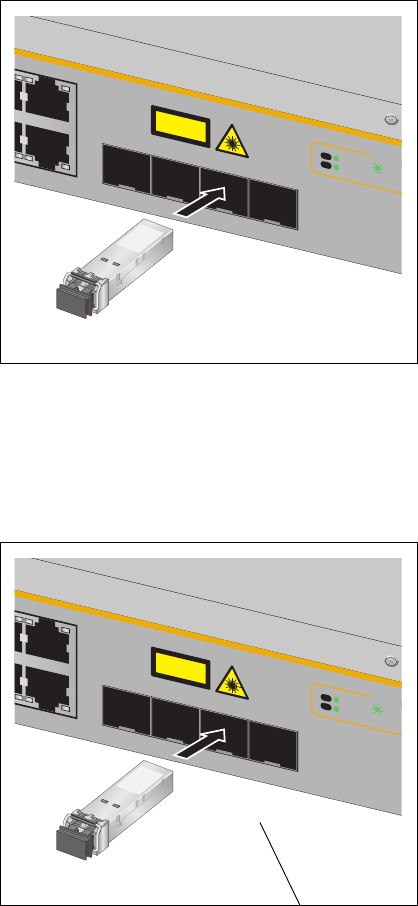
5. For the x600-24Ts and x600-24Ts/XP switches, verify that the handle
on the SFP transceiver is in the upright position, as shown in
Figure 41, to prevent inadvertently removing the transceiver.
Figure 41. Positioning Handles on the x600-24Ts and x600-24Ts/XP
Switches
1331
23R
24R
CLASS 1
LASER PRODUCT
D/C
L/A
1000 LINK / ACT
FDX
PORT A
C
SFP
21 22
23
24
1331
23R
24R
CLASS 1
LASER PRODUCT
D/C
L/A
1000 LINK / ACT
FDX
PORT A
C
SFP
21 22
23
24