NetExtreme II Family Adapters AT-2973SX AT-2973T AT-2973T/4 Installation and User’s Guide 613-001252 Rev.
Copyright © 2011 Allied Telesis, Inc. All rights reserved. No part of this publication may be reproduced without prior written permission from Allied Telesis, Inc. Broadcom® and the pulse logo are among the trademarks of Broadcom Corporation. All other product names, company names, logos or other designations mentioned herein are trademarks or registered trademarks of their respective owners.
Electrical Safety and Emissions Standards This product meets the following standards. Federal Communications Commission Interference Statement Declaration of Conformity Manufacturer Name: Allied Telesis, Inc. Declares that the product: NetExtreme II Family Adapters Model Numbers: AT-2973SX, AT-2973T, AT-2973T/4 This equipment has been tested and found to comply with the limits for a Class B digital device, pursuant to Part 15 of FCC Rules.
RFI Emissions FCC Class B, EN55022 Class B, VCCI Class B, C-TICK, CE Immunity EN55024 Electrical Safety EN60950-1 (TUV), UL 60950-1 (CULUS) Laser Safety EN60825 Translated Safety Statements Important: The indicates that a translation of the safety statement is available in a PDF document titled “Translated Safety Statements” on the Allied Telesis website at www.alliedtelesis.com/support/software.
Contents Preface ............................................................................................................................................................ 11 Safety Symbols Used in this Document ........................................................................................................................12 Where to Find Web-based Guides ................................................................................................................................
Contents Modifying the Startup Disk .....................................................................................................................................59 Installing the DOS NDIS2 Driver Software .............................................................................................................61 Using Keywords for the Drivers .....................................................................................................................................
AT-2973SX, AT-2973T, and AT-2973T/4 NetExtreme II Family Adapters Installation and User’s Guide Using the Installer134 Using the Silent Install Option134 Modifying Management Applications137 Repairing Management Applications138 Removing Management Applications139 Chapter 11: Troubleshooting 141 Checking Hardware Diagnostics142 Checking Port LEDs143 Consulting the Troubleshooting Checklist144 Checking Current Drivers144 Running a Cable Length Test145 Testing Network Connectivity145 Solving Microsoft Windows
Contents 8
Figures Figure 1. AT-2973SX Adapter .............................................................................................................................................17 Figure 2. AT-2973SX Faceplate ..........................................................................................................................................17 Figure 3. AT-2973T Adapter .....................................................................................................................................
Figures 10
Preface This guide contains instructions on how to install the AT-2973SX, AT-2973T, AT-2973T/4 adapters and configure the adapters using the driver software.
Preface Safety Symbols Used in this Document This document uses the safety symbols defined in Table 1. Table 1. Safety Symbols Symbol 12 Meaning Description Caution Performing or omitting a specific action may result in equipment damage or loss of data. Warning Performing or omitting a specific action may result in electrical shock.
AT-2973SX,, AT-2973T, and AT-2973T NetExtreme II Family Adapters Installation and User’s Guide Where to Find Web-based Guides The installation and user guides for all Allied Telesis products are available in portable document format (PDF) on our web site at www.alliedtelesis.com/support/software. After you have accessed this website, enter the model number in the Search by Product Name box and then click Find to view the current list of documents.
Preface Contacting Allied Telesis This section provides Allied Telesis contact information for technical support as well as sales or corporate information. Online Support You can request technical support online by accessing the Allied Telesis Knowledge Base: www.alliedtelesis.com/support/kb.aspx. You can use the Knowledge Base to submit questions to our technical support staff and review answers to previously asked questions.
Chapter 1 Introducing the AT-2973SX, AT-2973T, and AT-2973T/4 Adapters This chapter provides an introduction to the Allied Telesis AT-2973SX, AT-2973T, and AT-2973T/4 NetExtreme II Family Adapters and discusses the following topics: “Functional Descriptions” on page 16 “Features” on page 22 15
Chapter 1: Introducing the AT-2973SX, AT-2973T, and AT-2973T/4 Adapters Functional Descriptions The AT-2973SX, AT-2973T, and AT-2973T/4 Broadcom NetXtreme II adapters are a new class of Gigabit Ethernet (GbE) converged network interface controller (C-NIC) that can simultaneously perform accelerated data networking and storage networking on a standard Ethernet network.
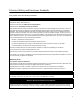
AT-2973SX, AT-2973T, and AT-2973T/4 NetExtreme II Family Adapters Installation and User’s Guide The AT-2973SX adapter connects a PCI-E compliant server or workstation to a Gigabit Ethernet network using fiber optic cabling and a connector that meets 62.5/125 µm or 50/125 µm multimode specifications. This adapter operates at speeds of 1000 Mbps in full-duplex mode. The AT-2973SX adapter is show in Figure 1. 10 0 ATI ACT LNK 1696 Figure 1.
Chapter 1: Introducing the AT-2973SX, AT-2973T, and AT-2973T/4 Adapters For AT-2973SX LED information, see Table 1. Table 1. Network Link and Activity Indicated by the Fiber Port LEDs Port LED Link LED Activity LED AT-2973T Adapter LED Appearance Network State Off No link (cable disconnected) Continuously illuminated Link Off No network activity Blinking Network activity The AT-2973T adapter operates at speeds of 10/100/1000T Mbps in both full-duplex and half-duplex modes.
AT-2973SX, AT-2973T, and AT-2973T/4 NetExtreme II Family Adapters Installation and User’s Guide L/A 101 L/A 0 2 1701 Figure 4. AT-2973T Faceplate For copper-wire Ethernet connections, the state of the network link and activity is indicated by the LEDs on the RJ-45 connector. The LED labeled L/A1 indicates port 1 and the LED labeled L/A2 indicates port 2. See Table 2. Table 2.
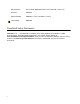
Chapter 1: Introducing the AT-2973SX, AT-2973T, and AT-2973T/4 Adapters AT-2973T/4 Adapter The AT-2973T/4 adapter is a PCI-Express adapter that operates at speeds of 10/100/1000T Mbps in both full-duplex and half-duplex modes. This adapter has four twisted-pair connectors and eight LEDs, as shown in Figure 5. LN K T ATI AC T 1861 Figure 5.
AT-2973SX, AT-2973T, and AT-2973T/4 NetExtreme II Family Adapters Installation and User’s Guide AT-2973T/4 Adapter Physical Description The faceplate on the AT-2973T/4 adapter provides four twisted-pair connectors for attaching the adapter to a compatible link partner. The ports numbers are not shown on the card. See Figure 6 for the port numbers and the LED assignments. When the adapter is mounted vertically, the top LED is the Link LED and the bottom LED is the activity (ACT) LED.
Chapter 1: Introducing the AT-2973SX, AT-2973T, and AT-2973T/4 Adapters Features The following list of features for the AT-2973SX, AT-2973T, AT-2973T/4 adapters applies to all of the supported operating systems: TCP Offload Engine (TOE) Internet Small Computer Systems Interface (iSCSI) offload Single-chip solution 22 – Integrated 10/100/1000BASE-T transceivers – 10/100/1000 triple-speed MAC – Host interfaces – SerDes interface for optical transceiver connection – PCI Express v1.
AT-2973SX, AT-2973T, and AT-2973T/4 NetExtreme II Family Adapters Installation and User’s Guide TCP Offload Engine (TOE) – SMBus controller – ACPI 1.1a compliant (multiple power modes) – IPMI support Advanced network features – Jumbo frames (up to 9 KB). The OS and the link partner must support jumbo frames. – Virtual LANs – IEEE Std 802.3ad Teaming – Smart Load Balancing Teaming – Smart Load Balancing TOE Teaming (with the correct configuration) – Flow Control (IEEE Std 802.
Chapter 1: Introducing the AT-2973SX, AT-2973T, and AT-2973T/4 Adapters adapter, the TCP/IP processing can be moved to hardware, freeing the CPU for more important tasks such as application processing. The Broadcom NetXtreme II adapter's TOE functionality allows simultaneous operation of up to 1024 fully offloaded TCP connections for 1-Gbps network adapters. The TOE support on the adapter significantly reduces the host CPU utilization while preserving the implementation of the operating system stack.
AT-2973SX, AT-2973T, and AT-2973T/4 NetExtreme II Family Adapters Installation and User’s Guide Note For specific systems, see your system documentation for information about support of the WOL feature. Adaptive Interrupt Frequency The adapter driver intelligently adjusts host interrupt frequency based on traffic conditions to increase overall application throughput. When traffic is light, the adapter driver interrupts the host for each received packet, minimizing latency.
Chapter 1: Introducing the AT-2973SX, AT-2973T, and AT-2973T/4 Adapters 26
Chapter 2 Installing the Hardware This chapter describes how to install the AT-2973SX, AT-2973T, and AT-2973T/4 adapters in a PC and discusses the following topics: “Reviewing the Contents of Your Shipment” on page 28 “Reviewing Safety Precautions” on page 29 “Pre-Installation Checklist” on page 31 “Replacing the Bracket” on page 32 “Installing a Network Adapter Card” on page 34 “Connecting the Network Cables” on page 38 27
Chapter 2: Installing the Hardware Reviewing the Contents of Your Shipment The following items are included with your adapter: Antistatic bag (used for protecting the adapter when stored or shipped). Keep the adapter in its packaging until ready for installation. Low-profile bracket (The low-profile bracket is not included with the AT-2973T/4 adapter.) Standard bracket Inform your network supplier of any missing or damaged items.
AT-2973SX, AT-2973T, and AT-2973T/4 NetExtreme II Family Adapters Installation and User’s Guide Reviewing Safety Precautions Please review the following safety precautions before you begin to install a network adapter card. Note The indicates that a translation of the safety statement is available in a PDF document titled “Translated Safety Statements” on the Allied Telesis website at www.alliedtelesis.com/support/ software.
Chapter 2: Installing the Hardware accessing internal components. - Installation or removal of adapters must be performed in a staticfree environment. The use of a properly grounded wrist strap or other personal antistatic devices and an antistatic mat is strongly recommended.
AT-2973SX, AT-2973T, and AT-2973T/4 NetExtreme II Family Adapters Installation and User’s Guide Pre-Installation Checklist Before you install an adapter card, do the following: 1. Verify that your system is using the latest BIOS. Note If you acquired the adapter software from the Allied Telesis support website, enter the path to where the adapter driver files reside on your system. 2. If your system is active, shut it down. 3. When the system shut down is complete, power OFF and unplug your system. 4.
Chapter 2: Installing the Hardware Replacing the Bracket Both the AT-2973SX and AT-2973T adapters are shipped with the lowprofile bracket attached to the adapter. In addition, the standard bracket is included in the shipment. Depending on your PC, you may need to replace the bracket attached to your adapter. Note The AT-2973T/4 adapter is shipped with a standard bracket attached to the card. A low-profile bracket is not included with this adapter.
AT-2973SX, AT-2973T, and AT-2973T/4 NetExtreme II Family Adapters Installation and User’s Guide ATI ACT LNK 2. Align the tabs of the standard bracket with the holes on the adapter and fasten the screws onto the adapter. See Figure 8. 1698 Figure 8.
Chapter 2: Installing the Hardware Installing a Network Adapter Card The following instructions apply to installing the AT-2973SX, AT-2973T, and AT-2973T/4 adapters in most systems. For details about performing these tasks on your particular system, refer to the manuals that were supplied with your system. Note To perform this procedure, you need to supply a Phillips-head screw. Note The AT-2973SX, AT-2973T, and AT-2973T/4 adapters require a PCIe x4 PC.
AT-2973SX, AT-2973T, and AT-2973T/4 NetExtreme II Family Adapters Installation and User’s Guide Figure 9. Removing the PC Cover 3. Select an empty, non-shared PCI slot and remove the faceplate. Keep the faceplate in a safe place. You may need it for future use. See Figure 10. Figure 10. Removing the Faceplate From PCI Slot Note If you cannot locate or do not know how to find an appropriate PCI slot, refer to the documentation that came with your system.
Chapter 2: Installing the Hardware 4. Remove the network adapter card from the shipping package and store the packaging material in a safe location. Caution Wear a grounding device and observe electrostatic discharge precautions when installing the network adapter card in a system. Failure to observe this caution could result in damage to the card. 5. Applying even pressure at both corners of the card, push the adapter card until it is firmly seated in the appropriate PCI slot.
AT-2973SX, AT-2973T, and AT-2973T/4 NetExtreme II Family Adapters Installation and User’s Guide Figure 12. Securing the Adapter with a High-profile Bracket 7. Replace the system’s cover and secure it with the screws removed in Step 2. 8. Disconnect any personal antistatic devices. 9. Power the system on. Once the system returns to proper operation, the adapter hardware is fully installed. Next, connect the network cables. See “Connecting the Network Cables” on page 38.
Chapter 2: Installing the Hardware Connecting the Network Cables After you install the adapter in your PC, attach the system to a compatible link partner or an IEEE 802.3z compliant Gigabit Ethernet switch. The AT-2973SX adapter has two fiber optic connectors, each with a transmit and receive connector. This adapter requires a fiber optic cable. For cable specifications, see the AT-2973SX adapter data sheet.
AT-2973SX, AT-2973T, and AT-2973T/4 NetExtreme II Family Adapters Installation and User’s Guide After you connect the system to the network and power is supplied, the AT-2973SX, AT-2973T, and AT-2973T/4 adapters attempt to establish the connection at 1000 Mbps in full-duplex mode.
Chapter 2: Installing the Hardware 40
Chapter 3 Installing Broadcom Boot Agent Driver Software This chapter provides information about how to install the Broadcom Boot Agent Driver Software and discusses the following topics: “Overview” on page 42 “Setting Up MBA in a Client Environment” on page 43 “Setting Up MBA in a Server Environment: Red Hat Linux PXE Server” on page 45 41
Chapter 3: Installing Broadcom Boot Agent Driver Software Overview The AT-2973SX, AT-2973T, and AT-2973T/4 NetXtreme II Family adapters support Preboot Execution Environment (PXE). Multi-Boot Agent (MBA) is a software module that allows your network computer to boot with the images provided by remote servers across the network. The Broadcom MBA driver complies with PXE 2.1 code. The MBA module operates in a client/server environment.
AT-2973SX, AT-2973T, and AT-2973T/4 NetExtreme II Family Adapters Installation and User’s Guide Setting Up MBA in a Client Environment Setting up a Multiple Book Agent (MBA) in a client environment involves the following: Enabling the MBA Driver “Enabling the MBA Driver” on page 43 “Configuring the MBA Driver” on page 43 “Setting Up the BIOS” on page 44 To enable or disable the MBA driver, do the following: 1. Boot up your system in DOS mode. Note The uxdiag.
Chapter 3: Installing Broadcom Boot Agent Driver Software Note The message prompting you to press CTRL+S is displayed once for each Broadcom NetXtreme II adapter you have in your system that has MBA enabled. The messages are displayed in the same order as the assigned adapter device number. 3. Use the UP ARROW and DOWN ARROW keys to move to the Boot Protocol menu item.
AT-2973SX, AT-2973T, and AT-2973T/4 NetExtreme II Family Adapters Installation and User’s Guide Setting Up MBA in a Server Environment: Red Hat Linux PXE Server The Red Hat Enterprise Linux distribution has PXE Server support. It allows users to remotely perform a complete Linux installation over the network. The distribution comes with the boot images boot kernel (vmlinuz) and initial ram disk (initrd), which are located on the Red Hat disk#1: /images/pxeboot/vmlinuz /images/pxeboot/initrd.
Chapter 3: Installing Broadcom Boot Agent Driver Software 46
Chapter 4 Installing the Monolithic Software Driver A monolithic driver allows you to download an image of a PC onto an image server and then to another PC with an adapter installed. Often, multiple images are downloaded. The NetXtreme II Monolithic software driver allows remote installation of an image of a PC with an AT-2973SX, AT-2973T, or AT-2973T/4 adapter installed.
Chapter 4: Installing the Monolithic Software Driver Using the NetXtreme II Monolithic Driver The NetXtreme II Monolithic driver is used with a remote imaging software such as WinPE, although it is not associated with any operating system. Before you install a monolithic driver, you must install an AT-2973SX, AT2973T, or AT-2973T/4 adapter in a PC (or multiple PCs) that you want to act as a remote node.
AT-2973SX, AT-2973T, and AT-2973T/4 NetExtreme II Family Adapters Installation and User’s Guide directory. If Windows PE is deployed as a flat image from a RIS or WDS server, you must also place both the b06nd.inf and the appropriate driver file in the I386 or AMD64 directory containing the image.
Chapter 4: Installing the Monolithic Software Driver Inserting the NetXtreme II Monolithic Driver in a WinPE 2.0 Image By default, the monolithic driver is not included in the boot.wim and install.wim files that come with the Windows Vista, Windows Server 2008, and Windows Server 2008 R2 Operating Systems. Microsoft's Windows Automated Installation Kit (AIK) allows you to modify the default boot.wim and install.wim files and create WinPE 2.
AT-2973SX, AT-2973T, and AT-2973T/4 NetExtreme II Family Adapters Installation and User’s Guide 4. Mount the base image to a local directory so that you can add or remove packages by entering: imagex /mountrw c:\VistaPEx86\winpe.wim 1 c:\VistaPEx86\mount 5. Place the monolithic driver and inf file in c:\drivers\x32\ by entering: peimg /inf=c:\Drivers\x32\b06nd.inf c:\VistaPEx86\mount\windows AIK inserts the driver into the WinPE 2.0 image. 6.
Chapter 4: Installing the Monolithic Software Driver Configuring the Speed and Duplex Settings Since the typical environment where the NetXtreme II monolithic driver is used does not provide the means to configure advanced network adapter properties, the driver file (b06nd.inf) was modified to include a section that allows it to be configured for a specific speed and duplex mode.
AT-2973SX, AT-2973T, and AT-2973T/4 NetExtreme II Family Adapters Installation and User’s Guide Options for fiber interfaces: – Auto (1 Gbps is enabled when that speed is supported) = "0" – 1 Gbps Full Duplex = "771" – Auto with 1 Gbps Fallback = "33539" – Hardware default = "65283" The following example shows how to configure a copper interface for a 10 Mbps Full Duplex connection: hkr, , req_medium, 2, "258" 53
Chapter 4: Installing the Monolithic Software Driver 54
Chapter 5 Installing the NDIS2 Driver Software This chapter provides procedures to install the NDIS2 driver on the Microsoft Network Client and DOS NDIS platforms.
Chapter 5: Installing the NDIS2 Driver Software Overview The BXND20X Broadcom NetXtreme II Gigabit Ethernet driver is described in this chapter. This driver can be installed on AT-2973SX, AT-2973T, and AT-2973T/4 adapters that are installed in systems running an MS-DOS platform.
AT-2973SX, AT-2973T, and AT-2973T/4 NetExtreme II Family Adapters Installation and User’s Guide Checking Pre-installation Requirements Before you can successfully install the NDIS2 driver software, you must do the following: Physically install the network adapter in the server. Install the networking software that is appropriate to the operating system (such as Microsoft LAN Manager 2.2 for MS-DOS). The networking software must be running on your server.
Chapter 5: Installing the NDIS2 Driver Software Installing the NDIS2 Driver Software on MS-DOS Platforms The NDIS2 driver software can be run from an MS-DOS startup disk using Microsoft Network Client 3.0 or from the hard disk using Microsoft LAN Manager 2.2. This section describes how to create a startup disk and modify it.
AT-2973SX, AT-2973T, and AT-2973T/4 NetExtreme II Family Adapters Installation and User’s Guide 7. Open the NCADMIN folder and double-click ncadmin.exe. 8. Follow the on-screen instructions to make the network startup disk (choose NE2000 Compatible from the list of adapters). Modifying the Startup Disk To modify the startup disk, do the following: 1. Edit A:\Net\Protocol.ini with Notepad or a similar text editor. a. Change DriverName=$ to DriverName=BXND20X$. b.
Chapter 5: Installing the NDIS2 Driver Software DriverName=BXND20X$ [protman] DriverName=PROTMAN$ PRIORITY=MS$NDISHLP [MS$NDISHLP] DriverName=ndishlp$ BINDINGS=MS$NE2CLONE [MS$NETBEUI] DriverName=netbeui$ SESSIONS=10 NCBS=12 BINDINGS=MS$NE2CLONE LANABASE=0 2. Edit A:\Net\System.ini. 3. Change netcard= to netcard=BXND20X.dos. 4. Check for references to C:\NET and change C:\NET to A:\NET if necessary. Example system.ini file The following is an example of a system.
AT-2973SX, AT-2973T, and AT-2973T/4 NetExtreme II Family Adapters Installation and User’s Guide 6. Create the appropriate Autoexec.bat file in drive A for the chosen protocol as shown: TCP/IP Here is an example of the TCP/IP autoexec.bat file: path=a:\net a:\net\net initialize a:\net\netbind.com a:\net\umb.com a:\net\tcptsr.exe a:\net\tinyrfc.exe a:\net\nmtsr.exe a:\net\emsbfr.exe a:\net\net start basic net use z: \\SERVERNAME\SHARENAME NetBEUI Here is an example of the NetBEUI autoexec.
Chapter 5: Installing the NDIS2 Driver Software 5. Edit the Autoexec.bat file by adding the following lines: C:\ LANMAN\NETBIND.EXE C:\LANMAN\NET START WORKSTATION C:\LANMAN\NET USE drive letter: \\server name\resource name 6. Edit the Protocol.ini file (located in C:\LANMAN) to configure the driver to bind with NetBEUI or any other protocols. Here is an example: [PROTOCOL MANAGER] DriverName = PROTMAN$ [NETBEUI_XIF] DriverName = netbeui$ BINDINGS = BXND20X [BXND20X] DriverName = "BXND20X$" 7.
AT-2973SX, AT-2973T, and AT-2973T/4 NetExtreme II Family Adapters Installation and User’s Guide Using Keywords for the Drivers The Protocol.ini file contains certain keywords that are used by the BXND20X.dos driver. These keywords are listed below: BusNum. Specifies the number of the PCI bus on which the network adapter is located. This keyword requires a value ranging from 0 to 255. DevNum. Specifies the device number assigned to the network adapter when it is configured by the PCI BIOS.
Chapter 5: Installing the NDIS2 Driver Software See below for an example of the keywords: [BXND20X] DriverName = "BXND20X$" BusNum = 3 DevNum = 14 PortNum = 2 LineSpeed = 1000 Duplex = Full NodeAddress = 001020304050 64
Chapter 6 Installing the Linux Drivers This chapter provides procedures to install the Linux drivers for the AT-2973SX, AT-2973T, and AT-2973T/4 adapters.
Chapter 6: Installing the Linux Drivers Overview This chapter discusses the Linux drivers for the Broadcom NetXtreme II network adapters and describes how to install them. For a description of the drivers, see Table 4. Table 4. Broadcom NetXtreme II Linux Drivers Linux Driver Limitations Description bnx2 cnic Indicates the Linux drivers for the AT-2973SX AT-2973T, and AT-2973T/4 network adapters.
AT-2973SX, AT-2973T, and AT-2973T/4 NetExtreme II Family Adapters Installation and User’s Guide bnx2i Driver The current version of the driver has been tested on 2.6.x kernels, starting from 2.6.18 kernel. The driver may not compile on older kernels with the exception of SLES 10 SP1, which runs the 2.6.16.46 kernel. SUSE upgraded the iscsi_transport kernel module in SLES 10 SP1. In addition, Broadcom iSCSI offload initiators is supported on SLES 10 SP1.
Chapter 6: Installing the Linux Drivers Installing Linux Driver Software There are two ways to install the Linux driver software— from the Source RPM Package or build the driver from the source TAR file.
AT-2973SX, AT-2973T, and AT-2973T/4 NetExtreme II Family Adapters Installation and User’s Guide 3. Install the newly built package which includes the driver and man page: rpm -ivh RPMS/i386/bnx2-version.arch.rpm If you are installing over an existing distribution that may already contain an older version of the driver, the —force option is needed. Depending on the kernel, the driver is installed to one of the following paths: 2.4.x kernels /lib/modules/kernel_version/kernel/drivers/net/ bnx2.o 2.6.
Chapter 6: Installing the Linux Drivers To configure the network protocol and address, refer to the documentation provided with your operating system. Building the Driver from the Source TAR File This procedure describes how to build the bnx2 and bnx2i Linux drivers from the Source TAR file. See the following sections: “Building the bnx2 Driver” on page 70 “Building the bnx2i Driver” on page 71 Building the bnx2 Driver To build the bnx2 Linux driver from the Source TAR file, do the following: 1.
AT-2973SX, AT-2973T, and AT-2973T/4 NetExtreme II Family Adapters Installation and User’s Guide Building the bnx2i Driver To build the bnx2i Linux driver from the Source TAR file, do the following: 1. Create a directory and extract the TAR files to the directory by entering the following command: tar xvzf bnx2-version.tar.gz 2. Build the driver bnx2.ko as a loadable module for the running kernel by entering the following command: cd bnx2i-version/drivermake 3.
Chapter 6: Installing the Linux Drivers Load and Run Necessary iSCSI Software Components The Broadcom iSCSI Offload software suite consists of three kernel modules and a user daemon. To load the required software components either manually or through system services, do the following: 1. Unload existing driver and kill the user daemon, if necessary. Do the following: Manual: rmmod bnx2i pkill -9 bnx2id Using system service: service bnx2id stop 2. Load the iSCSI driver and the user daemon.
AT-2973SX, AT-2973T, and AT-2973T/4 NetExtreme II Family Adapters Installation and User’s Guide Note On 2.6 kernels, it is not necessary to bring down the eth# interfaces before unloading the driver module. Note If the cnic driver is loaded, unload the cnic driver before unloading the bnx2 driver. Note Before unloading the bnx2i driver, disconnect all active iSCSI sessions to targets.
Chapter 6: Installing the Linux Drivers Apply the updates by running the scripts provided in the supplemental tar file. For example, on Red Hat Enterprise Linux, apply the updates by entering the following commands: ./patch_pcitbl.sh /usr/share/hwdata/pcitable pci.updates /usr/share/hwdata/pcitable.new bnx2 ./patch_pciids.sh /usr/share/hwdata/pci.ids pci.updates /usr/share/hwdata/pci.ids.
AT-2973SX, AT-2973T, and AT-2973T/4 NetExtreme II Family Adapters Installation and User’s Guide Setting Optional Properties for the bnx2 Driver The disable_msi optional property can be supplied as a command line argument to the insmod or modprobe command. The property can also be set in the modprobe.conf command. See the man page for more information. All other driver settings can be queried and changed using the ethtool utility. See the ethtool man page for more information.
Chapter 6: Installing the Linux Drivers without proper knowledge of iSCSI protocol details, users are advised not to experiment with these parameters. en_tcp_dack The "Enable TCP Delayed ACK" parameter enables or disables the TCP delayed ACK feature on offloaded iSCSI connections. The TCP delayed ACK feature is ENABLED by default. To set the en_tcp_dack parameter in the bnx2i driver, enter one of the following commands: insmod bnx2i.
AT-2973SX, AT-2973T, and AT-2973T/4 NetExtreme II Family Adapters Installation and User’s Guide Note Broadcom validation is limited to a power of 2; for example, 16, 32, or 128. event_coal_div The Event Coalescing Divide Factor parameter is a performance tuning parameter used to moderate the rate of interrupt generation by the iscsi firmware.
Chapter 6: Installing the Linux Drivers Coalesce RX Frames: 6 (range is 0–255) Coalesce RX Frames IRQ: 6 (range is 0–255) Coalesce TX Microseconds: 80 (range is 0–1023) Coalesce TX Microseconds IRQ: 80 (range is 0–1023) Coalesce TX Frames: 20 (range is 0–255) Coalesce TX Frames IRQ: 20 (range is 0–255) Coalesce Statistics Microseconds: 999936 (approximately 1 second) (range is 0–16776960 in increments of 256) MSI: Enabled (if supported by the 2.6 kernel and the interrupt test passes) TSO: Enabled (on 2.
AT-2973SX, AT-2973T, and AT-2973T/4 NetExtreme II Family Adapters Installation and User’s Guide Link Up and Speed Indication bnx2: eth# NIC Link is Up, 1000 Mbps full duplex Link Down Indication bnx2: eth# NIC Link is Down MSI enabled successfully (bnx2 only) bnx2: eth0: using MSI Checking bnx2i Driver Messages The following are the most common bnx2i driver messages: BNX2I Driver signon Broadcom NetXtreme II iSCSI Driver bnx2i v1.0.
Chapter 6: Installing the Linux Drivers Network route to target node and transport name binding are two different devices bnx2i: conn bind, ep=0x...
AT-2973SX, AT-2973T, and AT-2973T/4 NetExtreme II Family Adapters Installation and User’s Guide bnx2i: iscsi_error - ERL0, U2 bnx2i: iscsi_error - ERL0, U3 bnx2i: iscsi_error - ERL0, U4 bnx2i: iscsi_error - ERL0, U5 bnx2i: iscsi_error - ERL0, U bnx2i: iscsi_error - invalid resi len bnx2i: iscsi_error - MRDSL violation bnx2i: iscsi_error - F-bit not set bnx2i: iscsi_error - invalid TTT bnx2i: iscsi_error - invalid DataSN bnx2i: iscsi_error - burst len violation bnx2i: iscsi_error - buf offset violation bnx2
Chapter 6: Installing the Linux Drivers Reject iSCSI PDU received from the target bnx2i - printing rejected PDU contents [0]: 1 ffffffa1 0 0 0 0 20 0 [8]: 0 7 0 0 0 0 0 0 [10]: 0 0 40 24 0 0 ffffff80 0 [18]: 0 0 3 ffffff88 0 0 3 4b [20]: 2a 0 0 2 ffffffc8 14 0 0 [28]: 40 0 0 0 0 0 0 0 Open-iSCSI daemon handing over session to driver bnx2i: conn update - MBL 0x800 FBL 0x800MRDSL_I 0x800 MRDSL_T 0x2000 Teaming with Channel Bonding Statistics Linux iSCSI Offload With the Linux drivers, you can team adapter
AT-2973SX, AT-2973T, and AT-2973T/4 NetExtreme II Family Adapters Installation and User’s Guide Installing User Application - bnx2id When the bnx2i RPM package is installed, install the bnx2id application under /sbin. See “Installing the Source RPM Package” on page 68 for information. Run the bnx2id daemon before attempting to create iSCSI connections. The driver does not establish connections to the iSCSI target without the daemon's assistance.
Chapter 6: Installing the Linux Drivers 4. Install the newly built package by entering: rpm -ivh RPMS//..rpm where is the machine architecture such as i386. rpm -ivh RPMS/i386/.i386.rpm 5. Start the daemon by entering: iscsid Binding iSCSI Target to Broadcom NX2 iSCSI Transport Name By default, the open-iscsi daemon connects to discovered targets using software initiator (transport name = 'tcp').
AT-2973SX, AT-2973T, and AT-2973T/4 NetExtreme II Family Adapters Installation and User’s Guide If you want to switch back to using the software initiator, enter the following: iscsiadm --mode node --targetname iqn.200406.com.broadcom:tg1 \ --portal 192.168.1.100 --op=update \ --name=node.transport_name --value=tcp Making Connections to iSCSI Targets Refer to open-iscsi documentation for a comprehensive list of iscsiadm commands.
Chapter 6: Installing the Linux Drivers 86
Chapter 7 Installing the Windows Drivers This chapter provides procedures to install and remove the driver software for all of the Windows Operating Systems supported by the AT-2973SX, AT-2973T, and AT-2973T/4 adapters. In addition, it describes how to display and change adapter properties including power management options.
Chapter 7: Installing the Windows Drivers Installing the Windows Driver Software This chapter describes how to install all of the following Windows Operating Systems: Microsoft Windows Server 2003 (32-bit and 64-bit extended) Microsoft Windows Server 2008 (32-bit and 64-bit extended) Microsoft Windows Server 2008 R2 (32-bit and 64-bit extended) Microsoft Windows Vista™ (32-bit and 64-bit extended) Microsoft Windows 7™ (32-bit and 64-bit extended) The Windows driver software for all of t
AT-2973SX, AT-2973T, and AT-2973T/4 NetExtreme II Family Adapters Installation and User’s Guide Note You must physically install a network device driver before the Broadcom NetXtreme II Controller can be used with your Windows Operating System. There is no installation CD. You must download the drivers from the Allied Telesis website at www.alliedtelesis.com/support/software.
Chapter 7: Installing the Windows Drivers Figure 13. Found New Hardware Wizard Page 2. From the driver directory, select the setup.exe file and Run.
AT-2973SX, AT-2973T, and AT-2973T/4 NetExtreme II Family Adapters Installation and User’s Guide The Broadcom NetXtreme II Driver Installer - InstallShield Wizard Page is displayed. See Figure 14. Figure 14. Broadcom NetXtreme II Driver Installer - InstallShield Wizard Page 3. Click Next to continue. The License Agreement Page is displayed. See Figure 15 on page 92.
Chapter 7: Installing the Windows Drivers Figure 15. License Agreement Page 4. After you review the license agreement, click I accept the terms in the license agreement and then click Next to continue. The Ready to Install the Program Page is displayed. See Figure 16 on page 93.
AT-2973SX, AT-2973T, and AT-2973T/4 NetExtreme II Family Adapters Installation and User’s Guide Figure 16. Ready to Install the Program Page 5. Click Install. The InstallShield Wizard Completed Page is displayed. See Figure 17 on page 94.
Chapter 7: Installing the Windows Drivers Figure 17. InstallShield Wizard Completed Page 6. Click Finish to close the wizard. 7. The installer determines if a system restart is necessary. Follow the on-screen instructions. Using Silent Installation 94 Silent installation provides a command-line silent mode which allows for unattended installation.
AT-2973SX, AT-2973T, and AT-2973T/4 NetExtreme II Family Adapters Installation and User’s Guide Note All commands are case sensitive. Note User must "Run as Administrator" for Vista when using "msiexec" for "silent" install or uninstall procedures. Note For detailed instructions and information about unattended installs, refer to the Silent.txt file in the DrvInst folder.
Chapter 7: Installing the Windows Drivers To perform a silent uninstall from within the installer source folder, enter: msiexec /x "BDrv5706.msi" /qn To perform a silent uninstall from any folder, enter: msiexec /x "{F0DA8A3F-1457-419E-96F4-235DD3EF41E1}" / qn Note The hexidecimal number above may differ from your current installer.
AT-2973SX, AT-2973T, and AT-2973T/4 NetExtreme II Family Adapters Installation and User’s Guide Removing the Device Drivers This section discusses how to remove the device drivers. Note Windows Server 2003, Windows Server 2008, and Windows Server 2008 R2 provide the Device Driver Rollback feature to replace a device driver with one that was previously installed.
Chapter 7: Installing the Windows Drivers 98
Chapter 8 Setting Advanced Properties For all of the Windows operating systems, you access the Windows Advanced Properties from the Advanced Tab. Although the default values of the Advanced Properties are appropriate in most cases, you can change any of the available options to meet the requirements of your system.
Chapter 8: Setting Advanced Properties Accessing the Advanced Tab To modify the configuration properties of the Windows Operating systems, you must access the Advanced Tab. Depending on your operating system, there are several ways to do this.
AT-2973SX, AT-2973T, and AT-2973T/4 NetExtreme II Family Adapters Installation and User’s Guide Figure 18. System Properties Dialog Box 4. Click on the Advanced tab on the System Properties Dialog Box which is located at the top of the window.
Chapter 8: Setting Advanced Properties The Advanced tab is shown in Figure 19. Figure 19.
AT-2973SX, AT-2973T, and AT-2973T/4 NetExtreme II Family Adapters Installation and User’s Guide Selecting the Advanced Tab in Windows Server 2008, Windows Server 2008 R2, and Windows 7 To select the Advanced Tab in Windows Server 2008, Windows Server 2008 R2, or Windows 7 Operating systems, do the following: 1. Select the Start button. See Figure 20. Figure 20. Windows Server 2008, Windows Server 2008 R2, and Windows 7 Search Box 2. Enter the following command: mmc compmgmt.
Chapter 8: Setting Advanced Properties Figure 21. Device Manager Window 3. Open the Network Adapters folder. The list of installed adapters is displayed. 4. Right click on one of the following adapters: Allied Telesis AT-2973SX Allied Telesis AT-2973T Allied Telesis AT-2973T/4 The adapter window is displayed. 5. Select the Advanced tab. The Advanced tab is shown in Figure 19 on page 102.
AT-2973SX, AT-2973T, and AT-2973T/4 NetExtreme II Family Adapters Installation and User’s Guide See Figure 22 for an example of the Windows Vista Start menu. Figure 22. Windows Vista Start Menu 2. From the Start Menu, select Run. The Windows Vista Run window is displayed. See Figure 23. Figure 23. Windows Vista Run Window 3. Enter the following command in the Run window: mmc devmgmt.msc 4. From the Computer Management Window, select Device Manager in the left panel.
Chapter 8: Setting Advanced Properties 5. Open the Network Adapters folder. The list of installed adapters is displayed. 6. Right click on one of the following adapters: Allied Telesis AT-2973SX Allied Telesis AT-2973T Allied Telesis AT-2973T/4 The adapter window is displayed. 7. Select the Advanced tab. The Advanced tab is shown in Figure 19 on page 102.
AT-2973SX, AT-2973T, and AT-2973T/4 NetExtreme II Family Adapters Installation and User’s Guide Modifying Advanced Properties After you have installed the driver software, you can use the following procedures to verify or change the adapter properties: “Updating the Ethernet@ WireSpeed Property” on page 108 “Updating the Flow Control Property” on page 108 “Updating the Interrupt Moderation Property” on page 110 “Updating the Checksum Offload Property” on page 111 “Updating the Large Send
Chapter 8: Setting Advanced Properties Updating the Ethernet@ WireSpeed Property The Ethernet@Wirespeed property enables a Gigabit Ethernet adapter to establish a link at a lower speed when only two pairs of wires are available in the cabling plant. By default, the Ethernet@Wirespeed property is enabled. To enable or disable the Ethernet@WireSpeed property, do the following: 1.
AT-2973SX, AT-2973T, and AT-2973T/4 NetExtreme II Family Adapters Installation and User’s Guide To change the Flow Control property, do the following: 1. Access the Advanced tab: For Windows Server 2003 Operating systems, see “Selecting the Advanced Tab in Windows Server 2003” on page 100. For Windows Server 2008, Windows Server 2008 R2 or Windows 7 Operating systems, see “Selecting the Advanced Tab in Windows Server 2008, Windows Server 2008 R2, and Windows 7” on page 103.
Chapter 8: Setting Advanced Properties Updating the Interrupt Moderation Property Interrupt moderation enables adaptive interrupt coalescing, which limits the rate of interrupt to the CPU during packet transmission and packet reception. The disabled option allows one interrupt for every packet transmission and packet reception. The default value is Enabled. To change the Interrupt Moderation setting, do the following: 1.
AT-2973SX, AT-2973T, and AT-2973T/4 NetExtreme II Family Adapters Installation and User’s Guide Updating the Checksum Offload Property Usually, the Checksum Offload function is computed by the protocol stack. By selecting one of the Checksum Offload properties, the adapter can compute the checksum. To change the Checksum Offload setting, do the following: 1. Access the Advanced tab: For Windows Server 2003 Operating systems, see “Selecting the Advanced Tab in Windows Server 2003” on page 100.
Chapter 8: Setting Advanced Properties Updating the Large Send Offload Property Normally, the protocol stack performs TCP segmentation. When you enable the Large Send Offload property, the network adapter does the TCP segmentation. There are several Large Send Offload properties to choose from, depending on the TCP/IP version you are using on your PC. You can select IPV4, IPV4 version 2, or IPv6 version 2. By default, the Large Send Offload Property is disabled.
AT-2973SX, AT-2973T, and AT-2973T/4 NetExtreme II Family Adapters Installation and User’s Guide Updating the Jumbo MTU Property The Jumbo MTU property allows the adapter to transmit and receive oversized Ethernet frames that are greater than 1,514 bytes but less than 9,000 bytes in length. Note that this property requires a switch that is able to process large frames. By default, the Jumbo MTU property is set to 1500 bytes. To increase the size of the received frames, do the following: 1.
Chapter 8: Setting Advanced Properties Updating the Network Address Property The Network Address is a user-defined address that is used to replace the MAC address that was originally assigned to the adapter. In some operating systems, this property is called Locally Administered Address. The network address consists of a 12-digit hexadecimal number. To change the Network Address property, do the following: 1.
AT-2973SX, AT-2973T, and AT-2973T/4 NetExtreme II Family Adapters Installation and User’s Guide Updating the RSS Queues Property The number of RSS queues varies depending on the adapter. For 1 Gbps network adapters, the RSS queue options are 1, 2, 4, and 8. The default is 8 RSS queues. For 10 Gbps network adapters, the RSS queue options are Auto, 1, 2, 4, 8, and 16. The default value is Auto queues. To set the number of RSS Queues property, do the following: 1.
Chapter 8: Setting Advanced Properties Updating the Priority & VLAN Property Priority allows you to prioritize traffic or limit bandwidth instead of treating all traffic in the same manner. A Virtual Local Area Network (VLAN) is a logical area network that extends beyond a traditional LAN to a group of logical LANs. By default, this property is enabled. To set the port priority and assign a VLAN ID, do the following: 1.
AT-2973SX, AT-2973T, and AT-2973T/4 NetExtreme II Family Adapters Installation and User’s Guide Updating the Receive Buffers Property Receive Buffers are data segments that allow the network adapter to allocate receive packets to memory. For 1 Gbps adapters, the range of valid receive buffers is 50 to 2,000 in increments of 1. The default value is 750 receive buffers. To set the Receive Buffers property, do the following: 1.
Chapter 8: Setting Advanced Properties For Windows Server 2008, Windows Server 2008 R2 or Windows 7 Operating systems, see “Selecting the Advanced Tab in Windows Server 2008, Windows Server 2008 R2, and Windows 7” on page 103. For Windows Operating systems, see “Selecting the Advanced Tab in Windows Vista” on page 104. The Advanced tab is shown in Figure 19 on page 102. 2. From the Property list on the Advanced tab, select Receive Side Scaling. 3.
AT-2973SX, AT-2973T, and AT-2973T/4 NetExtreme II Family Adapters Installation and User’s Guide For Windows Server 2008, Windows Server 2008 R2 or Windows 7 Operating systems, see “Selecting the Advanced Tab in Windows Server 2008, Windows Server 2008 R2, and Windows 7” on page 103. For Windows Operating systems, see “Selecting the Advanced Tab in Windows Vista” on page 104. The Advanced tab is shown in Figure 19 on page 102. 2. From the Property list on the Advanced tab, select Speed & Duplex. 3.
Chapter 8: Setting Advanced Properties Updating the TCP Connection Offload Properties There are two types of TCP Connection Offload properties. The TCP Connection Offload (IPv4) property enables or disables TOE offload when the IPv4 protocol is in use. The TCP Connection Offload (IPv6) property enables or disables TOE offload when the IPv6 protocol is in use. By default, this property is enabled for both the IPv4 and IPv6 versions.
AT-2973SX, AT-2973T, and AT-2973T/4 NetExtreme II Family Adapters Installation and User’s Guide Updating the Transmit Buffers Property Transmit buffers are data segments that allow the network adapter to monitor transmit packets in the system memory. The default value is 1500. To set the Transmit Buffers property, do the following: 1. Access the Advanced tab: For Windows Server 2003 Operating systems, see “Selecting the Advanced Tab in Windows Server 2003” on page 100.
Chapter 8: Setting Advanced Properties For Windows Server 2008, Windows Server 2008 R2 or Windows 7 Operating systems, see “Selecting the Advanced Tab in Windows Server 2008, Windows Server 2008 R2, and Windows 7” on page 103. For Windows Operating systems, see “Selecting the Advanced Tab in Windows Vista” on page 104. The Advanced tab is shown in Figure 19 on page 102. 2. Under Property list on the Advanced tab, select VLAN ID. 3.
Chapter 9 Installing CIM and SNMP for Manageability Both Common Information Model (CIM) and Simple Network Management Protocol (SNMP) are information models that allow you to monitor and manage a PC or a network. Both CIM and SNMP are supported on the Windows Server 2003, Windows Server 2008, and Windows Server 2008 R2 Operating Systems. The CIM standard defines managed elements and the SNMP standard defines events such as temperature threshold and power outages which are called traps.
Chapter 9: Installing CIM and SNMP for Manageability Installing CIM The Common Information Model (CIM) is an industry standard defined by the Distributed Management Task Force (DMTF). Microsoft implements CIM on Windows platforms. Also, Broadcom supports CIM on the Windows Server 2003, Windows Server 2008, and Windows Server 2008 R2 platforms. Broadcom's implementation of CIM enables various classes to provide information through CIM client applications. The Broadcom CIM data provider provides data only.
AT-2973SX, AT-2973T, and AT-2973T/4 NetExtreme II Family Adapters Installation Guide SELECT * FROM __InstanceDeletionEvent where TargetInstance ISA "BRCM_NetworkAdapter" SELECT * FROM __InstanceCreationEvent where TargetInstance ISA "BRCM_ActsAsSpare" SELECT * FROM __InstanceDeletionEvent where TargetInstance ISA "BRCM_ActsAsSpare" For detailed information about these events, see the CIM documentation at http://www.dmtf.org/standards/published_documents/ DSP0004V2.3_final.pdf.
Chapter 9: Installing CIM and SNMP for Manageability Figure 24. BACS CIM Option Window 4. Select CIM Provider. 5. Select one of the following: This feature will be installed on local hard drive This feature, and all subfeatures, will be installed on local hard drive 6. Click Next. 7. Follow the on-screen instructions to complete the installation.
AT-2973SX, AT-2973T, and AT-2973T/4 NetExtreme II Family Adapters Installation Guide Installing SNMP The BASP version of SNMP has two components that are described in the following sections: BASP Subagent “BASP Subagent” on page 127 “BASP Extensible-Agent” on page 127 The BASP subagent, baspmgnt.dll, is designed for the Windows Server 2003, Windows Server 2008, and Windows Server 2008 R2 platforms. You must install the SNMP service before installing the BASP subagent.
Chapter 9: Installing CIM and SNMP for Manageability The extensible-agent allows the SNMP manager software to actively monitor the configurations of the Broadcom NetXtreme II adapter. It supplements the information already provided by the standard SNMP Management Network Interface information.
AT-2973SX, AT-2973T, and AT-2973T/4 NetExtreme II Family Adapters Installation Guide 4. Select SNMP. The BACS SNMP Option Window is displayed. See Figure 24. Figure 25. BACS SNMP Option Window 5. Select one of the following: This feature will be installed on local hard drive This feature, and all subfeatures, will be installed on local hard drive 6. Click Next. 7. Follow the on screen instructions to complete the installation.
Chapter 9: Installing CIM and SNMP for Manageability 130
Chapter 10 Installing Management Applications This chapter provides information about prerequisites for installing management applications as well as procedures instructions.
Chapter 10: Installing Management Applications Installing Broadcom Advanced Control Suite 3 and Related Management Applications The Broadcom Advanced Control Suite 3 (BACS 3) software and related management applications can be installed from the source-file directory or by using the silent install option. See the following: “Checking .
AT-2973SX, AT-2973T, and AT-2973T/4 NetExtreme II Family Adapters Installation and User’s Guide Checking .NET Framework Requirements Before you use either the source-file directory or the silent install option, you must make sure that your system meets the minimum installation requirements. Microsoft .NET Framework 2.0 includes the runtime and associated files needed to run BACS 3, and must be installed on your system in order for BACS 3 to operate. For information on the minimum and recommended .
Chapter 10: Installing Management Applications Note Long startup times for BACS 3 may be caused by a limitation of .NET Framework 2.0, as described in Microsoft knowledge base article KB936707. To improve the startup time of BACS 3, apply .NET Framework 2.0 SP1 (or appropriate version for your OS as shown in the Recommended column of Table 6), and reboot your system. Using the Installer The driver software is available for download from the Allied Telesis web site at www.alliedtelesis.com/support.
AT-2973SX, AT-2973T, and AT-2973T/4 NetExtreme II Family Adapters Installation and User’s Guide “Performing a Silent Install by Feature on IA32 Platforms” on page 136 “Performing a Silent Install by Feature on AMD64/EM64T Platforms” on page 136 “Performing a Silent Install from Within a Batch File” on page 136 Note All commands are case sensitive. Note User must "Run as Administrator" for Vista when using "msiexec" for "silent" install/uninstall(s).
Chapter 10: Installing Management Applications Note After performing a silent uninstall, it is necessary to reboot the system before reinstalling this installer. If you do not perform a reboot, BASP does not install correctly. Performing a Silent Install by Feature on IA32 Platforms To perform a silent install by feature on IA32 platforms, enter: Note CHM32 or CHM64 installs the BACS help file and must be included when installing the BACS feature. Use ADDSOURCE to include any of the features listed below.
AT-2973SX, AT-2973T, and AT-2973T/4 NetExtreme II Family Adapters Installation and User’s Guide Modifying Management Applications To modify the management applications, do the following: 1. In Control Panel, double-click Add or Remove Programs. 2. Click Broadcom Management Programs and then click Change. 3. Click Next to continue. 4. Click Modify to change program features. 5. Click Next to continue. 6. Click on an icon to change how a feature is installed. 7. Click Next. 8. Click Install. 9.
Chapter 10: Installing Management Applications Repairing Management Applications To repair or reinstall the management applications, do the following: 1. In Control Panel, double-click Add or Remove Programs. 2. Click Broadcom Management Programs, and then click Change. 3. Click Next to continue. 4. Click Repair to repair errors in installed applications. 5. Click Next to continue. 6. Click Install. 7. Click Finish to close the wizard.
AT-2973SX, AT-2973T, and AT-2973T/4 NetExtreme II Family Adapters Installation and User’s Guide Removing Management Applications To remove all management applications, do the following: 1. In Control panel, double-click Add or Remove Programs. 2. Click Broadcom Management Programs, and then click Remove. 3. Reboot your system to complete the removal of management applications.
Chapter 10: Installing Management Applications 140
Chapter 11 Troubleshooting This chapter provides troubleshooting information.
Chapter 11: Troubleshooting Checking Hardware Diagnostics Loopback diagnostic tests are available for testing the adapter hardware. These tests provide access to the adapter internal and external diagnostics, where packet information is transmitted across the physical link. For instructions and information on running tests in an MS-DOS environment, see Chapter 12, “User Diagnostics” on page 155.
AT-2973SX, AT-2973T, and AT-2973T/4 NetExtreme II Family Adapters Installation and User’s Guide Checking Port LEDs To check the state of the network link and activity, see the following sections: “AT-2973SX Adapter Physical Description” on page 17 “AT-2973T Adapter Physical Description” on page 18 “AT-2973T/4 Adapter Physical Description” on page 21 143
Chapter 11: Troubleshooting Consulting the Troubleshooting Checklist Caution Before you open the cabinet of your server to add or remove the adapter, see “Reviewing Safety Precautions” on page 29. The following checklist provides recommended actions to resolve problems installing or running the AT-2973SX, AT-2973T, or AT-2973T/4 adapters in your system: Checking Current Drivers Inspect all cables and connections.
AT-2973SX, AT-2973T, and AT-2973T/4 NetExtreme II Family Adapters Installation and User’s Guide Linux To verify that the bnx2.o driver is loaded properly, enter: lsmod If the driver is loaded, a line similar to one Table 7 is displayed, where size indicates the size of the driver in bytes, and n is the number of adapters configured. Table 7.
Chapter 11: Troubleshooting The ping statistics that are displayed indicate whether the network connection is working or not. Linux To verify that the Ethernet interface is up and running on a Linux platform, run ifconfig to check the status of the Ethernet interface. In addition, you can enter the netstat -i command to check the statistics on the Ethernet interface. See “Installing Linux Driver Software” on page 68 for information on ifconfig and netstat.
AT-2973SX, AT-2973T, and AT-2973T/4 NetExtreme II Family Adapters Installation and User’s Guide Solving Microsoft Windows Server 2008 R2 Hyper-V Issues Microsoft Windows Server 2008 R2 Hyper-V™ is a hypervisor virtualization system. For detailed information about Hyper-V, see http:// www.microsoft.com/windowsserver2008/en/us/hyperv.aspx. This section addresses issues that affect the configuration of NetXtreme II network adapters and teamed adapters when Hyper-V is used.
Chapter 11: Troubleshooting When configuring a team of NetXtreme II network adapters on a Hyper-V system, be aware of the following: Create the team prior to binding the team to the Hyper-V virtual network Create a team only with an adapter that is not already assigned to a Hyper-V virtual network. A TOE-enabled team that is bound to a Hyper-V virtual network reports TOE as an offload capability in BACS; however, TOE does not work.
AT-2973SX, AT-2973T, and AT-2973T/4 NetExtreme II Family Adapters Installation and User’s Guide Note This does not include an unattended installation when performed from a CD-ROM. Note The path shown in OemPnpDriversPath can be appended with the path to other applicable drivers. For an unattended installation, place the Broadcom NetXtreme II driver files in the $OEM$\$1\Drivers\NIC directory. For Sysprep, the drivers are located in Drivers\NIC at the root of the system drive.
Chapter 11: Troubleshooting Solving Broadcom Boot Agent and Broadcom Advanced Server Program (BASP) Issues This section discusses issues with the Broadcom Boot Agent and Broadcom Advanced Server (BASP) as well as provides solutions. Problem: Unable to obtain network settings through DHCP using PXE. Solution: For proper operation, make sure that the Spanning Tree Protocol (STP) feature is disabled or that portfast mode (for Cisco switches) is enabled on the port to which the PXE client is connected.
AT-2973SX, AT-2973T, and AT-2973T/4 NetExtreme II Family Adapters Installation and User’s Guide Problem: A Generic Trunking (GEC/FEC) 802.3ad-Draft Static type of team may lose some network connectivity if the driver to a team member is disabled. Solution: If a team member supports underlying management software (ASF/IPMI/UMP) or Wake-On-LAN, the link may be maintained on the switch for the adapter despite its driver being disabled.
Chapter 11: Troubleshooting Solving Miscellaneous Issues This section presents issues and provides solutions for a variety of driver software issues. Problem: Although installed, the Broadcom Advanced Control Suite 3 (BACS) application does not start and an error message appears. Solution: NET Framework 2.0 is required for BACS 3 to operate. Install .NET Framework 2.0. Problem: Broadcom Advanced Control Suite 3 takes a long time to start up. Solution: This is a limitation of .NET Framework 2.0. Apply .
AT-2973SX, AT-2973T, and AT-2973T/4 NetExtreme II Family Adapters Installation and User’s Guide Solution: This is a Microsoft issue. For more information, see Microsoft knowledge base KB913119 at http://support.microsoft.com/kb/913119. Problem: Performance is degraded when multiple BCM57710 network adapters are used in a system. Solution: Ensure that the system has at least 2 GB of main memory when using up to four network adapters and 4 GB of main memory when using four or more network adapters.
Chapter 11: Troubleshooting 154
Chapter 12 User Diagnostics This chapter provides user diagnostic information for the MS-DOS platform.
Chapter 12: User Diagnostics Overview Broadcom NetXtreme II User Diagnostics is an MS-DOS based application that runs a series of diagnostic tests. These tests allow you to update device firmware as well as to view and change settings for available adapter properties. To run Broadcom NetXtreme II User Diagnostics, you must create an MSDOS 6.22 bootable disk containing the uxdiag.exe file. Next, start the system with the boot disk in drive A.
AT-2973SX, AT-2973T, and AT-2973T/4 NetExtreme II Family Adapters Installation and User’s Guide System Requirements The following system requirements are needed to run user diagnostics: MS-DOS 6.22 Operating System uxdiag.
Chapter 12: User Diagnostics Performing Diagnostics At the MS-DOS prompt, type uxdiag followed by the command options. The uxdiag command options are shown in Table 8. For example, to run all of the diagnostic tests except Group B tests on adapter #1, enter: C:\>uxdiag -c 1 -t b Note You must include uxdiag at the beginning of the command string each time you type a command. Table 8.
AT-2973SX, AT-2973T, and AT-2973T/4 NetExtreme II Family Adapters Installation and User’s Guide Table 8. uxdiag Command Options (Continued) Command Options Description uxdiag -fnvm Programs the raw image into NVM. uxdiag -fump Specifies the bin file to update UMP firmware. uxdiag -help Displays the Broadcom NetXtreme II User Diagnostics, uxdiag, command options. uxdiag -I Specifies the number of iterations to run on the selected tests.
Chapter 12: User Diagnostics Table 8. uxdiag Command Options (Continued) Command Options 160 Description uxdiag -t Disables certain groups or tests. uxdiag -T Enables certain groups or tests. uxdiag -ver Displays the version of Broadcom NetXtreme II User Diagnostics (uxdiag) and all installed adapters.
AT-2973SX, AT-2973T, and AT-2973T/4 NetExtreme II Family Adapters Installation and User’s Guide Diagnostic Test Descriptions The diagnostic tests are divided into four groups: Basic Functional Tests (Group A) Memory Tests (Group B) Block Tests (Group C) Ethernet Traffic Tests (Group D). The diagnostic tests are described in Table 9. Table 9.
Chapter 12: User Diagnostics Table 9.
AT-2973SX, AT-2973T, and AT-2973T/4 NetExtreme II Family Adapters Installation and User’s Guide Table 9. Diagnostic Tests (Continued) Test Description Number Name C2 RBUF Allocation Verifies the RX buffer (RBUF) allocation interface by allocating and releasing buffers and checking that the RBUF block maintains an accurate count of the allocated and free buffers.
Chapter 12: User Diagnostics Table 9. Diagnostic Tests (Continued) Test Description Number Name C8 DMA Engine Verifies the functionality of the DMA engine block by performing numerous DMA read and write operations to various system and internal memory locations (and byte boundaries) with varying lengths (from 1 byte to over 4 KB, crossing the physical page boundary) and different data patterns (incremental, fixed, and random). CRC checks are performed to ensure data integrity.
AT-2973SX, AT-2973T, and AT-2973T/4 NetExtreme II Family Adapters Installation and User’s Guide Table 9. Diagnostic Tests (Continued) Test Description Number Name D2 PHY Loopback Enables PHY loopback mode in the adapter and transmits 5000 Layer 2 packets of various sizes. As the packets are received by Broadcom NetXtreme II User Diagnostics, they are checked for errors. Packets are returned through the PHY receive path and never reach the wire. The adapter should not be connected to a network.
Chapter 12: User Diagnostics 166
Appendix A Specifications Physical Specifications This section provides the dimensions and weight of the adapters. Dimensions: AT-2973SX: 14.47 cm x 5.61 cm (5.7 in. x 2.2 in.) AT-2973T: 14.47 cm x 5.61 cm (5.7 in. x 2.2 in.) AT-2973T/4: 14.47 cm x 5.61 cm (5.7 in. x 2.2 in.) Weight: AT-2973SX: 68.0 g (.15 lbs.) AT-2973T: 68.0 g (.15 lbs.) AT-2973T/4: 113.4 g (.25 lbs.
Appendix A: Specifications Power Specifications The following power specifications apply to the AT-2973SX, AT-2973T, and AT-2973T/4 adapters: Operating Voltage: 3.3V Power Consumption: AT-2973SX: 5.28 Watts (maximum), @ +3.3V AT-2973T: 4.1 Watts (maximum), @ +3.3V AT-2973T/4: 7.1 Watts (maximum), @ +3.3V Performance Specifications The following performance specifications apply to the AT-2973SX, AT-2973T, and AT-2973T/4 adapters: x4 PCIe v2.0 and v1.
AT-2973SX, AT-2973T, and AT-2973T/4 NetExtreme II Family Adapters Installation and User’s Guide Table 10 lists the RJ-45 connector pins and their signals when a 1000Base-T port is operating at 1000 Mbps. Table 10. RJ-45 1000Base-T Connector Pinoutsa Pin Pair Signal 1 1 TX and RX+ 2 1 TX and RX- 3 2 TX and RX+ 4 3 TX and RX+ 5 3 TX and RX- 6 2 TX and RX- 7 4 TX and RX+ 8 4 TX and RX- a. Bi-directional data on each pair.
Appendix A: Specifications 170
Appendix B Cleaning Fiber Optic Connectors The fiber optic connector consists of a fiber optic plug and its adapter. The end of the fiber optic cable is held in the core of the ferrule in the plug. Light signals are transmitted through the core of the fiber. Even minor smudges or dirt on the end face of the fiber, completely invisible to the naked eye, can disrupt light transmission and lead to failure of the component or of the entire system.
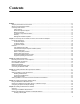
Appendix B: Cleaning Fiber Optic Connectors Using a Cartridge-Type Cleaner PUSH OPEN Di re c A PEng TAWipi tion Fiber optic cartridge cleaners are available from many vendors and are typically called “cartridge cleaners,” as shown in Figure 29. Figure 29. Cartridge Cleaner Note Do not use compressed air or aerosol air to clean a fiber optic connector. To clean a fiber optic connector using a cartridge cleaner, perform the following procedure. 1.
AT-2716FX/TP Fast Ethernet Fiber & PoE Adapter Installation Guide Note Rub the ferrule tip on the cleaning surface in one direction only. 3. When you reach the end of the cleaning surface, pick up the ferrule tip, rotate and place it at the top and rub downwards at least 2 times. Caution Failing to pick up the ferrule tip when you reach the bottom of the cleaning surface can result in static electricity that can damage the fiber optic cable. 4. If desired, repeat steps 3 and 4. 5.
Appendix B: Cleaning Fiber Optic Connectors Using a Swab Specially treated swabs, known as stick cleaners, are available for cleaning inside connector adapters or hard-to-reach ferrule tips. These swabs, often referred to as “lint free” or “alcohol free” swabs, are available from many vendors, as shown in Figure 31. Stick cleaners are available in both 2.5 mm and 1.25 mm sizes for use on SC and MU connectors respectively.
AT-2716FX/TP Fast Ethernet Fiber & PoE Adapter Installation Guide 3. If a fiber inspection scope is available, use the scope to inspect the connector to make sure that it is clean and to check for scratches, pits, or other problems that may affect performance. Note Always keep a dust cap on a fiber optic cable when it is not in use. Warning Do not stare into the laser beam. L2 Warning Do not look directly at the cable ends or inspect the cable ends with an optical lens.
Appendix B: Cleaning Fiber Optic Connectors 176