AT-VIEW PLUS DEVICE MANAGER USER’S GUIDE PN 613-50664-00 Rev B Page 1 of 118
Allied Telesyn AT-VIEW PLUS DEVICE MANAGER Copyright (c) 2003-2005 Allied Telesis K. K. All rights reserved. No part of this publication may be reproduced without prior written permission from Allied Telesis, K. K. Microsoft is a registered trademark of Microsoft Corporation. Netscape Navigator is a registered trademark of Netscape Communications Corporation.
Allied Telesyn AT-VIEW PLUS DEVICE MANAGER TABLE OF CONTENTS 1 Overview .......................................................................................................................7 2 Starting AT-View Plus Device Manager ........................................................................8 2.1 Starting From the Command Line...........................................................................9 2.1.1 Command Syntax.........................................................................
Allied Telesyn AT-VIEW PLUS DEVICE MANAGER 5.2.3 System Info ....................................................................................................39 5.2.4 Threshold .......................................................................................................40 5.2.5 Current Log ....................................................................................................41 5.2.6 Snapshot ........................................................................................
Allied Telesyn AT-VIEW PLUS DEVICE MANAGER 6.4.9 Threshold Button............................................................................................73 6.5 Options Tab ..........................................................................................................75 6.5.1 Polling Interval................................................................................................75 6.5.2 Display Data Type of Chart .......................................................................
Allied Telesyn AT-VIEW PLUS DEVICE MANAGER 7.6.7 Close ............................................................................................................
Allied Telesyn AT-VIEW PLUS DEVICE MANAGER This User's Guide describes the basic operations of AT-View Plus Device Manager. 1 Overview AT-View Plus Device Manager is a device management application that lets you manage Allied Telesyn's hubs, switches and routers using Simple Network Management Protocol (SNMP). You can perform various operations on the devices from an intuitive graphical user interface.
Allied Telesyn AT-VIEW PLUS DEVICE MANAGER 2 Starting AT-View Plus Device Manager AT-View Plus Device Manager can be started in two ways, from the command line or from a network management application. When started, AT-View Plus Device Manager identifies the target device after you enter its IP address. AT-View Plus Device Manager will then display the main panel of that device.
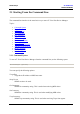
Allied Telesyn AT-VIEW PLUS DEVICE MANAGER 2.1 Starting From the Command Line The command line interface is the most basic way to start AT-View Plus Device Manager. Topics: • • • • • • • • • • • • • • Command Syntax Target Host SNMP Version Get Community Set Community Trap Community Titlebar String User Account Name Security Level Authentication Protocol Authentication Password Privacy Protocol Privacy Password Parameter File 2.1.
Allied Telesyn AT-VIEW PLUS DEVICE MANAGER DisplayName Titlebar string. UserName User account name to be used for accessing the MIB. This is required when using SNMPv3. SecLevel Security level that is configured for the User Name. This is required when using SNMPv3. AuthProtocol Authentication protocol that is configured for the User Name. This is required when using SNMPv3. AuthPassword Authentication password that is configured for the User Name. This is required when using SNMPv3.
Allied Telesyn AT-VIEW PLUS DEVICE MANAGER Examples: devicemanager -TargetHost 172.16.99.123 -SnmpVersion 1 devicemanager -TargetHost 172.16.99.123 -SnmpVersion 2 2.1.4 Get Community Get Community is an SNMP community string used to get MIB values from the agent. You must specify the same community string as the one configured on the target host. If the string is not specified, the default community string "public" is used. Examples: devicemanager -TargetHost 172.16.99.
Allied Telesyn AT-VIEW PLUS DEVICE MANAGER 2.1.7 Titlebar String You can specify a string to display on the titlebar. Example: devicemanager -TargetHost dvcmgrhub -DisplayName dvcmgr 2.1.8 User Account Name If you specified 3 (SNMPv3) for the SNMP Version, you must also specify a User Account Name that is already configured on the target host. Examples: devicemanager -TargetHost 172.16.99.123 -SnmpVersion 3 -UserName ATVP -SecLevel noAuthNoPriv devicemanager -TargetHost 172.16.99.
Allied Telesyn AT-VIEW PLUS DEVICE MANAGER devicemanager -TargetHost 172.16.99.123 -SnmpVersion 3 -UserName ATVP -SecLevel authNoPriv -AuthProtocol MD5 -AuthPassword PASS1234 devicemanager -TargetHost 172.16.99.123 -SnmpVersion 3 -UserName ATVP1 -SecLevel authNoPriv -AuthProtocol SHA -AuthPassword PASS1233 2.1.
Allied Telesyn AT-VIEW PLUS DEVICE MANAGER 2.1.13 Privacy Password If you specified 3 (SNMPv3) for the SNMP Version, and your Security Level is authPriv, you must specify a Privacy Password that is configured for the User Account Name on the target host. Examples: devicemanager -TargetHost 172.16.99.123 -SnmpVersion 3 -UserName ATVP -SecLevel authPriv -AuthProtocol MD5 -AuthPassword PASS1234 -PrivProtocol DES -PrivPassword PASS5678 devicemanager -TargetHost 172.16.99.
Allied Telesyn AT-VIEW PLUS DEVICE MANAGER 2.2 Starting From a Network Management Application AT-View Plus Device Manager can be started from an integrated network management application. Topics: • • • Starting From SNMPc Starting From HP OpenView Network Node Manager Starting From IBM Tivoli NetView 2.2.1 Starting From SNMPc To start AT-View Plus Device Manager from SNMPc, double-click on a node icon on the map window.
Allied Telesyn AT-VIEW PLUS DEVICE MANAGER Starting from SNMPc Note - SNMPv3: In order to start AT-View Plus Device Manager in SNMPv3 mode, the node's Read/Write Access Mode attribute should be set to SNMP V3 No-Auth, SNMP V3 Auth-MD5, SNMP V3 Auth-SHA, SNMP V3 Priv Auth-MD5, or SNMP V3 Priv Auth-SHA, depending on the SNMPv3 settings configured on the target device. 2.2.
Allied Telesyn AT-VIEW PLUS DEVICE MANAGER Starting from HP OpenView Note - The configuration of HP OpenView changes during the installation of AT-View Plus Device Manager to incorporate AT-View Plus Device Manager in its menu. Note - For the AT-AR250E running firmware v1.0.4, HP OpenView sets the host name to "RIP2ROUTERS.MCAST.NET". Device Manager, when started within HP Open View, uses this host name and connects to any RIP2 router present in the network.
Allied Telesyn AT-VIEW PLUS DEVICE MANAGER 2.2.3 Starting From IBM Tivoli NetView To start AT-View Plus Device Manager from IBM Tivoli NetView, select the device that you want to connect to then choose Tools > AT-ViewPlus to start AT-View Plus Device Manager. Note that AT-View Plus Device Manager and IBM Tivoli NetView run independently of each other, so exiting IBM Tivoli NetView has no effect on AT-View Plus Device Manager.
Allied Telesyn AT-VIEW PLUS DEVICE MANAGER 3 Main Window When started, AT-View Plus Device Manager displays one of the following windows, depending on how it is started.
Allied Telesyn AT-VIEW PLUS DEVICE MANAGER 3.1 Initial Window If the target host is not specified, or specified SNMP settings don't match those configured on the host, the following window appears. Initial Window To specify a target host from this window, select File > Open. When AT-View Plus Device Manager can identify the host, the panel window displaying the product front panel will appear.
Allied Telesyn AT-VIEW PLUS DEVICE MANAGER 3.2 Panel Window When the target host is specified and AT-View Plus Device Manager can identify the host model, the following window appears. Panel window The menu bar includes items specific to the product model, in addition to the menu items common to all models. Some elements such as network ports also act as menus. When you click on a port, a pull-down menu appears.
Allied Telesyn AT-VIEW PLUS DEVICE MANAGER 3.2.1 System Name Usually, the System Name is set to a unique descriptive name for identifying the device. This refers to the MIB object sysName. Note - SNMPv3: Depending on the READ VIEW access settings of the user name, there is a possibility that the System Name will not be displayed. 3.2.2 System Location Usually, the System Location is set to indicate where the device is installed. This refers to the MIB object sysLocation.
Allied Telesyn AT-VIEW PLUS DEVICE MANAGER 4 Basic Operations This chapter describes the basic operations within AT-View Plus Device Manager windows.
Allied Telesyn AT-VIEW PLUS DEVICE MANAGER 4.1 Click AT-View Plus Device Manager uses both the left and right mouse buttons. To operate items on the menu bar, you can use both the left and right mouse buttons. To click on the icons on the toolbar, use the left mouse button. To open the menus for the device images displayed in the main AT-View Plus Device Manager window, use the right mouse button, then you can use either the left or right mouse button to select an item in the menu that you have opened.
Allied Telesyn AT-VIEW PLUS DEVICE MANAGER 4.2 OK, Cancel and Set Buttons Dialog boxes have buttons to commit or discard changes made in the dialog box. Clicking the OK button confirms and commits the changes made and closes the dialog box. If the dialog box has tabs, the OK button commits changes in all the tabs. Note - Some configuration options are effective only after restarting AT-View Plus Device Manager.
Allied Telesyn AT-VIEW PLUS DEVICE MANAGER 4.3 Pop-up Menus Some elements such as network ports also act as menus. When you right click on a port, a pulldown menu appears. Select these menu items in the same way as from the menu bar, where they can also be selected. Port Right clicking on a port displays the menu items specific to the device. RS-232 Terminal Port Right clicking on an RS-232 port displays the menu items which allow you to select how to log in to the device's management interface.
Allied Telesyn AT-VIEW PLUS DEVICE MANAGER 4.4 Resizing Windows To resize a window, follow the procedures specific to the platform you use. The new window size is stored when exiting AT-View Plus Device Manager, and restored when AT-View Plus Device Manager is restarted. You can also resize the image or fix the display of the image using the Options window. In the main AT-View Plus Device Manager window, click Option > Option to open the Options window then check the "Image size fixed" option.
Allied Telesyn AT-VIEW PLUS DEVICE MANAGER 4.5 Resizing Tables AT-View Plus Device Manager displays information in tables. It is possible to resize table boundaries or field/column boundaries by dragging the borders. To do this, position your pointer on a table border. When the pointer has transfomed into arrows, left click on the border and drag it to the right or to the left, depending on whether you want to increase or decrease the table or field/column. Example 1: Adjusting the MIB Variable column.
Allied Telesyn AT-VIEW PLUS DEVICE MANAGER Ex 1: After adjustment Example 2: Adjusting the boundary between graph and table. To do this, position your pointer on the border between the graph and the table. When the pointer has transfomed into arrows, left click on the border and drag it to the left while holding the left mouse button to increase the table width.
Allied Telesyn AT-VIEW PLUS DEVICE MANAGER Ex 2: Before adjustment Ex 2: After adjustment Example 3: Adjusting the table boundary. To do this, position your pointer on the right table border. When the pointer has transfomed into arrows, left click on the border and drag it to the right while holding the left mouse button to increase the table width.
Allied Telesyn AT-VIEW PLUS DEVICE MANAGER Ex 3: Before adjustment Ex 3: After adjustment 4 Basic Operations PN 613-50664-00 Rev B Page 31 of 118
Allied Telesyn AT-VIEW PLUS DEVICE MANAGER 5 Common Menus This chapter describes the menu items common to all Allied Telesyn managed devices.
Allied Telesyn AT-VIEW PLUS DEVICE MANAGER 5.1 File The File menu lets you start and stop managing a device, check the properties of the target host, or exit AT-View Plus Device Manager. Topics: • • • • • Open Reopen Close Property Exit 5.1.1 Open From the Open menu item, you can specify a target host to manage. When you select File > Open, the following dialog box appears. To connect to the device, fill in parameters in the dialog box, then click OK.
Allied Telesyn AT-VIEW PLUS DEVICE MANAGER Target host The host name or the IP address of the target host. To see the description of the host, fill in host name or IP address and click Confirm. To connect to the host, click OK. Note - If "v3" is the selected SNMP version and the specified user account has no READ VIEW access to the System Description OID but has READ VIEW access to the System Object ID, clicking on the confirm button will display the message, "Unable to retrieve system description.
Allied Telesyn AT-VIEW PLUS DEVICE MANAGER for the Trap operation public SNMP v3 Settings dialog box User Account Name This is the SNMPv3 User Account to be used for accessing the MIB of the target device. Make sure to specify a User Account that has already been configured on the target device. Security Level This is the Security Level for the User Account Name that you have specified. Make sure to set the Security Level to be the same as what is configured on the target device.
Allied Telesyn AT-VIEW PLUS DEVICE MANAGER MD5 Use HMAC-MD5-96 protocol SHA Use HMAC-SHA-96 protocol Authentication Password If the Security Level is "Auth / No Priv" or "Auth / Priv", you need to specify an Authentication Password. Make sure to set the Authentication Password to be the same as what is configured on the target device. Privacy Protocol If the Security Level is "Auth / Priv", you need to specify a Privacy Protocol.
Allied Telesyn AT-VIEW PLUS DEVICE MANAGER Polling Options dialog box Polling Interval AT-View Plus Device Manager sends a GetRequest to the SNMP agent at predefined polling intervals to ensure that it is still connected to the device. If a shorter or longer interval is required adjust the value in the Polling Interval field accordingly. The minimum interval is 5 seconds and the maximum is 3600 seconds (1 hour). The default is 30 seconds. Retry Configures the SNMP timeout and the number of retries.
Allied Telesyn AT-VIEW PLUS DEVICE MANAGER Current status Indicates whether or not AT-View Plus Device Manager is currently connected to a target device and whether or not Trap operations are currently enabled. 5.1.2 Reopen This command can be used to reconnect to a recently accessed device. 5.1.3 Close Closes the SNMP session with the device and closes the Panel window. To connect to another device, select File > Open. 5.1.4 Property Change parameters for communicating with the device.
Allied Telesyn AT-VIEW PLUS DEVICE MANAGER 5.2 View Using the View menu, you can determine whether or not to display the AT-View Plus Device Manager toolbar and status bar, view and set thresholds on MIB variables, and view the log. Topics: • • • • • • • Toolbar Status Bar System Info Threshold Current Log Snapshot Refresh View menu 5.2.1 Toolbar Toggles display of the toolbar. The toolbar is the area holding command icons just below the menu bar. When checked, the toolbar is displayed. 5.2.
Allied Telesyn AT-VIEW PLUS DEVICE MANAGER 5.2.4 Threshold Displays a list of the configured thresholds. You can also create new thresholds or change the existing thresholds. The table has the following fields: • • • • • • • Status - Indicates the status of the MIB variable that AT-View Plus Device Manager is monitoring. MIB Variable - Name of the MIB variable that AT-View Plus Device Manager is monitoring. Current Value - Current value of the variable.
Allied Telesyn AT-VIEW PLUS DEVICE MANAGER 5.2.5 Current Log Displays the event log. It records events such as AT-View Plus Device Manager start up, reception of traps, or threshold events. Display Current Log Save As ('Floppy disk' icon) Saves the log as a text file. Specify a filename in the Save As dialog box. Each log entry is saved as one line. Each field in an entry is delimited by a TAB character. Clear ('note and eraser' icon) Clears the log.
Allied Telesyn AT-VIEW PLUS DEVICE MANAGER Start Snapshot File name Use the 'Browse' button to select the directory or folder where you want to save the image and to specify the name of the HTML file. When you click OK, three files will be created in the directory or folder you've selected: a PNG file, an XML file, and an HTML file. To display the device image and associated information, use a web browser to open the HTML file. Select Choose the information that you want to save in the HTML file.
Allied Telesyn AT-VIEW PLUS DEVICE MANAGER Background Color This enables you to specify the color of the background of the HTML file as displayed on the web browser. Click the "Color selection" button to open the Background Color Selection window where you can choose the background color. 5.2.7 Refresh Redisplay the Panel window with the latest device information. Use this menu when the target host is replaced with another device or if the hardware configuration of the target host changes.
Allied Telesyn AT-VIEW PLUS DEVICE MANAGER 5.3 Option In the Option menu, general preferences for AT-View Plus Device Manager can be changed. Although AT-View Plus Device Manager works well with the default configuration, you can customize some aspects of its behavior. This menu has only one submenu, 'Option'. Selecting Option > Option opens the Options dialog box, which has four tabs. Topics: • • • • Screen Tab External Command Tab User Action Tab Other Tab 5.3.
Allied Telesyn AT-VIEW PLUS DEVICE MANAGER Language Changes the language. English and Japanese are available. If you change this setting, you must restart AT-View Plus Device Manager to put the change into effect. Note - This feature is not supported in this version of AT-View Plus Device Manager. Toolbar type Changes the appearance of the toolbar. Choose one of 'Text Only', 'Image Only' or 'Image and Text'. To put this change into effect, click OK.
Allied Telesyn AT-VIEW PLUS DEVICE MANAGER Tab Type Displays each stacked device in a separate tab.
Allied Telesyn AT-VIEW PLUS DEVICE MANAGER Resize window when the number of stack changes When checked, AT-View Plus Device Manager resizes the Panel window according to the number of stacked devices. If this is not checked, the size of Panel window does not change even if AT-View Plus Device Manager detects a change in the stack configuration.
Allied Telesyn AT-VIEW PLUS DEVICE MANAGER TELNET command Specifies a command line to start the Telnet client. On Windows, "C:\Program Files\Windows NT\hypertrm.exe /t" may be used. On UNIX, use "dtterm -e telnet". Make sure that the command is correct by manually executing the command line. To select a command from the file list dialog box, click Browse. WEB browser Specifies the command or file used to start your web browser. External Command tab 5.3.
Allied Telesyn AT-VIEW PLUS DEVICE MANAGER User Action tab You can choose an action for each event type. There are two types of actions. Popup message AT-View Plus Device Manager displays a popup window when an event occurs. Command AT-View Plus Device Manager executes a predefined command line when an event occurs. You can use the following special arguments in the command line. They are automatically passed by AT-View Plus Device Manager. For all event types $TARGETHOST The host name of the device.
Allied Telesyn AT-VIEW PLUS DEVICE MANAGER $CURRENT Current value of the variable. $MAXVALUE Highest value of the variable during the monitoring period. $MINVALUE Lowest value of the variable during the monitoring period. $AVERAGE Average value of the variable during the monitoring period. $MAXLIMIT Threshold value configured for the variable. For trap events $TRAPHOST The host name of the device which sent the trap. $TRAPIPADDR The IP address of the device which sent the trap.
Allied Telesyn AT-VIEW PLUS DEVICE MANAGER $VARNAMEn The name of the nth MIB object sent with the trap, where n is a number in the range 1 to 9. If AT-View Plus Device Manager cannot get a name, $VAROIDn is used instead. $VALUEn The value of the nth MIB object sent with the trap, where n is a number in the range 1 to 9. 5.3.4 Other Tab In the Other tab, you can configure how MIB variables are displayed and the character encoding system to use in sending and receiving SNMP data.
Allied Telesyn AT-VIEW PLUS DEVICE MANAGER "MIB variable" option displays a MIB variable name in its original form. Examples: sysDescr.0 sysContact.0 sysName.0 sysLocation.0 "Both" option displays a MIB variable name in both English and its original form. Examples: System Description (sysDescr.0) System Contact (sysContact.0) System Name (sysName.0) System Location (sysLocation.0) Omit Display In the Edit tab of dialog boxes, where MIB variables can be edited, "Stack#.
Allied Telesyn AT-VIEW PLUS DEVICE MANAGER 5.4 Tool From the Tool menu, you can launch external applications such as Telnet, your WEB browser, the MIB browser Amigo, or VLAN Manager. Topics: • • • • TELNET WEB Browser MIB Browser VLAN Manager Tool menu 5.4.1 TELNET Starts the Telnet application specified in the External Command tab of the Options dialog box (Option > Option > External Command). This menu item simply starts the Telnet application with no argument (target host) specified.
Allied Telesyn AT-VIEW PLUS DEVICE MANAGER 5.4.2 WEB Browser Starts the web browser specified in the External Command tab of the Options dialog box (Option > Option > External Command). This menu item simply starts the web browser with no argument (URL) specified. Note - To connect directly to the target device via HTTP, click the RS-232 port in the Panel window and then select WEB Browser, or select the WEB Browser command from the Agent menu. 5.4.
Allied Telesyn AT-VIEW PLUS DEVICE MANAGER 5.5 User Menu In the User Menu, you can create, edit and execute user-defined menu items. This function may be useful if there are a small number of AT-View Plus Device Manager windows that you use more often than all others (common GUI windows). Usually, you need to perform several steps to open a window. By creating your own menu item, you can open the windows by a single action. You can also add frequently used commands or applications to the User Menu.
Allied Telesyn AT-VIEW PLUS DEVICE MANAGER 5.5.1 Create Your Own Menu Item To create a user-defined menu item, select User > Edit, or open the Options tab of the common GUI window. In the Options tab, click on the 'Regist menu' button. The Regist Menu Item window will appear. This window will allow you to add the currently opened common GUI window to the User Menu. After adding the common GUI window, you can open it by selecting it from the User Menu.
Allied Telesyn AT-VIEW PLUS DEVICE MANAGER User-defined menu items can be created to perform one of the following actions. MIB display Displays MIB variables of your choice in the common GUI window. Note - It takes times to get values for many variables. To improve performance, you can limit the number of variables to be displayed to about 10. You can further improve performance by increasing the polling interval when the volume of the data is high. MIB display MIB set Sets a value for the MIB variable.
Allied Telesyn AT-VIEW PLUS DEVICE MANAGER MIB set External command Executes the specified command line. External command 5.5.3 Common The Common submenu contains the user-defined menu items which are accessible regardless of the target device.
Allied Telesyn AT-VIEW PLUS DEVICE MANAGER 5.5.4 Target The Target submenu contains the user-defined menu items which are accessible only when connected to the specific target device.
Allied Telesyn AT-VIEW PLUS DEVICE MANAGER 5.6 Help From the Help menu, you can view the online user's manual, license information and version information for AT-View Plus Device Manager. Note - To view the online user's manual, you must first specify the web browser with which to view it in the External Command tab of the Options dialog box. Topics: • • • • Index ATI on-line License Registration About Help menu 5.6.1 Index Displays the main page of the online user's manual.
Allied Telesyn AT-VIEW PLUS DEVICE MANAGER 5.6.2 ATI on-line Opens the Allied Telesyn home page with the configured web browser. 5.6.3 License Registration AT-View Plus Device Manager can be evaluated for a limited period without a license. If you want to use AT-View Plus Device Manager after that period, you must obtain a license. Contact your authorized Allied Telesyn distributor or reseller.
Allied Telesyn AT-VIEW PLUS DEVICE MANAGER 5.6.4 About Displays version and copyright information for AT-View Plus Device Manager.
Allied Telesyn AT-VIEW PLUS DEVICE MANAGER 6 MIB Variable Window When you select a menu item to view information from the SNMP agent, a MIB variable window with tabs appears. In this window, you can view MIB variables in several different styles, set a threshold on variables for monitoring, change the value of the variables and change options. The window has some common components regardless of the information displayed. This section describes operations which are common for all such MIB variable windows.
Allied Telesyn AT-VIEW PLUS DEVICE MANAGER MIB Variable Window 6 MIB Variable Window PN 613-50664-00 Rev B Page 64 of 118
Allied Telesyn AT-VIEW PLUS DEVICE MANAGER 6.1 Table Tab In the Table tab, MIB variables are displayed in a table. This is the default tab opened by a menu item. Values in the table are updated at each polling interval. Note - The type of variables displayed determines which kind of tabs are displayed and which are not. For example, chart tabs are not displayed when you are only viewing string variables.
Allied Telesyn AT-VIEW PLUS DEVICE MANAGER 6.2 Plot Chart Tab In the Plot Chart tab, variables are displayed as a graph. To the right of the graph is a table of the numeric variables which can be displayed in the graph. Variables selected in the table are plotted on the graph. The scale of the vertical axis is automatically adjusted according to the values of the variables. The graph is updated at each polling interval. Note - The polling interval can be changed in the Options tab.
Allied Telesyn AT-VIEW PLUS DEVICE MANAGER The components of the Plot Chart tab are discussed below. 6.2.1 Graph The left half of the window contains the graph showing the values of the selected variables. The vertical (Y) axis shows the values and the horizontal (X) axis shows time. New values are plotted when AT-View Plus Device Manager gets them, at the predefined polling interval. The scale of the X-axis is automatically adjusted according to the number of values plotted.
Allied Telesyn AT-VIEW PLUS DEVICE MANAGER MIB variable table. To increase the polling interval, click the Options tab and change the Polling Interval.
Allied Telesyn AT-VIEW PLUS DEVICE MANAGER 6.3 Bar Chart Tab The Bar Chart tab displays variables as a bar chart. To the right of the graph is a table of the numeric variables which can be displayed in the chart. Only variables selected in the table are displayed in the chart. The scale of the vertical axis is automatically adjusted according to values of the variables displayed. The chart is updated at the polling interval. Note - The polling interval can be changed in the Options tab.
Allied Telesyn AT-VIEW PLUS DEVICE MANAGER 6.3.1 Chart In the left half of the window is the chart showing the values of the selected variables. The vertical (Y) axis shows the values and the horizontal (X) axis shows the variable name or number. You can select whether to display the name or the number in Option > Option > Other. Each variable is shown with a different color. The colors of the variables are displayed between the chart and the variable table.
Allied Telesyn AT-VIEW PLUS DEVICE MANAGER 6.4 Edit Tab In the Edit tab, you can change the value of any variable with read-write access. All variables are displayed in a table. For variables which can be changed, a checkbox is displayed in the first column. To change a value, input or select a new value in the MIB Value column, check the variable, then click the Set MIB Value button.
Allied Telesyn AT-VIEW PLUS DEVICE MANAGER 6.4.1 Checkbox Column The first (leftmost) column shows whether or not the variable can be changed (i.e. the variable supports the SNMP Set operation). If a checkbox is displayed in the column, the variable's value can be changed. When you change several variables, set the new values in the Value column and then check all corresponding boxes. AT-View Plus Device Manager sends new values for selected variables in a batch. 6.4.
Allied Telesyn AT-VIEW PLUS DEVICE MANAGER 6.4.8 Set MIB Value Button : Changes the values of the checked variables, using the SNMP Set operation. The values in the MIB Value fields are sent to the SNMP agent on the device. Note - SNMPv3: Depending on the WRITE VIEW access settings of the User Account Name used, there is a possibility that AT-View Plus Device Manager may not be able to set some MIB values. When this happens, a "No access error." value will be displayed on the affected MIB Value cells.
Allied Telesyn AT-VIEW PLUS DEVICE MANAGER To set a threshold, enter a threshold value in the Value field, then click OK. Note that this specifies a rising threshold which triggers an event when the variable's value increases to exceed the threshold, i.e. crosses the threshold from below. When the threshold is reached, a pop-up message is displayed or a predefined command is executed. You can select which action is executed in the Option > Option > User Action tab.
Allied Telesyn AT-VIEW PLUS DEVICE MANAGER 6.5 Options Tab In the Options tab, preferences specific to the MIB variable windows can be changed. Topics: • • • • • • Polling Interval Display Data Type of Chart Regist Menu Save Polling Data Start Snapshot Default Button Options tab 6.5.1 Polling Interval Specifies the polling interval. The valid range is 5 seconds to 3600 seconds (1 hour). However, a short polling interval may reduce system performance.
Allied Telesyn AT-VIEW PLUS DEVICE MANAGER Displays a value as it is. Relative Displays a change in the value per second. This is (Current value - Previous value) / Polling Interval. Note - The change here takes effect the next time the data is polled. 6.5.3 Regist Menu Add this window to the User Menu. If you want to view the current window repeatedly, do the following. 1. Click "Regist menu". 2. On "Regist Menu Item" dialog box, select one of "Common Menu" or "Target Menu".
Allied Telesyn AT-VIEW PLUS DEVICE MANAGER 6.5.5 Start Snapshot Clicking this button opens the Start Snapshot window. Use this window to save the information displayed in the front panel, as well as tables or charts representing device information. Use the 'Browse' button to select the directory or folder where you want to save the image. Note - You can generate an image of the main panel, table data, or charts.
Allied Telesyn AT-VIEW PLUS DEVICE MANAGER MIB Variables snapshot 6.5.6 Default Button : Reset all options to default settings.
Allied Telesyn AT-VIEW PLUS DEVICE MANAGER 7 RMON The RMON (Remote network MONitoring) facility collects management information from remote monitoring agents. Monitoring agents are implemented as dedicated hardware devices or are built into networking devices like switches. With AT-View Plus Device Manager, you can view management information retrieved from built-in RMON agents on the Allied Telesyn switches that support RMON.
Allied Telesyn AT-VIEW PLUS DEVICE MANAGER 7.1 RMON-specific Buttons The RMON window is slightly different from the MIB variable windows. The RMON window has several tabs and each tab has the following tool buttons in addition to the buttons in the MIB variable windows. Absolute Value Displays collected data as they are. Per Sample Displays the difference between the last two sampled values. The value is rounded. Per Second Displays the difference between the last two sampled values per second.
Allied Telesyn AT-VIEW PLUS DEVICE MANAGER 7.2 Statistics From the Statistics menu, you can view RMON Statistics information.
Allied Telesyn AT-VIEW PLUS DEVICE MANAGER 7.2.1 Data Group Buttons In the RMON Statistics window, you can view various network statistics. Data is grouped by the type of information. You can view each type of information by clicking a Data Group button at the top of the window (just below the title bar). Note - Data Group buttons change the data to be displayed. The tabs change the view of the data, that is, how the data selected by the Data Group buttons is displayed.
Allied Telesyn AT-VIEW PLUS DEVICE MANAGER Custom Shows all items plus Received Bytes but without Utilization. Note - Items calculated by AT-View Plus Device Manager always have the descriptive title (not the variable name) because they have no related MIB variables. 7.2.2 Management Information Area At the bottom of RMON Statistics window, the following information is always displayed. PortX: yyy Mbps X is the port number of the selected port. yyy is the speed of the port.
Allied Telesyn AT-VIEW PLUS DEVICE MANAGER RMON Statistics Entry tab 7.2.3.1 Available Control Table Entries This table shows all control table entries configured on the target RMON agent. Data displayed in the RMON Statistics window is collected using the selected control table entry. Here you can create a new entry, or change or delete an existing entry. By default, the topmost entry is automatically selected. The control table is not automatically updated.
Allied Telesyn AT-VIEW PLUS DEVICE MANAGER Owner The owner (creator) of the control entry. 7.2.3.2 Select Button : changes the control entry displayed in the Statistics window. To change an entry displayed, select the entry in the table, then click the Select button. Data collected for the selected entry is displayed on other tabs thereafter. Note - When you edit the current entry, or when you add an entry with the same index number after removing the current entry, make sure to select the entry again.
Allied Telesyn AT-VIEW PLUS DEVICE MANAGER 7.2.4 Table Tab In the RMON Statistics Table tab, network statistics are shown in the table format. The data is updated at the polling interval. Topics: • • Sort Reset Table Button RMON Statistics Table tab 7.2.4.1 Sort To sort table items, click a column title. When you click the column title, table items are sorted by the column in ascending order. One more click sorts the items in descending order. To restore the original order, click the Reset Table button.
Allied Telesyn AT-VIEW PLUS DEVICE MANAGER 7.2.5 Plot Chart Tab In the Plot Chart tab, network statistics are shown in the time-scaled plotting graph. Data is updated at the polling interval. The horizontal axis contains a maximum of the 40 latest values. Topics: • Popup Display RMON Statistics Plot Chart tab 7.2.5.1 Popup Display You can see the exact value of a plotted dot by moving the mouse cursor onto the dot. The values are displayed in the form "(x, y)".
Allied Telesyn AT-VIEW PLUS DEVICE MANAGER 7.2.6 Pie Chart Tab In the Pie Chart tab, network statistics are shown in a pie chart. This chart is useful for checking the proportions of the various packet counts. The data is updated at the polling interval. Note - The pie chart is not displayed when all data has the value zero. Topics: • Popup Display RMON Statistics 3-D Pie Chart tab 7.2.6.
Allied Telesyn AT-VIEW PLUS DEVICE MANAGER Topics: • • • • • Polling Interval Display Data Type of Chart Regist Menu Save Polling Data Start Snapshot RMON Options tab (Statistics) 7.2.7.1 Polling Interval You can change the polling interval here. 7.2.7.2 Display Data Type of Chart Specifies how to display data on the graph or chart. You can select one from the following options. Absolute Value Displays a value as it is.
Allied Telesyn AT-VIEW PLUS DEVICE MANAGER Per Sample Displays the change in the value between the two pollings. This is Current value Previous value. Per Second Displays the change in the value per second. This is (Current value - Previous value) / Polling Interval. Note - Calculated values are rounded. For example, Number of Error packets is usually very small so that calculated value is likely to be zero. 7.2.7.3 Regist Menu Add this window to the user-defined menu (User Menu). 7.2.7.
Allied Telesyn AT-VIEW PLUS DEVICE MANAGER Start snapshot Below is a snapshot from the RMON Statistics window, with the main panel and table data marked in the Start Snapshot window: PN 613-50664-00 Rev B Page 91 of 118
Allied Telesyn AT-VIEW PLUS DEVICE MANAGER RMON Statistics snapshot 7.2.8 Close Closes the RMON Statistics window.
Allied Telesyn AT-VIEW PLUS DEVICE MANAGER 7.3 History Control Table From the History Control Table menu, you can view RMON History information. Note - If there is a large amount of history data, it takes AT-View Plus Device Manager a long time to retrieve this data when you open the History Control Table window. If the message "Please wait for a while" is displayed for a long time, decrease the "Request Bucket" value in the Entry tab of the History Control Table window.
Allied Telesyn AT-VIEW PLUS DEVICE MANAGER RMON History Control Table window 7.3.1 Data Group Buttons At the RMON History Control Table window, you can view the history of various network statistics. Data is grouped by the type of information. You can view each type of information by clicking a Data Group button at the top of the window (just below the title bar). Note - Data Group buttons change the data to be displayed.
Allied Telesyn • AT-VIEW PLUS DEVICE MANAGER Multicast Packets Error Type Shows the number of packets categorized by error types. • • • • • • • • Good Packets (calculated by AT-View Plus Device Manager) Error Packets (calculated by AT-View Plus Device Manager) Collision Packets CRC Alignment Error Packets Undersize Packets Oversize Packets Fragment Packets Jabber Packets Custom Shows all items plus Received Bytes but without Utilization.
Allied Telesyn AT-VIEW PLUS DEVICE MANAGER Status Value of etherStatsStatus of the RMON Statistics group. 7.3.3 Entry Tab In the Entry tab, you can select a control table entry to view. Data collected by the selected entry is shown on the Table, Plot Chart and Pie Chart tabs. By default, the entry with the lowest index number is selected. On this tab, you can also add, remove or edit entries.
Allied Telesyn AT-VIEW PLUS DEVICE MANAGER 7.3.3.1 Available Control Table Entries This table shows all control table entries configured on the target RMON agent. Data displayed in the RMON History window is collected using the selected control table entry. Here you can create a new entry, or modify or remove an existing entry. By default, the topmost entry is automatically selected. The Control table is not automatically updated. To see the latest information, click the Refresh button.
Allied Telesyn AT-VIEW PLUS DEVICE MANAGER Index The index number used to identify this entry. Data Source The index of the interface on which the RMON agent collects data. Request Buckets The number of values which you want the RMON agent to store. Sampling Interval The interval at which the RMON agent retrieves data. Owner The creator (owner) of this entry. Add Control Table Entry dialog box 7.3.3.4 Edit Button : changes the selected entry.
Allied Telesyn AT-VIEW PLUS DEVICE MANAGER 7.3.4 Table Tab In the RMON History Table tab, RMON history information is displayed in table format. The data is updated at the polling interval. Topics: • • • History Table Sort Reset Table Button RMON History Table tab 7.3.4.1 History Table The table shows history data for the selected control table entry.
Allied Telesyn AT-VIEW PLUS DEVICE MANAGER Min Value Shows the lowest value of each variable after the current history control entry is selected at the Entry tab. Average Value Shows the average value of each variable after the current history control entry is selected at the Entry tab. XXXXXX Sample Index. A maximum of the 40 latest index numbers are displayed. 7.3.4.2 Sort To sort table items, click a column title. When you click the column title, table items are sorted by the column in ascending order.
Allied Telesyn AT-VIEW PLUS DEVICE MANAGER RMON History Plot Chart tab 7.3.5.1 Popup Display You can see the exact value of a dot by moving the mouse cursor onto the dot. The values are displayed in the form of "(x, y)". where x indicates the elapsed time (sysUpTime seconds) and y indicates the value of the data. Below the graph's horizontal axis, time is displayed. Note that the times shown there are only a reference point. They are not synchronized with the plotted dots. 7.3.
Allied Telesyn AT-VIEW PLUS DEVICE MANAGER Topics: • Popup Display RMON History Pie Chart tab 7.3.6.1 Popup Display To display the numeric value for a particular section of the pie chart, move the mouse cursor onto that section. 7.3.7 Options Tab In the Options tab, you can customize the options for viewing and editing the RMON history data.
Allied Telesyn • AT-VIEW PLUS DEVICE MANAGER Start Snapshot RMON Options tab (History Control Parameters) 7.3.7.1 Polling Interval You can change the polling interval here. 7.3.7.2 Display data type of chart Specifies how to display data in graphs and charts. You can select one of the following options. Because RMON histories are collected by RMON agents and AT-View Plus Device Manager only displays the collected data, settings here are slightly different from other windows.
Allied Telesyn AT-VIEW PLUS DEVICE MANAGER Data sampled by RMON Sample 1 Sample 2 Sample 3 100 50 250 Data displayed by AT-View Plus Device Manager 100 150 400 Per Sample Displays data which AT-View Plus Device Manager got from the RMON agent as it is. Data sampled by RMON Sample 1 Sample 2 Sample 3 100 50 250 Data displayed by AT-View Plus Device Manager 100 50 250 Per Second Displays "Sampled data / Sampling Interval configured on the RMON agent".
Allied Telesyn AT-VIEW PLUS DEVICE MANAGER 7.3.7.5 Start Snapshot Clicking this button opens the Start Snapshot window. Use this window to create an image of the device, as well as tables or charts representing device information, in HTML format. Use the 'Browse' button to select the directory or folder where you want to save the image. Note - You can generate an image of the main panel, table data, or charts.
Allied Telesyn AT-VIEW PLUS DEVICE MANAGER RMON History Control Parameters snapshot 7.3.8 Close Closes the RMON History window.
Allied Telesyn AT-VIEW PLUS DEVICE MANAGER 7.4 Alarm Table From the Alarm Table menu, you can view and edit the RMON Alarm table on the RMON agent. RMON Alarm table is used to monitor a specific variable by setting a threshold on the variable and by specifying an event action to be taken if the threshold is reached. The Alarm Table is not automatically updated. To see the latest information, click the Refresh button.
Allied Telesyn AT-VIEW PLUS DEVICE MANAGER 7.4.1 Alarm Table Tab The Alarm Table shows the list of currently defined alarm entries. Index The index number used to identify this alarm entry. Sampling Interval The time interval at which the RMON agent samples data. Sampling MIB Variable Name MIB variable to be monitored. The object type must be one of INTEGER, COUNTER, GAUGE and TIMETICKS. Sampling Type How to compare the sampled value with the threshold.
Allied Telesyn AT-VIEW PLUS DEVICE MANAGER Falling Event Index The index of the RMON Event entry which is triggered when the sampled value falls below the falling threshold. 7.4.2 Event Table of Alarm "Event Table of Alarm" shows a list of events for the Alarm entry which is selected in the Alarm Table. You can check which type of events are configured for a specific alarm entry. Index The index number used to identify the Event entry. Event Description Text describing the Event entry.
Allied Telesyn AT-VIEW PLUS DEVICE MANAGER Add Alarm Table Entry dialog box Alarm Index The index number used to identify this Alarm entry. By default, the lowest unused number is automatically displayed. If you explicitly specify a number currently in use, that entry will be overridden. Sampling Interval The sampling interval in seconds. Sampling MIB Variable Name Type or select the name of the MIB variable to be sampled. Sampling Type How the sampled value is compared with the threshold.
Allied Telesyn AT-VIEW PLUS DEVICE MANAGER Startup Alarm Type The type of threshold which is applied to the first sampled value after this Alarm entry becomes valid. rising alarm A single RMON event is triggered if the first sampled value is greater than or equal to the configured rising threshold. falling alarm A single RMON event is triggered if the first sampled value is less than or equal to the configured falling threshold.
Allied Telesyn AT-VIEW PLUS DEVICE MANAGER Event Description Text string describing the event. By default, "Rising Event for Alarm#idx" is used where "idx" represents the Alarm index number. Falling Alarm Event Rule Configuration for the falling alarm. If you select "rising alarm" for the Startup Alarm Type, only "Falling Threshold" and "Falling Event Index" can be configured. If there is no Event entry corresponding to the Event Index, no event will occur. Falling Threshold The floor threshold.
Allied Telesyn AT-VIEW PLUS DEVICE MANAGER 7.5 Event Table From the Event Table menu, you can view and edit the RMON Event entries. The data is not automatically updated. Use the Refresh button to view the latest information. Topics: • • • • • • Event Table Tab Select Button Add Button Edit Button Remove Button Close RMON Event Table window 7.5.1 Event Table Tab The Event Table shows the list of all currently configured Event entries.
Allied Telesyn AT-VIEW PLUS DEVICE MANAGER Index The index number used to identify the Event. Event Description Text describing the Event entry. Event Type The type of action to be taken when the event occurs. Select one of "none" (no action taken), "SNMP trap" (send an SNMP trap), "log" (record to the log) and "log & SNMP trap" (record to the log and send an SNMP trap). TRAP Community The Trap Community name. Last Sent Event Time The value of sysUpTime at the time when the last event occured. 7.5.
Allied Telesyn AT-VIEW PLUS DEVICE MANAGER 7.5.4 Edit Button : edits the selected Event entry. Click this button to open the Edit dialog box for the selected entry. Change the configuration, then click OK to modify the entry. You can also open this dialog box by double-clicking the entry. 7.5.5 Remove Button : removes the selected Event entry. 7.5.6 Close Closes the Event Table window.
Allied Telesyn AT-VIEW PLUS DEVICE MANAGER 7.6 Event Log From the Event Log menu, you can view and remove RMON event log entries. Log entries displayed on the screen are not automatically updated. To view the latest log entries, click the Refresh button. Topics: • • • • • • • Log List of All Events Event Log Entry Remove All Button Remove Button Display All Button Refresh Button Close RMON Event Log tab 7.6.1 Log List of All Events This table shows a list of all log events which occurred.
Allied Telesyn AT-VIEW PLUS DEVICE MANAGER Event Index The index number of the Event table for this log entry. Index The index number used to identify this log entry. Log Time The time when this log entry was recorded. Log Description Text describing the log entry. 7.6.2 Event Log Entry By double-clicking the log entry, the following Event Log Entry dialog box appears. Event Log Entry dialog box 7.6.3 Remove All Button : clears all log entries. 7.6.
Allied Telesyn AT-VIEW PLUS DEVICE MANAGER 7.6.6 Refresh Button : displays the latest log table. The log entries are not automatically updated. 7.6.7 Close Closes the Event Log window.