Operation/Maintenance Drying Tumblers 25 Pound Capacity 30 Pound Capacity 35 Pound Capacity 55 Pound Capacity Starting Serial No. 0602004144 Refer to Page 3 for Model Identification NOTA: Para bajar una copia de estas instrucciones en español, visite www.comlaundry.com. Keep These Instructions for Future Reference. (If this machine changes ownership, this manual must accompany machine.) www.comlaundry.com Part No.
Installation must conform with local codes or in the absence of local codes with: In the U.S.A., installation must conform to the latest edition of the American National Standard Z223.1/ NFPA 54 “National Fuel Gas Code” and Standard ANSI/NFPA 70 “National Electric Code.” In Canada, installation must comply with Standards CSA-B149.1 or Natural Gas and Propane Code CSA C22.1, latest edition, Canadian Electric Code, Part I.
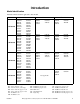
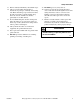
Table of Contents Introduction......................................................................................... Model Identification ............................................................................. Customer Service.................................................................................. Wiring Diagram .................................................................................... Serial Plate Location........................................................................
Introduction Model Identification Information in this manual is applicable to these models.
Introduction Customer Service Wiring Diagram If literature or replacement parts are required, contact the source from which the machine was purchased or contact Alliance Laundry Systems at (920) 748-3950 for the name and address of the nearest authorized parts distributor. The wiring diagram is located in the junction or contactor box. The wiring diagram part number in the lower portion of the electrical data on the serial plate. For technical assistance, call (920) 748-3121.
Safety Information Explanation of Safety Messages Precautionary statements (“DANGER,” “WARNING,” and “CAUTION”), followed by specific instructions, are found in this manual and on machine decals. These precautions are intended for the personal safety of the operator, user, servicer, and those maintaining the machine. DANGER Indicates an imminently hazardous situation that, if not avoided, will cause severe personal injury or death.
Safety Information Important Safety Instructions 14. The interior of the tumbler and the exhaust duct should be cleaned periodically by qualified service personnel. Save These Instructions WARNING Hazardous Voltage. Can cause shock, burn or cause death. Allow machine power to remain off for two minutes prior to working in and around AC inverter drive. W359 1. Read all instructions before using the tumbler. 2. Refer to the GROUNDING INSTRUCTIONS for the proper grounding of the tumbler. 3.
Safety Information 23. Remove laundry immediately after tumbler stops. 29. DO NOT bypass any safety devices. 24. Always read and follow manufacturer’s instructions on packages of laundry and cleaning aids. Heed all warnings or precautions. To reduce the risk of poisoning or chemical burns, keep them out of reach of children at all times (preferably in a locked cabinet). 30. Solvent vapors from dry-cleaning machines create acids when drawn through the heater of the drying unit.
Operating Instructions WARNING To reduce the risk of fire: • DO NOT DRY articles containing foam rubber or similarly textured rubberlike materials. • DO NOT DRY plastics, anything containing wax or chemicals such as mops and cleaning cloths, or anything dry-cleaned at home with a dry-cleaning solvent. • DO NOT TUMBLE fiberglass curtains and draperies unless the label says it can be done. If they are dried, wipe out the cylinder with a damp cloth to remove particles of fiberglass.
Operating Instructions Control Instructions TMB2133N Figure 3 Dual Digital Timer Control QT Control Suffix 1. Select HIGH, MED, LOW or NO HEAT by turning the temperature knob. 2. Set the HEAT TIME for the number of minutes (from 0 - 60) desired. 3. Set the COOL DOWN TIME for the number of minutes (from 0 - 15) desired. 4. Display will show minutes remaining before end of cycle. NOTE: One touch drying is available for repetitive loads.
Operating Instructions Error Codes WARNING To reduce the risk of electric shock, fire, explosion, serious injury or death: • Disconnect electric power to the tumbler before servicing. • Close gas shut-off valve to gas tumbler before servicing. • Close steam valve to steam tumbler before servicing. • Never start the tumbler with any guards/panels removed. • Whenever ground wires are removed during servicing, these ground wires must be reconnected to ensure that the tumbler is properly grounded.
Operating Instructions STATUS ON / SELECT HIGH START PROGRAM AUTO DRYING TIME AUTO MEDIUM STOP/RESET MED LOW TEMP DISPLAY LOW SIGNAL SPECIAL CYCLE COOL DOWN * DOOR OPEN AUTO TEMP SPECIAL TIME * COOL DOWN F/ C CUSTOM NO HEAT MORE + LESS CONDITION SAVE CUSTOM -- PROG TMB1789N TMB1789N Figure 4 Electronic OPL Control 2. Press START pad to start tumbler. OM Control Suffix 1. To use an Automatic Cycle, press an ON/ SELECT pad.
Operating Instructions TMB2123N Figure 6 Single Drop Control Preliminary Control Information SD and SX Control Suffixes Power-Up Mode 1. Select HIGH, MED, LOW or NO HEAT by turning the temperature knob. 2. Insert the coin(s) in the coin slot. 3. Press START button to start tumbler. IMPORTANT: To stop the tumbler at any time during the cycle, OPEN DOOR. To restart the tumbler, CLOSE door and press START button. NOTE: If display show an error code, refer to Error Codes section. 4.
Operating Instructions Run Mode In Run Mode, the control is running a cycle. The IN USE LED is lit. Door Open Mode In Door Open Mode, the control turns off the heater and motor when the door is opened during a run cycle. The timer will continue to count down time and the IN USE LED is lit. End of Cycle Mode In End of Cycle Mode, a cycle is complete and the IN USE LED is off. The control remains in this mode until the door is opened or additional vend has been satisfied.
Operating Instructions SELECT TEMP INSERT COINS or INSERT CARD PUSH START 25 C DRYING COOL DOWN DELICATES START TMB1964N TMB1964N Figure 7 MDC Coin Control BC and BX Control Suffixes 1. Select HIGH TEMP, MED TEMP, LOW TEMP or DELICATES by pressing the appropriate temperature pad. IMPORTANT: To stop the tumbler at any time during the cycle, OPEN DOOR. To restart the tumbler, CLOSE door and press START pad. 4. When the cycle is complete, open door and remove the laundry. 2.
Operating Instructions SELECT TEMP DRYING PUSH START COOL DOWN INSERT CARD HERE DELICATES START TMB1965N TMB1965N Figure 8 MDC Card Control BL and BY Control Suffixes 1. Select HIGH TEMP, MED TEMP, LOW TEMP or DELICATES by pressing the appropriate temperature pad. IMPORTANT: To stop the tumbler at any time during the cycle, OPEN DOOR. To restart the tumbler, CLOSE door and press START pad. 4. When the cycle is complete, open door and remove the laundry. 2. Insert card into opening. 3.
Operating Instructions C851I Figure 9 NetMaster Coin Control NC, NX, ZC and ZX Control Suffixes 1. Select HIGH TEMP, MED TEMP, LOW TEMP or NO HEAT by pressing the appropriate temperature pad. IMPORTANT: To stop the tumbler at any time during the cycle, OPEN DOOR. To restart the tumbler, CLOSE door and press START pad. 4. When the cycle is complete, open door and remove the laundry. 2. Insert the coin(s) in the coin slot. 3. Press START pad to start tumbler.
Operating Instructions C852I C852I Figure 10 NetMaster Card Control NR, NY, ZR and ZY Control Suffixes 1. Select HIGH TEMP, MED TEMP, LOW TEMP or NO HEAT by pressing the appropriate temperature pad. IMPORTANT: To stop the tumbler at any time during the cycle, OPEN DOOR. To restart the tumbler, CLOSE door and press START pad. 4. When the cycle is complete, open door and remove the laundry. 2. Insert card into opening. DO NOT remove the card until “REMOVE CARD” LED is lit. 3.
Operating Instructions Ignition Control Operation Run Mode Power Up While in Run Mode the ignition control leaves the gas valve on, monitors the flame signal, and leaves the igniter off. After 24 VAC is applied to the ignition control pins 24V and GND, the Diagnostic LED on the ignition control will turn orange/yellow. If a fault is detected the ignition control will enter Lockout Mode. If no faults are detected, the Diagnostic LED will turn Green and the ignition control will enter Standby Mode.
Operating Instructions System Tests Flame Probe Tests The following system tests are performed during normal operation. System tests are performed at a minimum of every 24 hours. Unexpected Presence of Flame Low Voltage Detection If the voltage between terminals TH and GND on the control is below 18.75VAC +/- 0.75VAC for more than 3 seconds the ignition control will turn off the gas valve and will not attempt to spark. The Diagnostic LED will display Error Code 5.
Maintenance WARNING To reduce the risk of electric shock, fire, explosion, serious injury or death: • Disconnect electric power to the tumbler before servicing. • Close gas shut-off valve to gas tumbler before servicing. • Close steam valve to steam tumbler before servicing. • Never start the tumbler with any guards/panels removed. • Whenever ground wires are removed during servicing, these ground wires must be reconnected to ensure that the tumbler is properly grounded. W002 Daily 1.
Maintenance WARNING To reduce the risk of electric shock, fire, explosion, serious injury or death: • Disconnect electric power to the tumbler before servicing. • Close gas shut-off valve to gas tumbler before servicing. • Close steam valve to steam tumbler before servicing. • Never start the tumbler with any guards/panels removed. • Whenever ground wires are removed during servicing, these ground wires must be reconnected to ensure that the tumbler is properly grounded.
Maintenance WARNING To reduce the risk of electric shock, fire, explosion, serious injury or death: • Disconnect electric power to the tumbler before servicing. • Close gas shut-off valve to gas tumbler before servicing. • Close steam valve to steam tumbler before servicing. • Never start the tumbler with any guards/panels removed. • Whenever ground wires are removed during servicing, these ground wires must be reconnected to ensure that the tumbler is properly grounded. W002 Monthly Bi-Annually 1.
Maintenance WARNING To reduce the risk of electric shock, fire, explosion, serious injury or death: • Disconnect electric power to the tumbler before servicing. • Close gas shut-off valve to gas tumbler before servicing. • Close steam valve to steam tumbler before servicing. • Never start the tumbler with any guards/panels removed. • Whenever ground wires are removed during servicing, these ground wires must be reconnected to ensure that the tumbler is properly grounded.
Maintenance WARNING To reduce the risk of electric shock, fire, explosion, serious injury or death: • Disconnect electric power to the tumbler before servicing. • Close gas shut-off valve to gas tumbler before servicing. • Close steam valve to steam tumbler before servicing. • Never start the tumbler with any guards/panels removed. • Whenever ground wires are removed during servicing, these ground wires must be reconnected to ensure that the tumbler is properly grounded.
Before You Call for Service Won’t Start Won’t Heat Clothes Not Dry Possible Reason – Corrective Actions • Insert correct coin(s) or valid card if applicable. • Close the loading door tightly. • Close lint panel tightly. • Press the START pad/button. • Be sure power cord is plugged all the way into the electrical outlet. • Check the main fuse and circuit breaker. • Check fuses located in the machine. • Insufficient airflow. • Gas shut-off valve in OFF position.