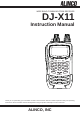
WIDE BAND COMMUNICATION RECEIVER DJ-X11 Instruction Manual WILD 1 GAIN ATT 2ABC DEF SET CLR 3 MODE TONE LINK SHIFT MAIN 4 GHI 5 JKL 6MNO 0 SUB NAME PRIO AUDIO STEP M V 7 PQRS 8 TUV WXYZ ENT SCOPE 9 F TUNE MW SCAN V/P/M DJ-X11 Thank you for purchasing your new Alinco receiver. This instruction manual contains important safety and operating instructions. Please read this manual carefully before using the product and keep it for future reference.
NOTICE / Compliance Information Statement NOTICE / Compliance Information Statement This equipment has been tested and found to comply with the limits for a Class B digital device, pursuant to part 15 of the FCC Rules. These limits are designed to provide reasonable protection against harmful interference in a residential installation.
NOTICE / Compliance Information Statement Conformity Information Alinco, Inc.
Warning Warning To prevent any hazard during operation of Alinco's radio product, in this manual and on the product you may find symbols shown below. Please read and understand the meanings of these symbols before starting to use the product. Danger This symbol is intended to alert the user to an immediate danger that may cause loss of life and property if the user disregards the warning.
Warning Risk of explosion if battery is replaced with an incorrect type. Dispose of, or recycle used batteries according to your local regulations. The manufacturer declines any responsibilities against loss of life and property due to a failure of this product when used with or as a part of a device made by third parties. Use of third party accessory may result in damage to this product. It will void our warranty for repair.
Warning Securely plug the power supply to the wall outlet. Insecure installation may result in short-circuiting, electronic shock and/or fire. Do not plug the power supply into the wall socket if the contacts are dirty. Short-circuit and/or overheating may result in fire, electric shock and/or damage to the product. Do not modify or remove fuse-assembly from the DC cable. It may result in fire, electric shock and/or damage to the product.
Warning ■ About receiver Be cautious of the whip antenna when carried in your shirt-pocket etc. It may make contact with your eye and cause injury. Do not connect devices other than specified ones to the jacks and ports on the product. It may result in damage to the devices. Turn off and remove the power source (AC cable, DC cable, battery, cigar cable, charger adapter etc.) from the product when the product is not in use for extended period of time or in case of maintenance.
Introduction Introduction Thank you very much for purchasing this excellent Alinco receiver. Our products are ranked among the finest in the world. This radio has been manufactured with state of the art technology and it has been tested carefully at our factory. It is designed to operate to your satisfaction for many years under normal use. PLEASE READ THIS MANUAL COMPLETELY TO LEARN ALL THE FUNCTIONS THE PRODUCT OFFERS.
Table of Contents Table of Contents 1. Features …………………………………………………………………12 2. Checking the Accessories ………………………………………………13 3.
Table of Contents 7-6 Quick Memory …………………………………………………………………………… 7-6-1 Programming a memory channel to the quick memory ……………………… 7-6-2 Calling up a memory channel from the quick memory ……………………… 7-7 Memory Skip Function ………………………………………………………………… 7-8 Memory Naming Function ……………………………………………………………… 40 40 40 40 41 8.
Table of Contents 10-3 Power and Battery Setting …………………………………………………………… 10-3-1 Auto power off setting ………………………………………………………… 10-3-2 Battery setting ………………………………………………………………… 10-3-3 Battery save function setting ………………………………………………… 10-4 Key Assignment Setting ……………………………………………………………… 10-4-1 Key-lock mode setting ………………………………………………………… 10-4-2 Set mode exit time setting …………………………………………………… 10-4-3 Band transition setting ………………………………………………………… 10-4-4 Right/left dial function setting ………………………………………………… 10-4-
1. Features 1 1. Features The DJ-X11 is a multifunctional receiver which receives a wide range of radio signals from low-frequency (LF) signals to ultra-high-frequency (UHF) signals. It provides the following features: 1 Receives a wide range of frequencies - between 0.05 and 1299.99995 MHz - including aviation radio and business communication frequencies. 2 Dual-frequency simultaneous reception for receiving signals with main and sub bands simultaneously.
2. Checking the Accessories 2. Checking the Accessories The package of the DJ-X11 contains the following items. Check that all items are included in your package before using the receiver. 2 Instruction Manual (this manual) Warranty certificate (T/K versions only) Dry battery case (EDH-36) Lithium ion battery pack (EBP-74 3.
3. Attaching Accessories 3. Attaching Accessories 3 3-1 Antenna 3-1-1 Attaching the antenna 1 Hold the antenna at its base and rotate it clockwise (to the right). 2 When you cannot rotate the antenna further, confirm that it is securely attached to the receiver. • To avoid breakage, the supplied antenna is made of a more flexible material than that of typical antennae. MEMO • This connector is also used for the connection of an external antenna.
3. Attaching Accessories 3-3 Belt Clip 3-3-1 Attaching the belt clip Belt clip 3 1 Align the belt clip with the groove at the rear of the receiver to secure it, insert the screw into the hole and rotate it clockwise (to the right). 2 Check that the belt clip is securely attached to the receiver. * The screw may become loose during use. Check the tightness from time to time. * The belt clip can be adjusted so that it can be used for a belt of approximately 8 cm width at maximum.
3. Attaching Accessories 3-4-2 Removing the battery pack 1 Slide the lock lever at the 3 bottom of the battery pack in the direction of arrow (1) and remove the battery pack (2). (2) (1) • The battery pack is not fully charged when shipped. You need to charge it after purchase before use. CAUTION • The battery pack must be charged within the temperature range of 0 to 40°C. • Do not modify or dismantle the battery pack and do not throw it into fire or water. These actions are dangerous.
3. Attaching Accessories 3-5 Charging the Battery Pack through the DC Jack The supplied lithium ion battery pack can be charged through the DJ-X11 by using the supplied AC adapter and a DC power supply (6 VDC, 1 A or more: IEC/ EN60950 standard). It takes about six hours to fully charge the battery pack from a state of complete discharge. 3 1 Attach the battery pack by referring to “Battery Pack” (P. 15).
3. Attaching Accessories 3-6 Charging the Battery Pack with the Charger Using the supplied charger completes charging in about four hours from a state of complete discharge. 3 1 Connect the plug of the AC adapter to the charger. 2 Plug the AC adapter into a wall outlet and place the DJ-X11 on the charger. During charging, the red lamp of the charger illuminates. When the charging is complete,the lamp goes off. EDC-174 doesn't charge when EBP-74 is fully charged and thered lamp stays off.
3. Attaching Accessories 3-8 Dry Battery Case (2) 1 Push up tab (1) and remove the lid. (1) (3) 3 2 Set three AA dry batteries in the case and close the lid in the order of 2 and 3. Check that the lid is closed securely. You must use alkaline dry batteries. Manganese dry batteries cannot be used. • To use dry batteries, read the instructions in “Battery setting” (P. 82). MEMO Precautions on using the dry battery case CAUTION • Be careful of the orientation of the batteries.
3. Attaching Accessories 3-9 Battery Level Icons 3 The battery icon displayed on the LCD of the DJ-X11 indicates the remaining battery power. When the battery icon indicates empty, charge the battery pack or replace the dry batteries with new ones. Battery icon ATH VFO - DCS BUSY MR 001 000 BS 145.000 FM Remaining battery power is sufficient. Remaining dry battery power is sufficient. Remaining battery power is decreasing. Remaining dry battery power is decreasing.