
User guide


Quick Start
Client Call Recorder Installation and User Guide 3
Quick Start
Quick Install
Connect to PC 1. Turn on your PC.
2. Connect the AuxBox to your PC using the supplied USB cable.
3. If you are using a 4105 Analog AuxBox, skip to step 5.
4. Plug in the power supply.
5. The Power light on the AuxBox should turn on solid to indicate power,
then start flashing to indicate successful USB communication with the
PC.
Connect to Telephone
Line
6. Disconnect your telephone from the existing jack and connect instead
to either telephone jack on the back of the AuxBox.
7. Using the supplied telephone cord, connect the remaining free tele-
phone jack of the AuxBox to the telephone jack where your telephone
was previously connected.
Note: Powering down the AuxBox will not affect your telephone.
Install Client Call
Recorder
8. Place the Client Call Recorder CD into your PC. If the Client Call
Recorder Installation Wizard does not start automatically, double-click
the CCR_Install.exe file on the CD and click Run
9. Follow the instructions provided by the Installation Wizard to complete
the installation.
By default, Client Call Recorder saves all calls automatically and stores
them indefinitely. To change these options, refer to “Save Modes” on
page 5 or “Automatic Delete” on page 26.
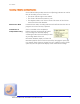
For other installation configurations possible
with your particular AuxBox model, please
consult “AuxBox Hardware Information” on
page 36.
When first running Client Call Recorder, some
third party firewall programs might incorrectly
flag that the program wants to access the
internet. If this happens, simply allow these
processes. For more information, please refer to
“Firewall Issues” on page 53.