
Specifications


SECTION 7
62
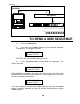
EXT MIDI SYNC
ON
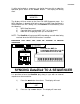
3) Now press the SEND button. The display will read:
SEND FILE MIDI
Seqnce FILE ZZ ?
4) Use the SCROLL buttons to select the desired sequence to
playback.
5) When the desired sequence is found, press the DO/YES
button. The display will then read:
Waiting for MIDI
Start/Continue . .
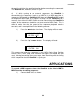
6) Start the external sequencer or drum machine. Once a MIDI
Start or Continue command is received, the display will read:
SENDING: MIDI
Seqnce File ZZ
Where File ZZ is a file name (the same as sending any other file).
PLEASE NOTE:
a) The sequence recorded by the DataDisk MUST be recorded with
MIDI clock in order to use the external sync feature. If the file does not
contain MIDI clock, then all file data will be sent with the first MIDI CLOCK
received.
b) DataDisk will assume that the start of the MIDI Sequence file is the
start of the song, as far as Start, Continue, and Song Position Pointer
commands are concerned. For example, if the sequence was recorded in
the DataDisk starting at bar 2, beat 1, then that point becomes the
beginning of the sequence as far as DataDisk is concerned. When the
file is played back from the DataDisk (synced to MIDI Clock), a Start
command will start playing from the beginning of the file, which will be 1
bar ahead of the original sequence's start location. Continue and Song
Position Pointer commands will be 1 bar ahead of the original sequence's
location as well.
c) Since a Continue command may occur anywhere within a MIDI
Sequence File, there may be a slight delay while the DataDisk searches