
User`s manual


Alcorn McBride Digital Video Machine DVM-7400 User’s Manual Rev 1.5
71
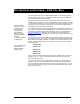
Copying Files Using an FTP Connection
Note: This procedure applies only if your DVM is equipped with the optional
Ethernet .Module (i.e. DVM7400/E, DVM7400/A/E, DVM7400/P/E, DVM7400/B/E,
DVM7400/D/E).
Use a straight-thru
Ethernet cable to
connect to a network
hub or switch.
Use a crossover (Null)
Ethernet cable for a
direct connection to a
PC.
Refer to the Command
Protocol section in this
manual for the list of
commands needed to
configure the Ethernet
connection.
• Connect the DVM to an Ethernet network, or directly to a PC with an Ethernet
jack and power-up the DVM.
• Use a serial terminal program or AMI Terminal to program the DVM to an
unused IP address on your network. If plugged directly into a PC (not on a
network) you can use the default IP address of 192.168.0.254 (assuming that
it has not been previously changed from the factory default).
• Also program a username and password using serial commands. You can
use the username (admin) and password (password) if they have not been
changed from the factory default.
• If this is the first time transferring files to the DVM, format the Compact Flash
card in the DVM by following the procedure outlined previously.
• On the PC open a DOS shell and go to the directory containing the files you
want to transfer to the DVM.
AMI Terminal is a
Windows application
used to control Alcorn
McBride equipment. It
is available at
www.alcorn.com.
• Begin an FTP session by typing
FTP 192.168.0.254 at the command prompt
(without the quotes, with the IP address replaced by the DVM’s IP address).
• You should get a connection to the DVM and it should ask for a username.
• Type the username. It should then ask you for a password.
You can use Windows
FTP client programs
such as CuteFTP if
desired.
• Type the password. You should get a welcome message.
• Type “ls” (without quotes). You should get a directory listing if files exist on
the media.
• Type “bin” to get the interface into binary mode.
• Type “ha” so that progress hash marks will appear during file transfer.
• Type “put filename” where filename is the name of the file you want to transfer
to the DVM.
• You should see the hash marks go across the screen indicating that data is
being transferred to the DVM.
• Once the transfer completes you can repeat the above process for as many
files as the Compact Flash will hold.
• Type “quit” to end the FTP session.
• At this point the DVM will check to see if a new schedule file was transferred
and load it if found.