
User`s guide


Networking Your DVM2 57
Networking
Your DVM2
Set Date and Time
When you receive your DVM2, the time should be consistent with the current
time on the Eastern coast of the United States (where Alcorn McBride is
located). The DVM2’s Real Time Clock has a battery back-up so that if power
is removed from your DVM2, it will be able to keep the time. If your DVM2 is
to be located elsewhere, it will be necessary to change the hours (and possibly
the date) of the Real Time Clock.
The DVM2 Real Time Clock operates in 24-hour time mode, otherwise known
as Military Time (i.e. 1:00 AM = 0100 hours, 1:00 PM = 1300 hours).
To change the Real Time Clock, click the Set Time button. The DVM2 will
immediately set its time and date to the time and date on your computer. The
setup screen will return the time and date that the DVM2 has been set to.
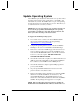
Serial Protocol Setup
This page allows you to set up the Baud Rate, data bits, parity, and stop bits
setting of the Pioneer, the Sony RS-422, or the Sony LDP connector on the rear
panel of the DVM2. In order to use this Web Page to setup the port, Switches
#3, 4 and 5 (Serial Protocol Setup) must be in the “ Off” position. Otherwise, the
port will be configured according to the switch settings (See the section labeled
Configuration DIP Switch).
To set up the port:
• Choose the correct Protocol in the pull-down box for Pioneer, Sony
LaserDisc, Sony Professional, or MIDI.
• Choose the correct Baud Rate.
• Choose the correct Data Bits.
• Choose the correct Parity.
• Choose the correct number of Stop Bits.
• Press the Change button to save the changes. To cancel changes, press
the Cancel button.
The Advanced button on this page allows you to alter more advanced features of
the serial port such as the playback completion ack character.
Video Setup (DVM2 only)
This page allows you to set the video output to RGB, S-Video, or YUV.
Regardless of this setting, the DVM2 will always output composite video. In
order to use this Web Page to setup the video output, Switches 7 and 8 (Video
Select) must be in the “Off” position. Otherwise, the output will be configured
according to the switch settings (See the section labeled Configuration DIP
Switch).