
Quick Reference Guide


SCRAM GPS
Quick Reference Guide
5
5
5
5
5
5
5
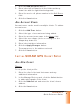
1. Click the Schedules button.
The ‘Zones and Schedule’ pop-up window appears.
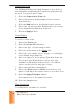
2. Double- click the date/ tim e fi eld where t he schedule
will begin.
The ‘Schedule Det ails’ pop- up window appears.
3. I n the pop-up window:
a. Select t he zone t hat you want t o schedule.
b. Nam e t he schedule.
c. Select t he schedule st art dat e.
d. Select t he allowed out tim e.
e. Select t he t he days in which t he schedule applies.
f. Select t ravel tim e and/ or grace period.
g. Click the Save butt on.
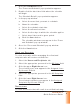
The schedule windows now appear in the ‘Zones
and Schedule’ pop-up window.
4. Close t he ‘Zones and Schedule’ pop- up window.
5. Click the Save button.
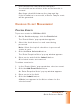
USERS AND RECI PI ENTS
To select users who will be m anaging t he client and
recipients who will receive not ifi cat ions:
1. Select the Users and Recipients t ab.
2. Select t he appropriat e personnel in the All Users fi eld.
3. Click t he upper Right Arrow icon.
The select ed users now appear in the Assigned Users
By Account I D fi eld.
4. Select t he appropriat e personnel in the All Recipients
fi eld.
5. Click t he lower Right Arrow icon.
The select ed recipient s now appear in the Assigned
Recipient s By Account I D fi eld.
NOTI FI CATI ONS
To select t he events that will result in a not ifi cat ion being