
User Guide


Adding entries
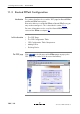
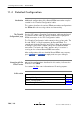
Detailed configuration
Deleting entries
11 Configuration and Use - Routed PPPoA
107 / 288
3EC 36231 ABAA TCZZA Ed. 01
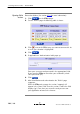
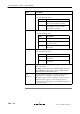
Proceed as follows:
1. Browse to the 'PPP' page.
2. If needed, click
.
3. Select the PPPoA protocol from the 'Protocol' popdown list.
4. Select the phonebook entry from the 'Address' popdown list.
Free PPPoA and ETHoA phonebook entries are shown as well
as free any" type phonebook entries. You must use a PPPoA
or any" type phonebook entry for Routed PPPoA.
Note: In case the presented phonebook entries do not suite your desired
configuration, you must firstly create a correct phonebook entry. See
section 13.3 for more information.
5. Select the encapsulation method for the Routed PPPoA entry
from the 'Encapsulation' popdown list (per default set to
VCMUX).
6. Optionally, enter username and password for the Routed
PPPoA entry.
Note: In case you do not enter this information it is asked each time you
open this PPPoA session.
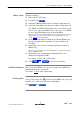
7. Optionally, enter the appropriate configurations in the
'Detailed Configuration' table.
See section 11.4 for more information.
8. Click and to finish the procedure.
Prior to using the PPPoA entry you may need to enter additional
configurations for the connection.
See section 11.4 for more information.
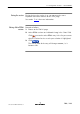
On the 'PPP' page, click next to the idle PPPoA entry you want
to delete. As a result your selection is highlighted.
Click
and .