
User Guide


Alcatel PIMphony
10
Installation of network version software
The software is installed from the CD-ROM supplied in the pack.
1. With Windows running, insert the CD-ROM into the drive.
2. In Windows Explorer, select the CD-ROM drive and click on Setup.exe.
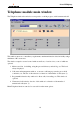
3. The Welcome window then appears.
4. Follow the instructions given on the screen, through the installation.
5. The default installation folder is C:\Program Files\Alcatel PIMphony, but you can install
the application in another folder of your choice.
6. The default programme folder is Alcatel PIMphony, but you can change it or select an
existing programme folder, in which the application icons will be stored.
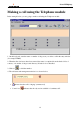
7. Select the serial port assigned to the PC-telephone connection and the language for the error
messages.
8. Check and change, if necessary, the Windows dialling properties (Area code, country,
outgoing code for a local call, outgoing code for a long distance call).
9. When the installation is complete, you can create a direct selection facility for the
application, on your Desktop.
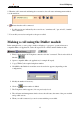
IMPORTANT: After the initial installation, it is recommended that you restart your system, as
prompted.
Before attempting to run Alcatel PIMphony, check the Windows telephone configuration on your
PC:
Getting started with Alcatel PIMphony
If you are just starting to use the Alcatel PIMphony application, then this section is for you:
• It describes the operations required the first time the application is run.
• In the form of a short tutorial, it gives examples of the implementation of the main
functions. This guides you through the early phases of learning and also provides a check
that the installation is correct.