
Instructions


Usage basics
akYtec GmbH · Vahrenwalder Str. 269 A · 30179 Hannover · Germany · Tel.: +49 (0) 511 16 59 672-0 · www.akytec.de
18
3 Usage basics
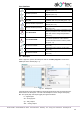
To program the device, proceed as follows:
Start ALP
Create a new project for the selected target device or open an existing project (sect. 3.3)
Save the project on the PC
Test and debug the program in the simulation mode (sect. 7.11)
Upload the project to the connected device (sect. 3.7)
3.1 Program execution
The selected target device determines the number of available inputs and outputs and
the availability of a real-time clock. The general structure of the programmable relay is
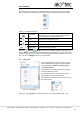
shown in Fig. 3.1.
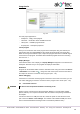
Fig. 3.1 PR operation flowchart
The programmable relay is a kind of PLC with a cyclically executed program:
Step 1 – The status of physical inputs is saved to the input memory cells (Input Image Table).
Step 2 – The input memory cells are read out and the program is executed from its first
instruction to the last one.
Step 3 – The results are saved to the output memory cells (Output Image Table) and ap-
plied to the outputs.
When the last step is completed, the program runs again from the first step.
3.2 Program cycle time
The cycle time is calculated by the device and depends on program complexity. The fol-
lowing blocks are especially resource-intensive:
FBs (sect. 6.2)
macros (sect. 6.3)
network variables (sect. 5.5)
display elements (sect. 6.4).
It is a read-only parameter and can be viewed on the device display (if exists) using the
system menu (see user guide). The minimum cycle time is 1 ms.
Note: The parameters Cycle time in device and in ALP simulation mode (sect. 7.11) are
different in spite of the same name.
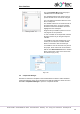
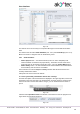
3.3 Project creation
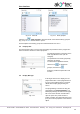
To create a new project select File > New project in the main menu or use the equivalent
icon in the taskbar. Select the target device in the dialog window Device selection and
confirm it with OK (Fig. 3.2).