
Manual
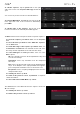
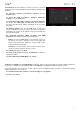
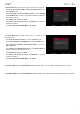
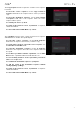
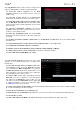
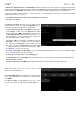

Table Of Contents
- Table of Contents
- Introduction
- Features
- Tutorial / Basic Concepts
- Operation
- General Features
- Modes
- Appendix

73
The Transpose function transposes a range of events on a track in
a sequence. The events within that range will shift accordingly in the
Grid View.
To select the sequence you want to transpose, use the
Sequence field.
To select the track you want to transpose within the
sequence, use the Track field.
To set the time range of the sequence you want to transpose,
use the two sets of Bar, Beat, and Tick fields. The left fields set
the start of the time range, and the right fields set the end of the
time range.
For drum programs, use the two Pad fields to select the
“source” pad (whose events you want to move) and “destination”
pad (where the events will be placed). Tap each field and then
press the desired pad.
For keygroup programs, plugin programs, and MIDI
programs, set the range and amount of transposition:
Range: Use the two Note fields to set the range of notes of
the events you want to transpose. Note events within this
range will be transposed, while note events outside of this
range will remain unchanged.
Transpose: Use this field to set how many semitones up or
down you want to transpose the note events.
To confirm your choice, tap Do It.
To return to the previous screen, tap Function or anywhere
outside the window.
To cancel and return to Main Mode, tap Cancel.
The Bounce to Sample function immediately renders the sequence (all of its tracks) as an audio sample and places it
in the project’s sample pool. By default, it will be named Bounce - and appended with the sequence name.
If you have already used this function on this sequence, then you will be asked if you want to overwrite the existing
sample with this new one or cancel.
To continue and save the sequence over the existing one, tap Replace.
To cancel, tap Cancel.