
User's Manual


AirSynergy 2000 Installation Guide
Page 26 Commercial in Confidence UGD-D01001 Rev A
4 Verify Prerequisites
Prior to installing the AirSynergy, verify the required safety, power, tools, parts and components.
Reference: Set up requirements for the installation is detailed in the Job Sheet,
see Appendix A for this guide.
4.1 Verify Site Requirements
To set up the AirSynergy a connection to a Netspan server PC will be required.
4.2 Verify Installation Requirements
4.2.1 Verify the Tools
Table 7 - AirSynergy installation tools
Tool
Use
Small flat blade screwdriver
screw terminals inside PoE injector
Large flat bladed screwdriver
securing the pole straps
Medium Phillips (crosshead)
screwdriver
PoE injector lid and mounting screws
13mm wrench x 2
heavy-duty pole clamp option only
10mm or 13/32 inch wrench
AirSynergy securing flange nuts
Large pliers
Tightening cable glands - To fit 15mm
Knife
For stripping insulation
Large pliers
Tightening cable glands on the US PSU -
To fit 15mm across flats
Wire cutters
Wire strippers
Cutting of insulation
Ring terminal crimp tool
Tilt-meter
If accurate down-tilt of antenna needs to be set
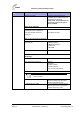
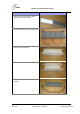
4.2.2 Verify the Parts and Kits
Table 8 - AirSynergy installation parts and kits
Installation Kit /
Part
Consisting of
Note:
Main AirSynergy
parts
1 x AirSynergy Universal Mounting
Plate and pole strap kit
(Includes 2 pole straps for poles up
to 200mm diameter)