
User's Manual


AirHarmony-4000 (External Cavity Filters) Installation Guide
UGD-D01019 Airspan Commercial and Internal Use 29
a layer of self-amalgamating tape followed by an over layer of PVC tape. The weather-
proofing the GPS connection is best done at this stage to give easier access to the
connections.
4.3 Pole/Wall Mount Assembly
Install the AirHarmony-4000 eNodeB by pole/wall mount. AirHarmony-4000 is mounted on a pole or
wall in close proximity to its external antenna (connectorized variant).
Caution: Proper local rigging and hoisting practices should be followed when installing
the AirHarmony-4000.
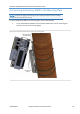
4.3.1 Mounting on a Wooden Pole
The following images show the pole mount assembly on a wooden pole.
Caution: Take care to install the Pole/Wall mounting plate in the correct orientation.
Verify that the mounting pins are facing upwards as shown below.
Figure 19: Pole/Wall mounting plate
1. Select the location on the pole to mount the AirHarmony-4000. You can attach the
AirHarmony-4000 to any pole from 1-7/8 to 16 inches (47.6 to 406.4 mm) in diameter.
2. Determine where to position the mounting plate on the pole and mark where to drill for
insertion of the 3/8-16 through-bolt.
Note: Threaded rod and necessary hardware are not supplied by Airspan and are the
responsibility of the installer.