
User's Manual


AirHarmony-1000D Installation Guide
UGD-D01083 Airspan Commercial and Internal Use 34
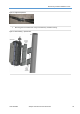
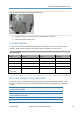
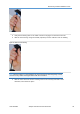
Figure 27: Slide over and click
Note: The shell should be hand tightened only. Do NOT use tools to tighten the shell.
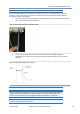
7. Once the connector is properly installed, the cable should be positioned and secured to
minimize stress on the cable and connector.
6.3 Power Cable Preparation
The Power cable is connected to the AirHarmony-1000D using a Gland connector assembled on the
bottom panel of the unit.
1. Remove the Gland connector by unscrewing the body from the AirHarmony-1000D, using the
Gland wrench.
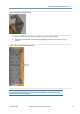
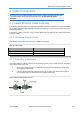
2. Pass the pre-assembled connector through the tail nut, gland seal, body and rubber seal of
the connector casing as shown below. Do not tighten the tail nut.
Note The connector is attached inside the weather protected area of the enclosure and
is not subjected to water/moisture therefore the use of die-electric gels is not required.
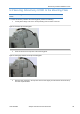
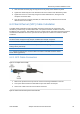
3. Connect the DC power cable connector to the female connector outlet inside the unit.
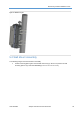
Figure 28: Power connection on bottom panel of AirHarmony-1000D
4. Screw the gland connector plug securely into the body cavity of the unit using the provided
Gland wrench.
5. Tighten the tail nut on to the body forcing the seal to compress around the power cable using
the (provided) Gland wrench.