
User's Manual


AirHarmony-1000D Installation Guide
UGD-D01083 Airspan Commercial and Internal Use 32
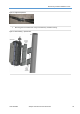
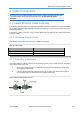
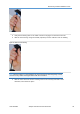
3. Seat the RJ45 connector plug securely into the body cavity of the AirHarmony-4000
4. Tighten the Gland body into to the threaded hole on the bottom of the AirHarmony-4000.
5. Tighten the tail nut on to the body using the included Gland wrench, forcing the seal
compress around the cable.
6. Once the connector is properly installed, the cable should be positioned and secured to
minimize stress on the cable.
6.2 Fiber Ethernet (SFP) Cable Installation
The Fiber Ethernet Small form-factor pluggable transceiver (SFP) must be connected to the
AirHarmony -1000D using an outdoor fiber cable. The optical connection enables a one-hand
installation of the connector. This enables the users to easily remove and replace the SFP transceiver
module which eliminates the need to open the unit and expose its contents to hazardous weather
conditions.
Note: Airspan recommends using the Finisar - FTLF1318P3BTL 1000BASE-LX which
has been tested and approved by Airspan. Available from Airspan if required.
The Outdoor fiber cable is available in 8 different lengths from 10m to 200m.
Note: Airspan recommends to test the fibers prior to installation (using FOA’s standard
testing industry standards).
Note: Airspan recommends to clean the fibers according to standard procedure (using
FOA’s cleaning guidance).
6.2.1 SFP Cable Connection
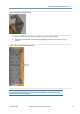
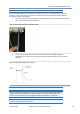
Figure 24: LC duplex cable assembly
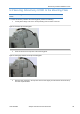
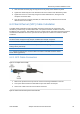
1. Remove the protective dust cap from the connector housing assembled on the unit.
2. Line up the SFP transceiver module with the port and slide it into the port.
3. Connect the cable connector onto the board connector.
Figure 25: Cable connector hook up to the board connector