
User's Manual


AirHarmony-1000D Installation Guide
UGD-D01083 Airspan Commercial and Internal Use 29
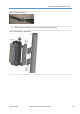
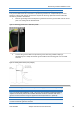
Figure 20: AirHarmony-1000D unit engaged into the bottom slots
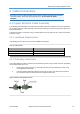
4. Tighten the flange nuts (4 places) to the required degree of down-tilt.
5. Check and tighten all flange nuts.
5.4 LED Display
A single tri-color LED (Green/Red/Orange) appears at the bottom of the unit, providing unit status
indication. When powering up refer to the following table for indication of current status:
Table 12: LED display
Name
Color
Status
Description
Powering Up
Orange
On Continuously
Till the SW starts loading
Software loading
Green
Blinking (3Hz)
While SW is loading
Normal Operation
Green
On Continuously
Normal operation (no alarm)
Major Alarm
Red
Blinking (3Hz)
Service not affected
Critical Alarm
or
Sector OOS
Red
On Continuously
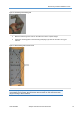
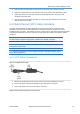
5.5 Connecting the Ground Cable
Connect the ground cable after attaching the grounding lug (optionally supplied by Airspan – CBL-
GND-1M-1 and CON-LUG-GND-1) to the M6 threaded connection on the bottom of the main body
casting.
Note: Cutting the Ground cable to the required length and crimping the grounding lug is
performed by the Installer.
Note: The ground cable is available per meter. The lug can also be used for securing the
ground cable to the other side.
Note: The ground surface is bare metal and needs no preparation.