
User's Manual


Table Of Contents
- INTRODUCTION
- WARNINGS AND CAUTIONS
- DECLARATION OF CONFORMITY
- FCC INTERFERENCE STATEMENT
- SYSTEM OVERVIEW
- INSTALLATION PREREQUISITES
- PHYSICAL DESCRIPTION
- CABLING
- MOUNTING
- OPTIMIZING RF RECEPTION
- CONNECTING THE EXTERNAL ANTENNA
- REPLACING THE CLIP-ON ANTENNA
- EASYST SMART CARD
- RESETTING EASYST TO DEFAULT SETTINGS
- TROUBLESHOOTING
- TRADEMARKS AND COPYRIGHTS
- CONTACT INFORMATION
- REVISIONS
- WARNINGS
- GLOSSARY
- INDEX
Connecting the External Antenna
35
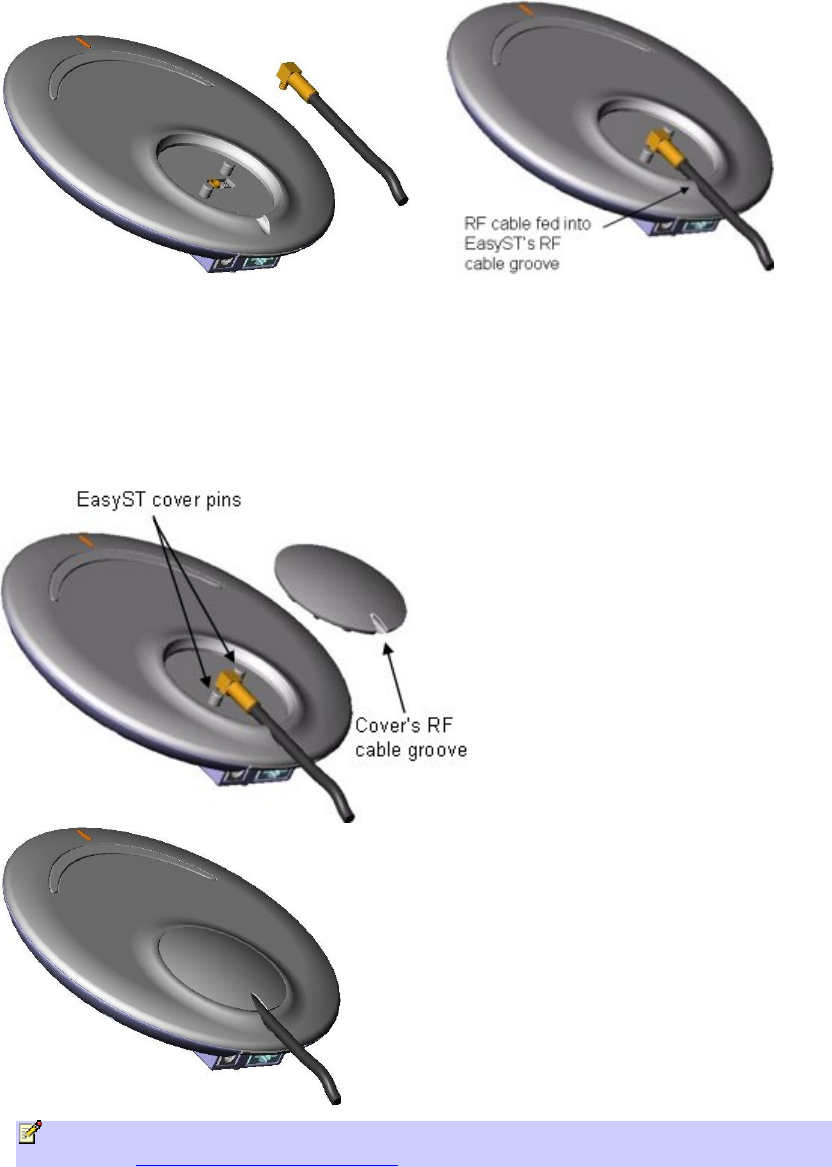
4. Feed the RF cable into the EasyST's RF cable groove, ensuring that the RF cable exits the
EasyST through the EasyST's RF cable groove, as shown above.
5. Protect the connectors by covering the area exposed by the removal of the clip-on antenna,
with the plastic protector cap (supplied). Attach the plastic protector cap to the exposed
area, by aligning the cap's two position cups with the EasyST's two position pins. Ensure
that the cap's RF cable groove is aligned and flush with the RF cable and EasyST's RF cable
groove.
Note: If you later decide to disconnect the external antenna and reconnect the clip-on
antenna, see Replacing the Clip-On Antenna.