
User's Manual
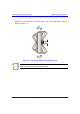


Mounting the Devices Hardware Installation Guide
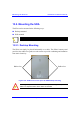
13-10 Airspan Networks Inc. 02030311-10
To wall mount the SDA:
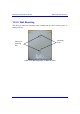
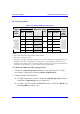
1. On the wall, mark the position of the two SDA mounting hooks. The
dimensions of the SDA's wall-mounting hooks are displayed in the template
below.
5 mm
59
100
9
2. Drill holes for each hole that you marked in the step above.
3. Insert wall anchors (supplied) into each of the drilled holes.
4. Insert the 9-inch screws (supplied) into the wall anchors. Ensure at least 2
mm of the screw is exposed to allow insertion into the SDA mounting holes.
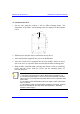
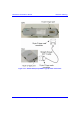
5. Hold the SDA with both hands, and align the entrance to the two mounting
hooks with the screws. Slide the screws into the mounting hooks, by
lowering the SDA.
Notes:
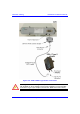
1) For safety, both fixing points must be utilized when mounting the unit.
2) The SDA is supplied with a 1-metre AC power lead assembly. Therefore,
ensure the unit is mounted within reachable distance to the customer's mains
power outlet.
3) The cable must be dressed tidily and not be taught or pose a trip hazard
when connected.
4) The maximum cable run between SDA and SPR is 100 meters. However,
this can be extended to up to 300 meters (see Appendix F, "Extending
IDU/ODU Cable Length").