
Installation Guide


AirHarmony-4200 DC (Internal Filters) Installation Guide
UGD-D01196 Airspan Commercial and Internal Use 38
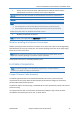
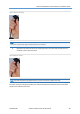
Figure 19: Gland connector - copper
1. Remove the Gland connector by unscrewing the body from the AirHarmony-4200 DC,
using the (supplied) Gland wrench.
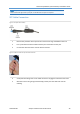
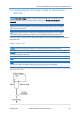
2. Pass the prepared Ethernet cable through the tail nut, gland seal, body and front seal of
the connector casing as shown below. Do not tighten the tail nut.
Figure 20: Ethernet Cable through connector
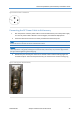
3. Seat the RJ45 connector plug securely into the body cavity of the AirHarmony-4200 DC
4. Tighten the Gland body into to the threaded hole on the bottom of the AirHarmony-
4200 DC.
5. Tighten the tail nut on to the body using the included Gland wrench, forcing the seal
compress around the cable.
6. Once the connector is properly installed, the cable should be positioned and secured to
minimize stress on the cable.
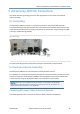
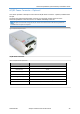
5.4 Fiber Ethernet (SFP) Cable Installation
The Fiber Ethernet Small form-factor pluggable transceiver (SFP) must be connected to the
AirHarmony -4200 DC using an outdoor fiber cable. The optical connection enables a one-hand
installation of the connector. This enables the users to easily remove and replace the SFP transceiver
module which eliminates the need to open the unit and expose its contents to hazardous weather
conditions.