
Installation Guide


AirHarmony-4200 DC (Internal Filters) Installation Guide
UGD-D01196 Airspan Commercial and Internal Use 26
4 Installing AirHarmony-4200 DC
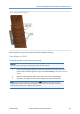
Note: Proper clearance is required for proper placement of the AirHarmony unit on pole
or wall. 500 mm clearance on bottom, 300 mm clearance on top and 100 mm clearance
on sides and back from other objects in the vicinity.
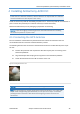
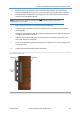
Install the AirHarmony-4200 DC eNodeB by pole/wall mount. AirHarmony-4200 DC is mounted on a
pole or wall in close proximity to its external antenna (connectorized variant).
Remove the AirHarmony from its packaging in preparation for mounting.
Caution: Proper local rigging and hoisting practices should be followed when installing
the AirHarmony-4200 DC on pole or wall.
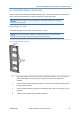
4.1 Connecting the GPS Antenna
Prior to installation of the AirHarmony the GPS antenna should be connected and after it is
recommended that the connection should be weather-proofed.
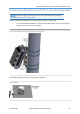
The following describes the connection of the GPS antenna which is installed directly to the top of
the unit.
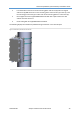
13. Remove the protective dust cap from the GPS antenna jack prior to mounting on the
AirHarmony-4200 DC.
14. Align the GPS jack with the plug on the top panel on the AirHarmony-4200 DC.
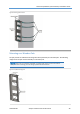
15. Attach the GPS antenna to the TNC connector on the unit.
Figure 6: Attaching GPS antenna to unit
Caution: Take care not to over tighten so as not to damage the threads.
Note: It is good practice to weather-proof all the antenna connections. This is done with
a layer of self-amalgamating tape followed by an over layer of PVC tape. The weather-
proofing the GPS connection is best done at this stage to give easier access to the
connections.