
User's Manual


Setting Up a Wireless Backhaul
Installation and User Guide: Airgo Access Point 141
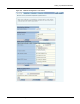
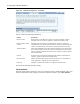
Use the area at the bottom of the tab to specify the BSSID criteria (in conjunction with the Uplink
BSSID buttons):
After adding BSSIDs, click Apply. The BP now attempts to establish a backhaul link based upon
the configured rules.
Click Delete to remove a BSSID from the list.
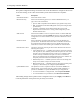
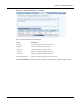
Candidate APs
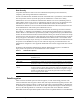
Select the Candidate APs tab (Figure 101) to identify the access points that can be used to create the
uplink to the wired network.
Figure 101: Backhaul Configuration - Candidate APs
The panel displays the discovered APs able to provide uplink connectivity. The table of uplink
candidate APs shows the following information:
If no uplink candidate APs are available, the table is empty.
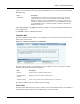
Trunk Table
Select the Trunk Table tab (Figure 102) to view the list of current backhaul trunks. The backhaul is
established if the MAC address of the backhaul trunk is listed in the table.
Field Description
Add BSSID To add BSSIDs to the Selected list, add from the pull-down list, and click
Add. Alternatively, enter the name of a BSSID, and click Add. The saved
BSSIDs are displayed in the selected BSSIDs list on the right. This list that
determines acceptable uplink candidates (if Accept from BSSIDs was selected
in Uplink BSSID Criteria), or eliminated uplink candidates (if Discard from
BSSIDs was selected).
Item Description
Interface Radio interface of uplink candidate parent
Destination MAC
Address
BSSID of the remote uplink candidate parent
AP Beacon Name Name of the AP node of the candidate parent, sent in beacons