
User's Manual
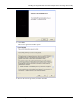
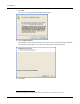
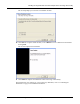
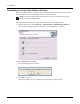

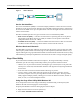
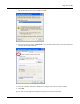
Table Of Contents

2 Introduction to the Airgo Client Utility
14 Installation and User Guide: Airgo Wireless LAN Client Adapter
Accessing the Airgo Client Utility
If you followed the instructions in Chapter 1, the Airgo Client Utility is installed on your PC.
To start the Airgo Client Utility:
• Choose Start > Programs > Airgo Networks > Airgo Client Utility.
The Airgo application icon will appear in the system tray.
Using the Tray Icon
When you start the Airgo Client Utility, a small signal icon becomes visible in the system tray on
the Windows toolbar (Figure 5). The color of the icon reflects the quality of the wireless
connection: green for good, yellow for intermittent connection, red if there is no active connection,
and a red X if the Airgo Wireless LAN Client Adapter radio is turned off. The tray icon provides
access to the Airgo Client Utility menu.
Figure 5: Airgo Client Utility System Tray Icon
To open the Airgo Client Utility window from the tray icon:
• Right-click and select Launch Client Utility or double-click on the icon.
To exit the Airgo Client Utility:
• Right-click and select Exit.
To access the help system:
• Right-click and select Help.
Disabling and Re-Enabling the Airgo Wireless LAN Client Adapter
You can easily enable or disable the Airgo Wireless LAN Client Adapter radio from the Airgo
Client Utility.
To enable the radio:
1 Right-click the Airgo Client Utility icon in the system tray.
2 Select Radio On.
To disable the radio:
1 Right-click the Airgo Client Utility icon in the system tray.
2 Select Radio Off.
Navigating the User Interface
This section explains how to use the compact and expanded views of the Airgo Client Utility.
Using the Compact View
The compact view displays summary information about current communications between your PC
and the access point. When you start the Airgo Client Utility, the compact view opens in text mode
(Figure 6).
Application icon