Quick-Guide --------------------------------------------------------------------- Foreword Many thanks for buying this product. We have invested much time and effort in its development in order that you may enjoy many years trouble-free with your digital photo frame. Safety Notice 1. Do not drop, puncture or disassemble the digital photo frame, otherwise the warranty will be voided. 2. Avoid all contact with water and dry hands before using. 3.
Getting Started Check the Package content 1. Digital Photo Frame 2. Frame Stand 3. Remote Control 4. AC to DC switching Power Adapter 5. USB cable to PC *1 6. USB cable to Pen Driver *1 7. Quick Guide 8. Software CD Front Panel 1. 2. 3. 4. 5. 6. Screen Adorning Remote sensor Front frame Stand Front-rear frame button Rear Panel 7. 8. 9. 10. 11. 12. Esc button Enter button Speaker Circle button Power LED Power/LED switch Bottom Panel 13. 14. 15. 16.
Using memory card The digital photo frame supports USB flash drive, CF, SD, MMC, MS and MS Pro. After Power On The digital photo frame can automatically do the picture slide show from the memory card /USB stick or internal memory after power on. You can also choose calendar, picture, music, movie file list as the start up interface. The Start interface shown on screen is according to the “Start-up Setup” setting. When you choose a memory card or USB or internal memory and press “ENTER”.
3) After the transmission is completed, the photo will display on the screen of the photo frame. Using Bluetooth to send photos – from PC or laptop 1) Make sure your PC or laptop is Bluetooth enabled. (This may require installing your Bluetooth software and plugging in your Bluetooth dongle.) 2) Your PC/laptop will start to search for nearby Bluetooth devices. You can find the photo frame in [My Bluetooth Center] on your PC/laptop.
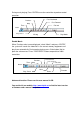
Enable Photo Slide Show When Function select screen displayed, select “Image” and press “ENTER”, you will have an overview about the available photos. With the circle button and the ENTER button you can select any photo to start the slideshow on the complete size of the display by pressing “ENTER”. Enable Photo Slide show combine Mood music During photo slide show, press the ENTER button to enable the picture control bar which is shown as below figure.
During music playing, Press ENTER to use the control bar to perform control operation. Fast Backward Previous Fast Forward Stop Time File Info Status Play/ Pause Play Mode ID3 tag Enable Movie When Function select screen displayed, select “Movie” and press “ENTER”, the system will search the video files in the current memory equipment and play them automatically. During movie playing, press Circle button (Up) to open the volume menu. Press “ENTER/ESC” button to open/close video control bar.
Troubleshooting 1. How to start/turn off a picture slideshow? Switch on the POWER button on the rear side. The default start-up setting is to play the picture slideshow with MP3 as background music. The photo slideshow can be turned off by using the PAUSE function in picture control bar. During the photo auto slideshow, press the ‘ENTER’ button to display the picture control bar. Press ‘ENTER’ again to stop the slideshow in a certain picture.
Schnellanleitung --------------------------------------------------------------------- Einleitung Vielen Dank für den Kauf dieses Produktes. Wir haben viel Zeit und Mühe in die Entwicklung gesteckt, damit Sie viele Jahre lang Freude an Ihrem digitalen Fotorahmen haben werden. Sicherheitshinweise 1. 2. 3. 4. 5. 6. 7. Lassen Sie den Fotorahmen nicht fallen, beschädigen und zerlegen Sie das Gerät nicht, andernfalls erlischt die Gewährleistung.
Erste Schritte Überprüfen Sie den Lieferumfang: 1. Digitaler Fotorahmen 2. Aufsteller 3. Fernbedienung 4. Schaltnetzteil (Wechselstrom Æ Gleichstrom) 5. USB-Kabel zum PC-Anschluss (1 x) 6. USB-Kabel zum Anschluss von USB Stick (1 x) 7. Schnellanleitung 8. Software-CD Vorderseite 1. 2. 3. 4. 5. 6. Bildschirm Zierrahmen Empfänger der Fernbedienung Äußerer Rahmen Aufsteller Rahmenfreigabetaste Rückseite 7. 8. 9. 10. Esc-Taste Eingabetaste Lautsprecher Richtungstasten (Aufwärts/Abwärts/Links/Rechts) 11.
Speicherkarten verwenden Unterstützt USB-Flash-Laufwerke und CF-, SD-, MMC-, MS- und MS Pro-Speicherkarten. Nach dem Einschalten Nach dem Einschalten kann der digitale Fotorahmen die Inhalte von Speicherkarten/USB- oder interner Speicher automatisch in einer Diaschau anzeigen. Sie können auswählen, ob nach dem Einschalten ein Kalender, Bilder, Musik, Videos oder eine Dateiliste angezeigt werden. Die nach dem Einschalten angezeigten Inhalte hängen von der Einstellung Start-Einstellungen ab.
Bilderrahmens). Geben Sie [0000] ein, wenn Sie nach einem Sicherheitscode gefragt werden. Anschließend wird ein Übertragungsbildschirm dargestellt und zeigt die Übertragung des Fotos an. 3) Nach Abschluss der Übertragung wird das Foto auf dem Bildschirm des Bilderrahmens angezeigt. Fotos per Bluetooth senden - vom PC oder Notebook 1) Sorgen Sie dafür, dass Ihr PC oder Notebook Bluetooth-fähig ist. (Dazu müssen Sie eventuell Bluetooth-Software installieren und Ihr Bluetooth-Dongle anschließen.
Falls der Bilderrahmen nicht von Ihrem Bluetooth-Gerät gefunden werden sollte, überzeugen Sie sich von Folgendem: 1. Der Bilderrahmen ist eingeschaltet. 2. Die Bluetooth-Funktion des Bilderrahmens wurde in den [Einstellungen] aktiviert. (Wenn die Bluetooth-Funktion aktiviert ist, wird das Bluetooth-Symbol im [Kartenauswahl]-Bildschirm angezeigt. 3. Der Bilderrahmen befindet sich in der Nähe Ihres Bluetooth-Gerätes, zwischen den beiden Geräten befinden sich keine Hindernisse.
Status Zeit Stopp Rückwärts Wiedergabe/Pause Schneller Rücklauf Schneller Vorlauf Dateiinfo Vorwärts ID3-Tag Wiedergabemodus Abbildung: Musiksteuerungsleiste Musik starten Im Funktionsauswahl-Bildschirm wählen Sie „Musik“ und drücken die Eingabetaste. Das System sucht nach Musikdateien auf dem angeschlossenen Speichermedium und spielt diese automatisch ab. Mit der Abwärtstaste öffnen Sie das Lautstärke-Menü.
Video starten Im Funktionsauswahl-Bildschirm wählen Sie „Video“ und drücken die Eingabetaste. Das System sucht nach Videodateien auf dem angeschlossenen Speichermedium und spielt diese automatisch ab. Bei laufender Videowiedergabe können Sie mit der Aufwärtstaste das Lautstärke-Menü öffnen; die Bedienung erfolgt wie oben beschrieben. Mit der Eingabe-/Esc-Taste können Sie die Videosteuerungsleiste einblenden.
Fehlerbehebung 1. Diashow starten/ausschalten Schalten Sie das Gerät auf der Rückseite über die Taste POWER ein. Standardmäßig wird beim Start des Geräts die Diashow mit einer Hintergrundmusik (MP3-Datei) abgespielt (Standardstarteinstellung). Die Diashow lässt sich über die Funktion PAUSE in der Bildsteuerleiste ausschalten. Drücken Sie während der Diashow die ENTER-Taste, um die Bildsteuerleiste anzuzeigen. Drücken Sie die ENTER-Taste erneut, um die Diashow bei einem bestimmten Bild anzuhalten.
Guide rapide --------------------------------------------------------------------- Avant-propos Merci beaucoup pour l'achat ce de produit. Nous avons investi beaucoup de temps et d'efforts dans son développement afin de vous assurer des années d'utilisation sans problème pour votre cadre photo numérique. Avis de Sécurité 1. Ne faites pas tomber, ne perforez pas et ne démontez pas le cadre photo numérique, autrement la garantie serait annulée. 2.
Démarrage Vérifiez le contenu de l'emballage 1. Cadre photo numérique 2. Support du cadre 3. Télécommande 4. Adaptateur d'alimentation AC vers DC 5. Câble USB vers PC *1 6. Câble USB vers clé USB *1 7. Guide rapide 8. CD avec logiciels Panneau avant 1. 2. 3. 4. 5. 6. Écran Décoration Recepteur de télécommande Cadre avant Support Bouton de verrouillage cadre avant-arrière Panneau arrière 7. 8. 9. 10. 11. 12.
Utilisation de la carte mémoire Le cadre photo numérique prend en charge: les cle’s USB, les cartes : CF, SD, MMC, MS et MS Pro. Après mise sous tension Le cadre photo numérique peut effectuer automatiquement un diaporama à partir de la carte mémoire/de la clé USB ou mémoire interne après mise sous tension. Vous pouvez également choisir entre calendrier, image, musique, film et liste de fichiers comme interface de démarrage. L'interface de démarrage affichée à l'écran dépend du réglage “Config.
PDA). Votre téléphone mobile ou votre PDA commence par rechercher les dispositifs Bluetooth alentours. 2) Une fois que votre téléphone/PDA a affiché tous les dispositifs Bluetooth sur l'écran des résultats de la recherche, choisissez [Aiptek] (le nom du cadre photo). Lorsque vous êtes invité à saisir un code, veuillez taper [0000]. Puis un écran de transmission s'affiche, indiquant que la photo est en train d'être transmise.
Si votre dispositif Bluetooth ne trouve pas le cadre photo, veuillez vous assurer que : 1. Le cadre photo est sous tension. 2. La fonction Bluetooth du cadre photo est activée dans les réglages [Setup (Configuration)]. (Si la fonction Bluetooth est activée, l'icône Bluetooth de l'écran [Card Select (Choix carte)] s'allume.) 3. Le cadre photo n'est pas trop éloigné, ni obstrué, par rapport à votre dispositif Bluetooth.
Rotation Zoom Précedent Stop État Affich Infos fichier Résolution image Suivant Vue 3×3 Figure (barre de commande image) État Durée Stop Lecture/Pause Précédent Retour rapide Avance rapide Infos fichier Suivant Tag ID3 Mode lecture Figure (barre de commande musique) Activer la musique Lorsque l'écran Sélection Fonction s'affiche, sélectionnez Musique et appuyez sur “Entrée”, le système recherche les fichiers musicaux dans la mémoire actuelle de l'appareil et les lit automatiquement.
Pendant la lecture de la musique, appuyez sur Entrée pour utiliser la barre de commande pour effectuer une opération de commande, Retour rapide Précédent Durée Avance rapide Stop Infos fichier État Lecture/pause Mode lecture Tag ID3 Activer le film Lorsque l'écran Sélection Fonction s'affiche, sélectionnez Film et appuyez sur “ Entrée”, le système recherche les fichiers vidéo dans la mémoire actuelle de l'appareil et les lit automatiquement.
Dépannage 1. Comment démarrer/arrêter un diaporama ? Appuyez sur le bouton MARCHE/ARRÊT situé à l’arrière. Par défaut, la lecture du diaporama démarre avec un fichier MP3 en musique de fond. Le diaporama peut être arrêté à l’aide de la fonction PAUSE dans la barre de commande de l’image. Pendant le diaporama, appuyez sur la touche « OK » pour afficher la barre de commande. Appuyez à nouveau sur « OK » pour arrêter le diaporama sur une photo spécifique.
Guida rapida --------------------------------------------------------------------- Prefazione Congratulazioni per l’acquisto di questo prodotto. Abbiamo investito molto tempo ed energie nel suo sviluppo per far sì che vi godiate per molti anni senza problemi la vostra cornice digitale. Avviso per la sicurezza 1. Non far cadere, forare o smontare la cornice digitale, diversamente la garanzia sarà annullata. 2. Evitare tutti i tipi di contatto con l’acqua ed asciugarsi le mani prima dell’uso. 3.
Preparazione Controllare i contenuti della confezione. 1. Cornice digitale 2. Base della cornice 3. Telecomando 4. Adattatore di corrente CA/CC 5. 1 cavo USB per il collegamento al PC 6. 1 cavo USB per il collegamento alla penna (PEN Drive) 7. Guida rapida 8. CD software Pannello frontale 1. 2. 3. 4. 5. 6. Schermo Cornice decorative Ricevitore del telecomando Cornice frontale Base Tasto di sblocco cornice decorativa frontale Pannello posteriore 7. 8. 9. 10. 11. 12.
Uso della scheda memoria La cornice digitale supporta unità USB Flash, schede CF, SD, MMC e MS Pro. Dopo l’accensione La cornice digitale può eseguire automaticamente la presentazione delle immagini contenute nella scheda memoria /USB stick o memoria interna subito dopo l’accensione. Si può anche scegliere di mostrare il calendario o l’elenco file immagini, musica, film come interfaccia d’avvio. L’interfaccia d’avvio mostrata sullo schermo dipende dall’impostazione eseguita nel menu “Imp. accensione”.
cornice digitale). Quando viene chiesto di inserire un codice, digitare [0000]. Quindi apparirà una schermata di trasmissione, ad indicare il processo in corso. 3) Una volta completata la trasmissione, la foto apparirà sullo schermo della cornice digitale. Uso del Bluetooth per inviare foto da PC o notebook 1) Accertarsi che il PC o il notebook siano abilitati Bluetooth. (Ciò può richiedere l’installazione del software Bluetooth e l’inserimento della chiave hardware Bluetooth).
Se il dispositivo Bluetooth non trova la cornice digitale, accertarsi che: 1. La cornice digitale sia accesa. 2. La funzione Bluetooth della cornice digitale sia abilitata nelle impostazioni in [Setup] (Imposta). (Se la funzione Bluetooth è abilitata, l’icona corrispondente nella schermata [Card Select] (Selezione scheda) si illumina). 3. La cornice digitale non sia lontana dal dispositivo Bluetooth o bloccata.
Rotazione Zoom Precedente Stato Stop Mostra info file Successivo Risoluzione mmagine View 3×3 Figura (barra di controllo immagini) Stato Ora Stop Esecuzione/Pausa Precedente Indietro veloce Avanti veloce Info file Successivo Tag ID3g Modalità esecuzione Figura (barra di controllo musica) Abilitare la musica Quando è visualizzata la schermata Selezione funzione, selezionare Musica e premere “ENTER”, il sistema cercherà i file musicali nel corrente dispositivo d’archiviazione e la eseguirà aut
Durante l’esecuzione musicale, premere ENTER per usare la barra di controllo ed eseguire le regolazioni. Indietro veloce Precedente Avanti veloce Stop Ora Info file Stato Esecuzione/pausa Modalità esecuzione Tag ID3 Abilitare i film Quando è visualizzata la schermata Selezione funzione, selezionare Film e premere “ENTER”. Il sistema cercherà i file video nel corrente dispositivo d'archiviazione e li eseguirà automaticamente.
Risoluzione dei problemi 1. Come si avvia/arresta una presentazione delle immagini? Attivare il pulsante ALIMENTAZIONE sul retro. Per impostazione predefinita, all'avvio la presentazione delle immagini viene eseguita con MP3 come musica di sfondo. La presentazione delle foto può essere arrestata utilizzando la funzione PAUSA disponibile dalla barra di controllo delle immagini control bar.
Guía rápida --------------------------------------------------------------------- Prólogo Gracias por comprar este producto. Hemos invertido mucho tiempo y esfuerzo en su desarrollo para que pueda disfrutar durante muchos años del marco digital para fotografías sin ningún problema. Aviso de seguridad 1. 2. 3. 4. 5. 6. 7. No deje caer, perfore ni desmonte el marco fotográfico digital; si lo hace, la garantía quedará invalidada.
Procedimientos iniciales Compruebe el contenido del paquete 1. Marco digital para fotografías 2. Pie del marco 3. Mando a distancia 4. Adaptador de alimentación conmutado de CA a CC 5. Cable USB al PC x1 6. Cable USB al Pen Drive x1 7. Guía rápida 8. CD de software Panel frontal 1. 2. 3. 4. 5. 6. Pantalla Marco decorativo Receptores de sensor Marco frontal Pie Botón para desmontar o cambiar del marco Panel posterior 7. 8. 9. 10. 11. 12.
Usar la tarjeta de memoria El marco digital para fotografías admite unidades USB flash y tarjetas CF, SD, MMC y MS PRO. Después del encendido El marco digital para fotografías puede realizar una presentación fácilmente a partir de la tarjeta de memoria o la unidad USB o memoria interna después de encenderse. También puede elegir las opciones de calendario, imágenes, música, películas y lista de archivos en la interfaz de inicio.
Bluetooth en la pantalla de resultados de la búsqueda, seleccione [Aiptek] (el nombre del marco fotográfico). Cuando se le pida que inserte un código, teclee [0000]. Aparecerá una pantalla de transmisión indicando que la foto se está transmitiendo. 3) Cuando la transmisión se complete, la fotografía se mostrará en la pantalla del marco fotográfico.
Si el dispositivo Bluetooth no encuentra el marco fotográfico, asegúrese de que: 1. El marco fotográfico está encendido. 2. La función Bluetooth del marco fotográfico está habilitada en el elemento [Setup] (Configuración). Si la función Bluetooth está habilitada, el icono Bluetooth de la pantalla [Card Select] (Seleccionar tarjeta) se iluminará. 3. El marco fotográfico no está alejado del dispositivo Bluetooth o bloqueado.
Zoom Girar Estado Anterior Detener Información del archivo Resolución de la imagen Siguiente Vista 3×3 Figura Barra de control de imágenes Estado Detener Tiempo Reproducir/Pausa Anterior Retroceso rápido Avance rápido Información del archivo Siguiente Etiqueta ID3 Modo de reproducción Figura Barra de control de música Habilitar la música Cuando aparezca la pantalla Elegir función, seleccione Música y presione “ACEPTAR”(ENTER), el sistema buscará archivos de música en el equipo de memoria actu
Durante la reproducción de música, presione “ACEPTAR”(ENTER) para usar la barra de control para realizar la operación de control. Retroceso rápido Anterior Avance rápido Detener Tiempo Información del archivo Estado Reproducir/Pausa Modo de reproducción Etiqueta ID3 Habilitar las películas Cuando aparezca la pantalla Elegir función, seleccione Filme y presione “ACEPTAR”(ENTER). El sistema buscará los archivos de vídeo del equipo de memoria actual y los reproducirá automáticamente.
Resolución de problemas 1. ¿Cómo iniciar y detener una presentación de imágenes? Pulse el botón de alimentación situado en la parte posterior. La configuración de inicio predeterminada es la reproducción de la presentación de imágenes con música de fondo en formato MP3. La presentación de fotografías se puede detener mediante la función de pausa de la barra de control de imagen. Durante la presentación automática de fotografías, pulse el botón ‘INTRO’ para visualizar la barra de control de imagen.
Snelstartgids --------------------------------------------------------------------- Voorwoord Hartelijk bedankt voor uw aankoop van dit product. Wij hebben bij de ontwikkeling tijd noch inspanningen gespaard zodat u jarenlang probleemloos kunt genieten van uw digitale fotolijst Veiligheidsrichtlijnen 1. 2. 3. 4. 5. 6. 7. Laat de digitale fotolijst niet vallen, prik er geen gaten in of demonteer het apparaat niet, anders vervalt de garantie.
Aan de slag De inhoud van de verpakking controleren 1. Digitale fotolijst 2. Lijstvoet 3. Afstandsbediening 4. Wisselstroom-naar-gelijkstroomadapter 5. USB-kabel naar pc *1 6. USB-kabel naar penstuurprogramma *1 7. Snelstartgids 8. Software-cd Voorpaneel 1. 2. 3. 4. 5. 6. Scherm Decoratieve lijst ontvangtoestel van de afstandsbediening Voorkant lijst Voetstuk Lijstontgrendelingsknop Achterpaneel 7. 8. 9. 10. 11. 12.
De geheugenkaart gebruiken Ondersteunt USB-flashstation, CF, SD, MMC, MS en MS PRO. Na het inschakelen Na het inschakelen kan de digitale fotolijst automatisch een diavoorstelling weergeven vanaf de menukaart/USB-stick of intern geheugen. U kunt ook een kalender, foto, muziek, film of bestandslijst selecteren als de opstartinterface. De opstartinterface die op het scherm wordt weergegeven, is afhankelijk van de instelling "Start instellen".
3) Nadat het verzenden is voltooid, wordt de foto weergegeven op het scherm van de fotolijst. Bluetooth gebruiken om foto's te verzenden - van pc of laptop 1) Controleer of uw pc of laptop Bluetooth ondersteunt. (Hiervoor kan het nodig zijn de Bluetooth-software te installeren en uw Bluetooth-dongle aan te sluiten). 2) Uw pc/laptop start het zoeken van Bluetooth-apparaten in de buurt. U kunt de fotolijst terugvinden in [My Bluetooth Center] (Mijn Bluetooth-centrum) op uw pc/laptop.
Als u een lijst wenst van de mobiele telefoons die werden getest voor en ondersteund worden door de digitale fotolijst, kunt u www.aiptek.eu bezoeken of ons een e-mail sturen op support@aiptek.eu voor de recentste update. Diavoorstelling inschakelen Wanneer het Functieselectiescherm wordt weergegeven, selecteert u Afbeelding en drukt u op "Enter". Zo krijgt u een overzicht van de beschikbare foto's.
Muziek inschakelen Selecteer Muziek terwijl het Functieselectiescherm wordt weergegeven. Het systeem zal de muziekbestanden in het huidige geheugenmedium zoeken en ze automatisch afspelen. Druk op de cirkelknop (omlaag) om het menu Volume te openen. Gebruik de cirkelknop (links en rechts) om het volume te regelen. Druk op de "ENTER"-knop om de parameters op te slaan of druk op knop "ESC" om het menu te sluiten (en de parameters niet op te slaan).
Problemen oplossen 1. Zo zet u een fotoweergave aan/uit. Zet de AAN/UIT-knop aan de achterkant uit. Bij de default opstartinstellingen wordt de fotoweergave afgespeeld met MP3 als achtergrondmuziek. U kunt de fotoweergave uitzetten met de PAUZE-functie in de fototaakbalk. Druk tijdens de automatische fotoweergave op de knop ‘ENTER’ om de fototaakbalk weer te geven. Druk nogmaals op ‘ENTER’ om de fotoweergave tijdens een bepaalde foto te stoppen.
Guia de consulta rápida --------------------------------------------------------------------- Introdução Obrigado por ter comprado este produto. Investimos muito tempo e esforço no seu desenvolvimento para que possa desfrutar da su quadro digital por muitos anos e sem problemas. Normas de segurança 1. 2. 3. 4. 5. 6. 7. Não deixe ao quadro digital cair e não a fure ou desmonte; caso contrário a garantia perde a validade. Evite todo o contacto com a água e seque as mãos antes de utilizar o dispositivo.
Introdução Verifique o conteúdo da embalagem 1. Quadro digital 2. Suporte para Quadro Digital 3. Telecomando 4. Transformador AC/DC 5. Cabo USB para ligação ao PC x1 6. Cabo USB para ligação à Pen Drive x1 7. Guia de consulta rápida 8. CD com o software Painel frontal 1. 2. 3. 4. 5. 6. Ecrã Quadro decorativo Receptores de encomendas Quadro frontal Suporte Botão da quadro digital Painel traseiro 7. 8. 9. 10. 11. 12.
Utilização do cartão de memória Ao quadro digital é compatível com unidades USB flash e com cartões de memória, CF, SD, MMC e MS PRO. Depois de ligar ao quadro digital Após a sua activação, este quadro digital pode apresentar automaticamente as suas fotos sob a forma de uma apresentação de diapositivos a partir do cartão de memória/USB stick ou Memória interna.
informações consulte o guia de utilizador do seu telemóvel/da sua agenda electrónica). O seu telemóvel ou agenda electrónica começa a procurar os dispositivos Bluetooth existentes nas proximidades. 2) Depois do telemóvel/da agenda electrónica ter mostrado todos os dispositivos Bluetooth no ecrã dos resultados de pesquisa, seleccione a opção [Aiptek] (Aiptek) (nome da moldura). Quando lhe for pedido um código, utilize o código [0000].
Se a moldura não for encontrada pelo dispositivo Bluetooth, certifique-se de que: 1. A moldura está ligada. 2. A função Bluetooth da moldura se encontra activada na opção [Setup] (Configurar) (Se a função Bluetooth estiver activada, o ícone Bluetooth no ecrã [Card Select] (Seleccionar placa) é realçado.) 3. A moldura não está longe do seu dispositivo Bluetooth ou bloqueada. Para obter a lista de telemóveis que foram testados e que são suportados pela moldura digital, visite o site www.aiptek.
Zoom Rodar Estado Anterior Parar Mostrar info do ficheiro Imagem Seguinte Resolução Ver 3×3 Figura (barra de controlo das imagens) Estado Parar Duração Reproduzir/Pausa Anterior Recuar Avançar Info do ficheiro Seguinte Etiqueta ID3 Modo de reprodução Figura (barra de controlo da música) Activar a reprodução de música No ecrã Escolher função, escolha a opção Música e prima o botão “ ENTER”. O sistema irá procurar os ficheiros de música existentes na memória reproduzindo-os automaticamente.
Durante a reprodução de música, prima o botão “ENTER” para utilizar a barra de controlo para controlar a função em curso. Recuar Anterior Avançar Parar Info do ficheiro Duração Estado Reproduzir/Pausa Modo de reprodução Etiqueta ID3 Activar a reprodução de filmes No ecrã Escolher função, seleccione a opção Filme e prima o botão “ ENTER”, O sistema irá procurar os ficheiros de vídeo guardados na memória e reproduzi-los automaticamente.
Resolução de Problemas 1. Como iniciar/parar uma exibição de imagens? Ligue o botão ALIMENTAÇÃO que se encontra de lado na parte de trás. A configuração pré-definida de arranque é a de reproduzir a exibição de imagens com música de fundo MP3. A exibição de fotos pode ser parada usando a função PAUSA na barra de controlo da imagem. Durante a exibição automática das fotos, prima a tecla "ENTER" para que seja exibida a barra de controlo de imagem.
Skrócona instrukcja --------------------------------------------------------------------- Wstęp Dziękujemy za zakupienie tego produktu. Poświęciliśmy wiele czasu i wysiłku w opracowanie ramki do zdjęć cyfrowych, która może służyć bezawaryjnie przez wiele lat. Uwaga dotycząca bezpieczeństwa 1. Nie należy upuszczać, nakłuwać lub rozbierać ramki do zdjęć cyfrowych, w przeciwnym razie nastąpi unieważnienie gwarancji. 2. Należy unikać kontaktu z wodą i przed użyciem należy wysuszyć ręce. 3.
Wprowadzenie Sprawdzenie zawartości opakowania 1. Ramka do zdjęć cyfrowych 2. Podstawka ramki 3. Pilot 4. Adapter przełączania prąd zmienny - prąd stały 5. Kabel USB do podłączenia komputera *1 6. Kabel USB do podłączania Pen Drivera *1 7. Skrócona instrukcja 8. Dysk CD z oprogramowaniem Panel przedni 1. 2. 3. 4. 5. 6. Ekran Ramka ozdobna Odbiornik Pilota Ramka przednia Podstawa Przycisk odblokowania ramki przedniej Panel tylny 7. 8. 9. 10. 11. 12.
Używanie karty pamięci Ramka do zdjęć cyfrowych obsługuje napęd USB flash, CF, SD, MMC, MS i MS PRO. Po włączeniu Ramka do zdjęć cyfrowych może po włączeniu zasilania automatycznie wyświetlić pokaz slajdów z karty pamięci/pamięci USB lub Pamięć wewnętrzny. Po uruchomieniu można także wybrać kalendarz, obraz, muzykę, film, listę plików. Interfejs widoczny na ekranie po uruchomieniu zależy od ustawień “Ustawienia StartUp”.
urządzeń Bluetooth, wybierz [Aiptek] (nazwa ramki do zdjęć). Po pojawieniu się polecenia wprowadzenia kodu, wprowadź [0000]. Następnie wyświetlony zostanie ekran transmisji, wskazując transmisję zdjęcia. 3) Po zakończeniu transmisji, zdjęcie zostanie wyświetlone na ekranie ramki do zdjęć. Używanie Bluetooth do wysyłania zdjęć - z komputera PC lub laptopa 1) Upewnij się, że komputer PC lub laptop ma włączone Bluetooth. (Może to wymagać instalacji oprogramowania Bluetooth i podłączenia klucza Bluetooth.
Jeśli ramka do zdjęć nie zostanie odnaleziona przez urządzenie Bluetooth, upewnij się że: 1. Włączone jest zasilanie ramki do zdjęć. 2. Funkcja Bluetooth ramki do zdjęć jest włączona w ustawieniach [Setup (Instalacja)]. (Jeśli funkcja Bluetooth jest włączona, zaświeci się ikona Bluetooth na ekranie [Card Select (Wybór karty)].) 3. Ramka do zdjęć nie jest zablokowana lub nie znajduje się zbyt daleko od urządzenia Bluetooth.
Zoom Obrót Zatrzymaj Stan Poprzedni Pokaż informacje o pliku Rozdzielczość obrazu Następny Widok 3×3 Rysunek (pasek sterowania obrazem) Stan Zatrzymaj Czas Odtwarzaj/Pauza Poprzedni Szybkie przewijanie do tyłu Szybkie przewijanie do przodu informacje o pliku Następny Znacznik ID3 Tryb odtwarzania Rysunek (pasek sterowania muzyką) Włączenie muzyki Po wyświetleniu ekranu Wybór funkcji, wybierz Muzyka i naciśnij “ Enter”, system wyszuka pliki z muzyką w aktualnie używanej pamięci i automatycznie
Naciśnij Enter podczas odtwarzania muzyki w celu sterowania, Szybkie przewijanie do tyłu Poprzedni Szybkie przewijanie do przodu Zatrzymaj Czas Informacje o pliku Stan Odtwarzaj/pauza Tryb odtwarzania Znacznik ID3 Włączenie filmu Po wybraniu ekranu Wybór funkcji, wybierz Film i naciśnij “Enter”, system wyszuka pliki video w aktualnie używanej pamięci i odtworzy je automatycznie. Podczas odtwarzania filmu, naciśnij okrągły przycisk (W górę), aby otworzyć menu głośności.
Rozwiązywanie problemów 1. Rozpoczynanie/ wyłączanie pokazu slajdów Naciśinij przycisk włączania zasilania zlokalizowany z tyłu urządzenia. Domyślnym ustawieniem rozruchowym jest uruchamianie pokazu slajdów z wykorzystaniem plików MP3 jako muzyki w tle. Pokaz slajdów można wyłączyć za pomocą funkcji wstrzymania (PAUSE) na pasku sterowania obrazami. W trakcie automatycznego pokazu slajdu naciśnij przycisk ENTER, żeby wyświetlić pasek sterowania obrazami.