ASP-MICRO THERMAL IMAGING MONOCULAR USER MANUAL
© 2020 AGM Global Vision. All rights reserved. This documentation is subject to change without notice. No parts of this manual, in whole or in part, may be copied, photocopied, translated, or transmitted by any electronic medium or in machine-readable form without the prior written permission of AGM Global Vision. If you have questions that are not covered in this manual, or need service, contact AGM Global Vision customer support for additional information prior to returning a product.
FCC INFORMATION Please take attention that changes or modification not expressly approved by the party responsible for compliance could void the user’s authority to operate the equipment. This equipment complies with FCC/IC RSS-102 radiation exposure limits set forth for an uncontrolled environment. FCC compliance: This product has been tested and found to comply with the limits for a Class B digital device, pursuant to Part 15 of the FCC Rules.
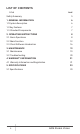
LIST OF CONTENTS TITLE PAGE Safety Summary 5 1. GENERAL INFORMATION 6 1.1 System Description 6 1.2 Key Features 7 1.3 Standard Components 7 2. OPERATING INSTRUCTIONS 8 2.1. Basic Operations 8 2.2 Main Function 12 2.3 Client Software Introduction 16 3. MAINTENANCE 19 3.1 Maintenance 19 3.2 Troubleshooting 20 4. WARRANTY INFORMATION 21 4.1 Warranty Information and Registration 21 5. SPECIFICATIONS 23 5.
SAFETY SUMMARY • • • • Read and follow all instructions Read all warnings Only use the attachments/accessories specified by the manufacturer All service must be provided by the manufacturer WARNING: This product contains natural rubber latex, which may cause potentially fatal allergic reactions! If you are allergic to latex, it is important that you strictly avoid exposure to products that contain it.
1 GENERAL INFORMATION 1.1 SYSTEM DESCRIPTION The Asp-Micro handheld observational thermal monocular is equipped with a 160×120 or 384×288 infrared detector and a 720×540 LCOS display. It supports functions of observation, highest temperature target tracking, distance measurement, Wi-Fi hotspot, and so on. The high-sensitivity built-in thermal detector provides you with clear view even in total darkness.
1.2 KEY FEATURES • 160×120 or 384×288 resolution, high sensitivity detector • Adaptive AGC, DDE, 3D DNR • 720×540 resolution LCOS display • Distance measurement • Highest temperature tracking • Built-in memory module supports video recording and snapshot capturing • Wi-Fi hotspot • Built-in rechargeable Lithium battery • Up to 10 hours continuous running (TM160) • Type-C interface • Limited 3-year warranty 1.
2 OPERATING INSTRUCTIONS 2.1. BASIC OPERATIONS 2.1.1 UNPACKING The following steps must be completed prior to each mission. 1. Open the carrying case, remove the monocular, and verify that all components are included. 2. Inspect the monocular for any obvious evidence of damage to the optical surfaces, body, eyecup, operation buttons, etc. Ensure that all optical surfaces are clean and ready for use. Clean all optical surfaces with a lens tissue. 2.1.
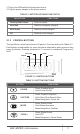
2. Plug in the USB cable and charge the device. 3. Plug the power adapter to the power source. TABLE 2-1. BATTERY LED INDICATOR STATUS INDICATORS FUNCTIONS Flashing Red & Green Error occurred. Solid Red Battery is properly charged. Solid Green Battery is fully charged. Off Battery is not charged. 2.1.3 CONTROL BUTTONS The Asp-Micro controls are shown in Figures 2-2 and are defined in Tables 2-2. Each button is responsible for some functions selected by short press or long press the button.
2.1.4 POWER ON AND OFF Power On Hold the POWER button for 5 seconds to power on the device. An image will appear on the display. Refer to the figure below for the main view of the monocular display. DIGITAL ZOOM HOT SPOT STORAGE BATTERY FIGURE 2-3. THE DISPLAY MAIN VIEW Power Off When the device is turned on, hold device. 2.1.5 button for 2 seconds to power off the SLEEP MODE In the view mode, press the button. After a few seconds, the display will turn off.
2.1.7 PALETTE SETTINGS You can select different palettes to display the same scene in different effects. Press button to switch palettes. TABLE 2-3. PALETTE SETTINGS PALETTE WHITE HOT BLACK HOT FUSION RED HOT 2.1.8 DESCRIPTION The hot part is white-colored in view. The higher the temperature is, the lighter the color is. The hot part is black-colored in view. The higher the temperature is, the more black the color is. The hot part is white-colored.
2.1.10 FILE EXPORT 1. Before connecting the thermal monocular to a computer, please make sure that the Wi-Fi function of the monocular is disabled. 2. Connect the thermal monocular to your PC with USB cable and open the detected disk. 3. Enter DCIM>100EZVIZ to view the videos and snapshots. - Select and copy the videos to PC and play the file with the player. - Select and copy the snapshots to PC and view the files. 4. Disconnect the device from your PC. 2.2 MAIN FUNCTIONS 2.2.
MENU ITEM SYMBOL OPTION OFF NETWORK Hotspot Auto / Manual / External 0.8m/1.2m/ 1.8m/3.0m Target Height FFC MEASURE OFF HOT TRACKING ON DPC CVBS --- CVBS OFF CVBS ON FUNCTION Press to enable or disable the Wi-Fi hotspot. Press to select the FFC mode. Press to enter distance measurement mode. Press to enable/disable hot spot mark (marking the spot of highest temperature). to correct dead pixel Press manually. to turn on and off the Press CVBS Output function.
2.2.4 CONTRAST ADJUSTMENT 1. Hold button to go to the menu. 2. Select Contrast menu item and press button to adjust the image contrast. You can select one of five levels of the contrast. 2.2.5 SCENE MODE You can select proper Scene Mode according to environment temperature to improve the display effect. 1. Hold button to go to the menu. 2. Select / Scene Mode menu item ( is default option) and press to switch scene. - Recognition mode ( ) improves an image so that the object edge is more distinct.
2.2.8 DISTANCE MEASUREMENT The device can detect the distance between the target and the observation position. NOTE: When measuring the distance, keep the hand and the position steady. Otherwise, the accuracy may be affected. 1. Hold button to show the menu. 2. Select mode. menu item and press 3. Press button to enter the Distance Measurement button to go to the target setting interface. or to select the target from Wolf (0.8m), Bear (3.0m), 1) Press Deer (1.2m), and Custom (1.8m).
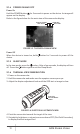
Before you start switch the palettes mode to White Hot mode. 1. Hold 2. Select 3. Press of cursor. 4. Press 5. Press 6. Hold button to show the menu. menu item. button to select the offset. The offset refers to the moving length and to select the moving direction. to move the cursor to the position of dead pixel. to correct the dead pixel. 2.2.11 CVBS OUTPUT You can view the video on CVBS monitor, to get a better and clear image, more convenient to check the detail. 1.
2. Move the cursor to menu item and press the button parameters to default settings. to restore all 1. Open the APP and connect the phone or pad with the device. Asp-Micro TM160 2. If the device is inactivated, set the password and activate it. If the device is activated, enter the password to add it to app.
3. When the device is added, the live view can be seen. You can view the interface of the monocular on the software. User can change such image parameters as brightness, contrast, zoom, palettes directly via phone or pad as well as record video on phone/pad memory.
3 MAINTENANCE 3.1 MAINTENANCE 3.1.1 CLEANING PROCEDURES 1. Gently brush off any dirt from the body of the device using a clean, soft cloth. 2. Moisten the cloth with fresh water and gently wipe down the external surfaces (except lenses). 3. Dry any wet surfaces (except lenses) using another dry, clean, soft cloth. 4. Using a lens brush, carefully remove all loose dirt from the lenses. 5. Dampen a cotton swab with ethanol and slowly, gently wipe down the lenses.
The device upgrades automatically. The upgrading process will be displayed in the main interface. 3.1.5 RESTORE DEVICE 1. Hold button to show the menu of device. 2. Select and press the prompt. button to restore the device to defaults according to 3.2 TROUBLESHOOTING Table 3-1 lists the most common malfunctions that may occur with your equipment. Perform the tests, inspections, and corrective actions in the order they appear in the table.
4 WARRANTY INFORMATION 4.1 WARRANTY INFORMATION AND REGISTRATION 4.1.1 WARRANTY INFORMATION This product is guaranteed to be free from manufacturing defects in material and workmanship under normal use for a period of three (3) years from the date of purchase.
the Customer; AGM Global Vision’s obligations under this Agreement extend solely to the Customer. AGM Global Vision’s liability hereunder for damages, regardless of the form or action, shall not exceed the fees or other charges paid to AGM Global Vision by the customer or customer’s dealer.
5 SPECIFICATIONS 5.1 SPECIFICATIONS ASP-MICRO TM160 Detector Type Resolution 160×120 384×288 Refresh Rate 50 Hz Response Waveband Lens (Focal Length) 8 μm to 14 μm 6.2 mm Aperture Field of View (H×V) 15 mm F1.1 F1.0 15.61° × 11.74° 16.51° × 12.42° Magnification 1× Digital Zoom 1×, 2×, 4× Monitor 1×, 2×, 4×, 8× 720×540, 0.
AGM Global Vision MAIN OFFICE 173 West Main Street PO Box 962 Springerville, AZ 85938 USA Tel. +1.928.333.4300 info@agmglobalvision.com www.agmglobalvision.com EUROPEAN OFFICE Andrey Lyapchev #7 Sofia, P.C. 1756 Bulgaria Tel. +44.292.255.0509 info@agmglobalvision.eu www.agmglobalvision.eu AGMglobalvision.