
User`s guide


Table Of Contents
- Agilent U1231A, U1232A, and U1233A Handheld Digital Multimeter
- Table of Contents
- List of Figures
- List of Tables
- Introduction
- Making Measurements
- Multimeter Features
- Multimeter Setup Options
- Using the Setup Menu
- Setup Menu Summary
- Setup Menu Items
- Changing the variation count
- Enabling and changing the Smooth refresh rate
- Enabling and changing the voltage alert level
- Changing the beep frequency
- Changing the auto power-off (APO) timeout
- Changing the LCD backlight timeout
- Adjusting the LCD backlight intensity
- Enabling the LED flashlight timeout
- Adjusting the LED flashlight intensity
- Changing the minimum measurable frequency
- Changing the continuity test alerts
- Changing the power-on greeting tone
- Resetting the Setup items
- Changing the scale conversion value
- Enable the AC/DC mV measurement
- Enable open continuity test by default
- Changing the temperature unit
- Characteristics and Specifications
Multimeter Features 3
Recalling Previously Recorded Readings (Recall)
U1231A/U1232A/U1233A User’s Guide 75
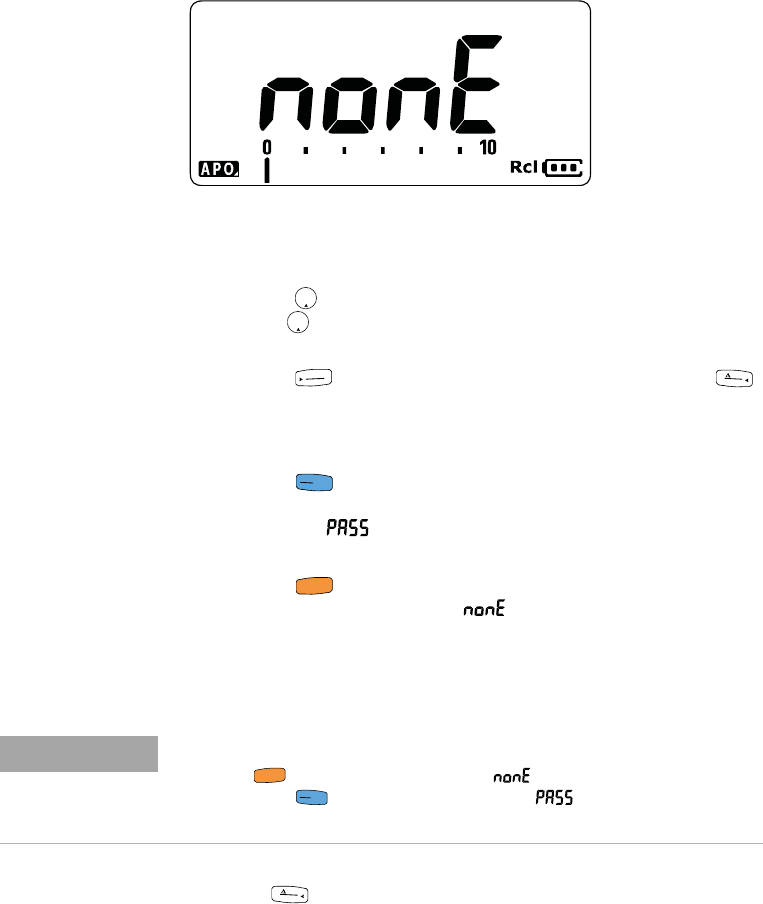
Figure 3-8 Empty view display
2 Use the following steps to navigate the Recall menu.
i Press to jump to the last stored entry, or press and
hold for more than 1 second to jump to the first
stored entry.
ii Press to view the next stored entry or press
to view the previous stored entry. The index number
(shown by the analog bar graph) increases or decreases
by one.
iii Press for more than 1 second to permanently
store all data entries in the multimeter’s nonvolatile
memory. is shown on the display if the data
entries are successfully stored.
iv Press for more than 1 second to clear the
temporary data entries. is shown on the display if
the data entries are successfully cleared. Cycle the
multimeter’s power again to view the permanent data
entries.
3 Press for more than 1 second to exit the Recall
menu.
Max
Min
Max
Min
A
u
to
R
a
n
g
e
N
u
l
l
R
e
c
a
l
l
A
u
t
o
T
ri
H
o
l
d
g
L
o
g
S
h
i
f
t
E
s
c
NOTE
To clear the permanent data entries
1 Press for more than 1 second until is shown on the display.
2 Then, press for more than 1 second until is shown on the display.
3 All data entries stored in the multimeter’s nonvolatile memory will be erased.
S
h
i
f
t
E
s
c
A
u
t
o
T
r
i
H
o
l
d
g
L
o
g
N
u
l
l
R
e
c
a
l
l