
User`s guide


Table Of Contents
- Agilent U1231A, U1232A, and U1233A Handheld Digital Multimeter
- Table of Contents
- List of Figures
- List of Tables
- Introduction
- Making Measurements
- Multimeter Features
- Multimeter Setup Options
- Using the Setup Menu
- Setup Menu Summary
- Setup Menu Items
- Changing the variation count
- Enabling and changing the Smooth refresh rate
- Enabling and changing the voltage alert level
- Changing the beep frequency
- Changing the auto power-off (APO) timeout
- Changing the LCD backlight timeout
- Adjusting the LCD backlight intensity
- Enabling the LED flashlight timeout
- Adjusting the LED flashlight intensity
- Changing the minimum measurable frequency
- Changing the continuity test alerts
- Changing the power-on greeting tone
- Resetting the Setup items
- Changing the scale conversion value
- Enable the AC/DC mV measurement
- Enable open continuity test by default
- Changing the temperature unit
- Characteristics and Specifications
Multimeter Features 3
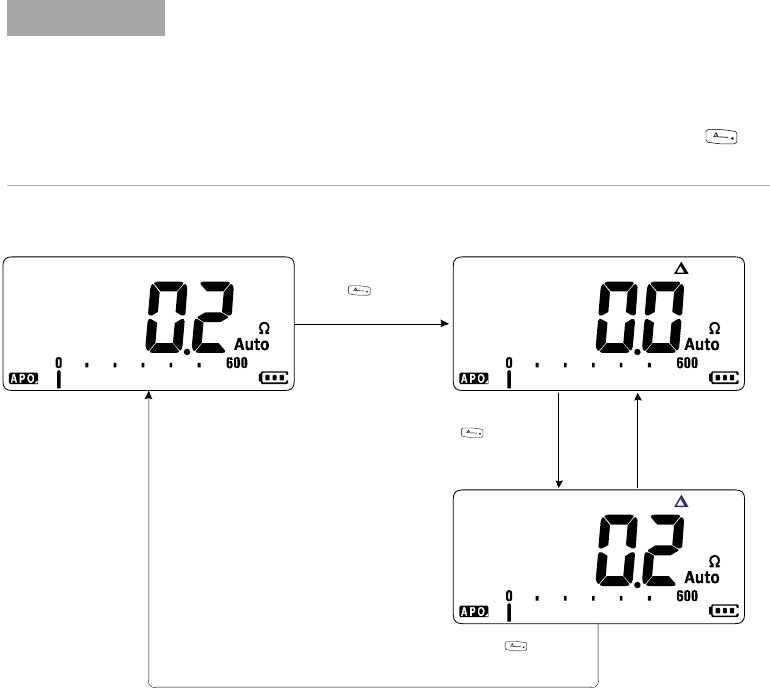
Making Relative Measurements (Null)
U1231A/U1232A/U1233A User’s Guide 69
Figure 3-3 Null operation
NOTE
• In resistance measurement, the multimeter will read a non-zero value
even when the two test leads are in direct contact because of the
resistance of these leads. Use the Null function to zero-adjust the
display.
• For DC voltage measurements, the thermal effect will influence the
accuracy of the measurements. Short the test leads and press
when the displayed value is stable to zero-adjust the display.
N
u
l
l
R
e
c
a
l
l
N
u
l
l
R
e
c
a
l
l
Display returns to
normal after 3 seconds
disable the Null function
N
u
l
l
R
e
c
a
l
l
Pr ess aga i n t o
the Null function
N
u
l
l
R
e
c
a
l
l
Press to enable
stored null value
Press to view the