
User`s guide


Table Of Contents
- Agilent U1231A, U1232A, and U1233A Handheld Digital Multimeter
- Table of Contents
- List of Figures
- List of Tables
- Introduction
- Making Measurements
- Multimeter Features
- Multimeter Setup Options
- Using the Setup Menu
- Setup Menu Summary
- Setup Menu Items
- Changing the variation count
- Enabling and changing the Smooth refresh rate
- Enabling and changing the voltage alert level
- Changing the beep frequency
- Changing the auto power-off (APO) timeout
- Changing the LCD backlight timeout
- Adjusting the LCD backlight intensity
- Enabling the LED flashlight timeout
- Adjusting the LED flashlight intensity
- Changing the minimum measurable frequency
- Changing the continuity test alerts
- Changing the power-on greeting tone
- Resetting the Setup items
- Changing the scale conversion value
- Enable the AC/DC mV measurement
- Enable open continuity test by default
- Changing the temperature unit
- Characteristics and Specifications
1 Introduction
Your Multimeter in Brief
22 U1231A/U1232A/U1233A User’s Guide
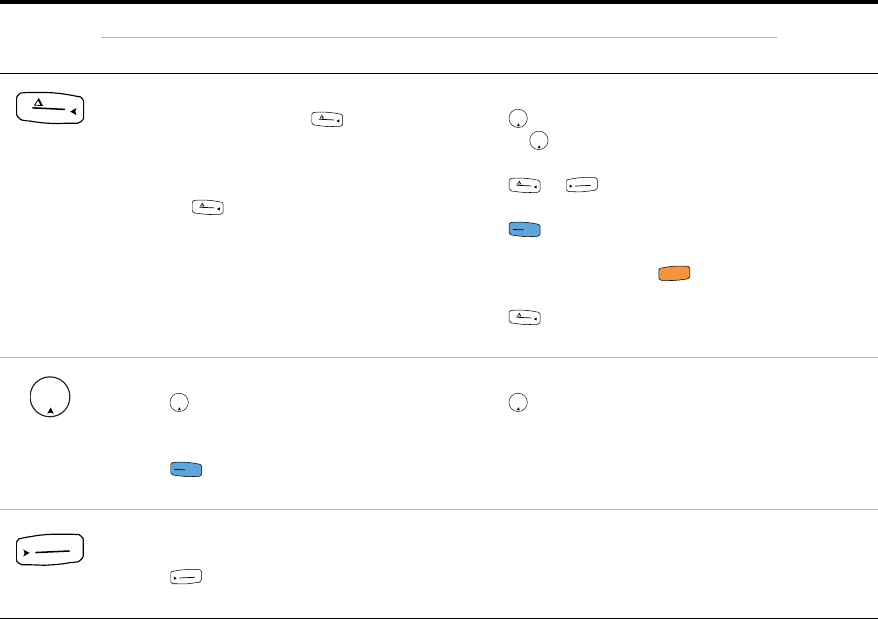
Keypad
The operation of each key is explained below. Pressing a key
enables a function, displays a related symbol, and emits a
beep. Turning the rotary switch to another position resets
the current operation of the key.
Click the respective “Learn more” pages in Table 1- 6 for
more information on each function.
Table 1 - 6 Keypad functions
Legend
Function when pressed for:
Learn
more on:
Less than 1 second More than 1 second
Sets the Null/Relative mode.
• While in Null mode, press again to
view the stored reference value that has
been saved. The display will return to
normal after 3 seconds.
• Pressing while the relative value is
being displayed will cancel the Null mode.
Enters the Hold-Log Recall menu.
• Press to jump to the last record. Press
and hold for more than 1 second to
jump to the first record.
• Press or to scroll through each
record.
• Press for more than 1 second to
store all records into the multimeter’s
non-volatile memory. Press for more
than 1 second to clear all records.
• Press for more than 1 second to exit
this mode.
page 68
and
page 74
Starts the MaxMin recording.
• Press again to cycle through maximum
(Max), minimum (Min), average (Avg), or
present (MaxMinAvg) readings.
• Press to restart the recording
session.
Stops the MaxMin recording.
• Press for more than 1 second to exit
this mode.
page 70
Sets a manual range and disables
autoranging.
• Press again to cycle through each
available measurement range.
Enables autoranging.
page 9
N
u
l
l
R
e
ca
l
l
N
u
l
l
R
e
c
a
l
l
N
u
l
l
R
e
c
a
l
l
Max
Min
Max
Min
N
u
l
l
R
e
c
a
l
l
A
u
t
o
R
a
n
g
e
A
u
t
o
T
r
i
H
o
l
d
g
L
o
g
S
h
i
f
t
E
s
c
N
u
l
l
R
e
c
a
l
l
Max
Min
Max
Min
A
u
t
o
T
r
i
H
o
l
d
g
L
o
g
Max
Min
A
u
t
o
R
a
n
g
e
A
u
t
o
R
a
n
g
e