
User`s guide


Table Of Contents
- Agilent U1231A, U1232A, and U1233A Handheld Digital Multimeter
- Table of Contents
- List of Figures
- List of Tables
- Introduction
- Making Measurements
- Multimeter Features
- Multimeter Setup Options
- Using the Setup Menu
- Setup Menu Summary
- Setup Menu Items
- Changing the variation count
- Enabling and changing the Smooth refresh rate
- Enabling and changing the voltage alert level
- Changing the beep frequency
- Changing the auto power-off (APO) timeout
- Changing the LCD backlight timeout
- Adjusting the LCD backlight intensity
- Enabling the LED flashlight timeout
- Adjusting the LED flashlight intensity
- Changing the minimum measurable frequency
- Changing the continuity test alerts
- Changing the power-on greeting tone
- Resetting the Setup items
- Changing the scale conversion value
- Enable the AC/DC mV measurement
- Enable open continuity test by default
- Changing the temperature unit
- Characteristics and Specifications
Introduction 1
Preparing Your Multimeter
U1231A/U1232A/U1233A User’s Guide 11
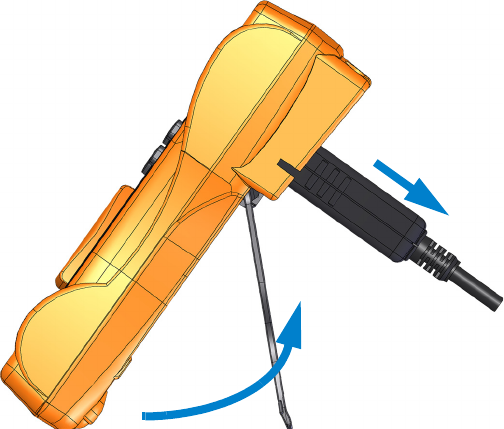
Adjusting the tilt stand
To adjust the multimeter to a 60° standing position, pull the
tilt stand outward as shown in Figure 1- 3.
Figure 1-3 Tilt-stand adjustment and IR-USB cable connection
Connecting the IR-USB cable
You can use the IR communication link (IR communication
port, located at the rear panel) and the Agilent GUI Data
Logger software to control your multimeter remotely,
perform data logging operations, and transfer the contents of
your multimeter’s memory to a PC.
To PC (host)
IR-USB cable
Pull until 60° standing position
Tilt stand