
User`s guide


Table Of Contents
- Agilent U1231A, U1232A, and U1233A Handheld Digital Multimeter
- Table of Contents
- List of Figures
- List of Tables
- Introduction
- Making Measurements
- Multimeter Features
- Multimeter Setup Options
- Using the Setup Menu
- Setup Menu Summary
- Setup Menu Items
- Changing the variation count
- Enabling and changing the Smooth refresh rate
- Enabling and changing the voltage alert level
- Changing the beep frequency
- Changing the auto power-off (APO) timeout
- Changing the LCD backlight timeout
- Adjusting the LCD backlight intensity
- Enabling the LED flashlight timeout
- Adjusting the LED flashlight intensity
- Changing the minimum measurable frequency
- Changing the continuity test alerts
- Changing the power-on greeting tone
- Resetting the Setup items
- Changing the scale conversion value
- Enable the AC/DC mV measurement
- Enable open continuity test by default
- Changing the temperature unit
- Characteristics and Specifications
Multimeter Setup Options 4
Setup Menu Items
U1231A/U1232A/U1233A User’s Guide 93
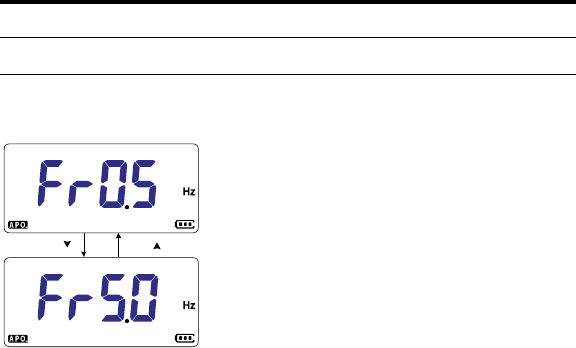
Changing the minimum measurable frequency
This setting is used with frequency tests (see page 62).
Changing the minimum measurable frequency will influence
the display update rates for frequency measurements. The
typical display update rate as defined in the specification is
based on a minimum measurable frequency of 0.5 Hz.
Use this Setup item to adjust the minimum measurable
frequency value (either 0.5 Hz or 5.0 Hz).
Figure 4-10 Changing the minimum measurable frequency
Changing the continuity test alerts
This setting is used with continuity tests (see page 41). You
can set the beeper to sound and the backlight to flash as a
continuity indication whether the circuit- under- test is less
than (short) or more than or equal to (open) the threshold
resistance.
Parameter Range Default setting
FrEq 0.5 Hz or 5.0 Hz 0.5 Hz
Pr e s s
Pr e s s