
Technical data


Hub Hi-Speed Tests 4
Notes on USB Electrical Compliance Testing 77
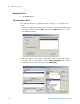
3 Click OK to close the Test Instructions dialog.
Test Instructions, Part 2
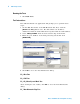
The USB automated test application will prompt you to perform these
steps:
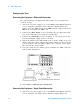
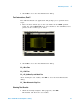
1 Place the Test Switch (S1) of the test fixture in the TEST position.
Verify the yellow TEST LED is lit. You should see the transmitted test
packet on the oscilloscope as below.
2 Click OK to close the Test Instructions dialog.
EL_6 Rise Time
EL_6 Fall Time
EL_2 EL_46 Data Eye and Mask Test
After viewing the test results, click OK to close the Test Instructions
dialog.
EL_7 Non-Monotonic Edge Test
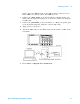
Viewing Test Results
1 When the Testing Complete dialog appears, click OK.
The Results tab shows the test results.