
User`s guide

4 Triggering
108 InfiniiVision Oscilloscopes User’s Guide
Setting Up VPT1000/Oscilloscope LAN Communication
This is necessary when the oscilloscope controls the VPT1000 in either Asynchronous or
Synchronous mode, but not when a PC with appropriate FlexRay protocol analysis
software controls the VPT1000.
Note that the VPT1000 is shipped pre-configured with an IP address of 192.168.80.80, and
a subnet mask of 255.255.240.0. These instructions assume the VPT1000 address has not
been changed. To change the VPT1000’s IP address, see page 416.
Set the Oscilloscope’s IP Address
1 Press [Utility]&IO&Control. Deselect the LAN check box (turn it off) if not already
deselected.
2 Press the LAN Settings softkey.
3 Press the Config softkey. Deselect DHCP and AutoIP.
4 Press the Address softkey. Press the Modify softkey. Set the oscilloscope’s IP address
to 192.168.80.1. (The first three dot-separated numbers in the oscilloscope’s IP
address must match the first three numbers in the VPT1000’s IP address. The last
dot-separated number in the IP address must be different from the VPT1000’s). Press
the Apply softkey.
5 Press the Modify softkey twice. Set the oscilloscope’s Subnet mask to 255.255.240.0.
Press the Apply softkey.
6 Press the Modify softkey twice. Set the oscilloscope’s Gateway IP to 192.168.80.1.
Press the Apply softkey.
Set the Oscilloscope to Communicate with the VPT1000
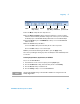
7 In the Waveform section on the front panel, press the [Acquire] key.
8 Press the Serial Decode softkey, and use the Entry knob to select FlexRay.
9 Press the Decode softkey to enable decode.
10 Press the Settings softkey to access the VPT1000 Menu.