
Technical data


1-4
Agilent E7501A Getting Started
Installation and Configuration
Step 2. Installing the System Hardware
Step 2. Installing the System Hardware
NOTE
If you ordered a preconfigured system, skip this step and proceed to
“Step 5. Starting the Agilent E7501A Software” on page 1-20.
CAUTION
Do not turn power on to the C-size VXI mainframe until all VXI modules
have been installed and you have made all peripheral connections to the
Slot 0 module being used.
If you have problems or questions reqarding the following processes, refer to
the manufacturers’ documentation for the product in question.
1. Set up an Agilent Technologies E8403A C-size VXI mainframe or
equivalent.
2. Turn power off to the C-size VXI mainframe and install the Slot 0
module being used.
3. Set the logical addresses of the Agilent Technologies E6432A
microwave synthesizer and Racal 3153 waveform generator:
The units can be Auto Configured when set to address 255 (FF).
If you prefer to manually select the addresses, the factory suggests
using address 210 (D2) for the Agilent Technologies E6432A
microwave synthesizer and 3 for the Racal 3153 waveform
generator.
4. Install the Agilent Technologies E6432A microwave synthesizer and
Racal 3153 waveform generator into the C-size VXI mainframe.
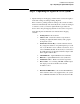
5. Connect the front panel cables as follows:
Agilent Technologies E6432A Racal 3153
Pulse Output 1
FM Output 2
AM Output 3
10 MHz Out 0 dBm 10 MHz REF INPUT