
Specifications


12
Instruction Note
1. Press [Frequency] > [4] > {GHz}. The FREQUENCY area of the display now reads
4.000 000 000 00 GHz.
Instruction Note
1. Press [Amplitude] > [0] > {dBm}. The AMPLITUDE area of the display
now reads
0.00 dBm.
Instruction Note
1. Press the [AM] hardkey. The first level menu of softkeys is displayed.
2. Press {AM Depth} > [90] > {%}. 90.0 % is displayed below the {AM Depth} softkey.
Instruction Note
1. Press {AM Rate} > [10] > {kHz}. 10.0000 kHz is displayed below the {AM Rate}
softkey.
Instruction Note
1. Press [AM Off On]
2. Press [RF On/Off].
Instruction Note
1. Press [Preset].
2. Press [Frequency] > [4] > {GHz}. The Center FREQUENCY area of the display now
reads
4.000 000 00 GHz.
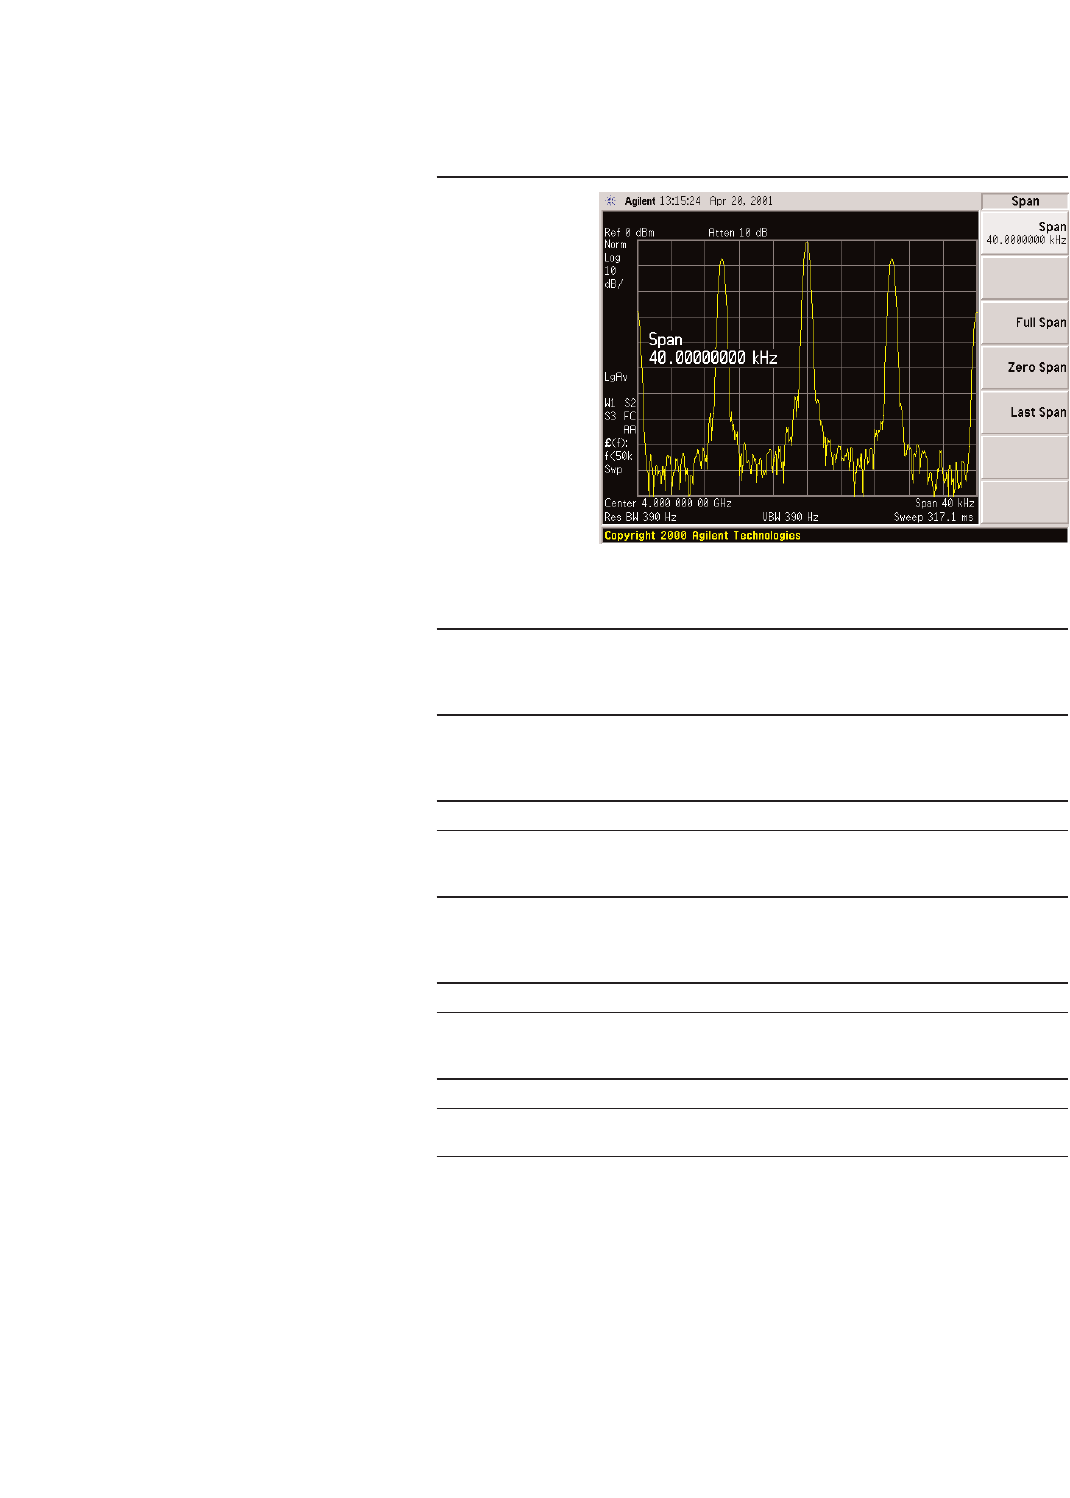
3. Press [Span] > [40] > {kHz} The Span are of the display now reads 40 kHz.
The display on the PSA should now match Figure 1.
Configuring AM
Using this procedure, you will learn
how to create a multipath ampli-
tude-modulated RF carrier with the
following characteristics:
•RF output frequency set to 4 GHz
•RF output amplitude set to 0 dBm
•AM Path 1 depth set to 90 percent
•AM Path 1 rate set to 10 kHz
•AM Path 1 waveform set to sine
•AM Path 2 depth set to 40 percent
•AM Path 2 waveform set to
triangle
•AM Path 2 rate set to 5 kHz
Setting the RF output frequency
Setting the RF output amplitude
Setting the AM depth
Setting the AM rate
Activating a AM configuration
Viewing the signal on an Agilent E4440A
PSA spectrum analyzer
Figure 1:
AM