
User`s guide


Agilent PXT Wireless Communications Test Set
User’s Guide
15
DO NOT SIMPLY SET Power Adjust (All Down) = Off. This results in a dropped connection
(under investigation), because the PXT adjusts the attenuator too high. To alleviate this
issue, always switch back to the setting: Power Adjust (All UP) = On
briefly, before leaving
this screen.
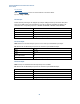
OTA Example Settings for Adaptive Attenuation
It has been found that for some devices, the following OTA settings are successful when using the
adaptive attenuation function.
Set Atten > Attenuation = Adaptive
.
Set the Output Power Offset to +40 dBm on both RF1 and RF2 (Config > Amplitude Offsets > RF1/RF2
Output Power Offset).
Set IDLE_ADJUSTER (Atten > More > IDLE_ADJUSTER ) and CONNECTED_ADJUSTER (Atten > More >
CONNECTED_ADJUSTER ) both to -30 dBm.
Set UL Resource Allocation Mode to Fixed Mac Padding
(Mode > BSE > Mode Setup > More > PHY
Settings > UL Resource Allocation). Note that if Atten > Attenuation = Auto
, this is not required. An
alternative to setting the UL Resource Allocation Mode to Fixed Mac Padding
, is to set UL Power Adjust
(All Up) = On
or Func > UE Power Control > Power Control Mode = CLCP.
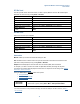
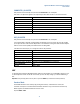
RF1 Input Attenuation
Auto: Enables the PXT to use the value set for Atten > RF1 Ref Level to calculate the required input
attenuation. Otherwise, this value is set by the Attenuation menu key.
Manual: Enables you to set the RF1 input attenuation value manually.
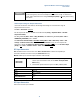
1.
Measurement results are not affected by this setting. To change the
offset of your measurement results, use the Atten > RF1 Input Power
Offset setting.
2. The maximum power level to this input is: 27 dBm (.5 Watts) 5VDC.
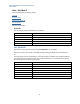
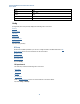
Mode
BSE, SA
Range
Auto | Manual
Preset
Auto
Initial S/W Revision
6.0
Key Path
Atten
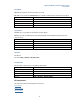
RF2 Input Attenuation
This function is currently not available.