
Technical data


3- 6 Agilent 41000 Administration Guide, Edition 3
Using Agilent iPACE Verification Tool
Installation
Installation Procedure
The installation flow is shown below. If you have already installed the Agilent IO libraries
and the Agilent GPIB (IEEE 488) interface on your computer, skip steps 1 through 3.
1. Install Agilent IO libraries.
Follow the setup program instructions, and complete the installation. Then do not
forget to add the VISACOM to the libraries to install. The VISACOM is required to
execute the Agilent iPACE verification tool.
2. Install Agilent GPIB interface to your PC.
See manual of the GPIB interface.
Note the model number of the GPIB interface, as you may need it to configure the
interface (in step 3).
3. Configure and check the GPIB interface.
See manual of the Agilent IO libraries.
4. Optional. Install Microsoft Visual Basic.NET and Agilent T&M Programmers Toolkit.
If you are going to modify the program code of the Agilent iPACE verification tool,
install the software. Follow the setup program instructions, and complete the
installation.
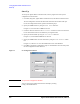
5. Install the Agilent iPACE verification tool.
a. Insert the Agilent iPACE Verification Tool CD-ROM to the CD-ROM drive
connected to your computer.
b. Execute Setup.exe file on the CD-ROM.
Follow the setup program instructions, and complete the installation. The required
files will be installed in the following folders.
<installed folder>\bin
<installed folder>\src
For example, <installed folder> will be as follows.
C:\Program Files\Agilent\iPACE Verification Tool A.01.00
NOTE To check if VISACOM is installed
The VISACOM is required to execute the Agilent iPACE verification tool. Check if the
VisaCom folder exists. If you cannot find it, install the Agilent IO libraries again.
VisaCom folder: <installed folder>\VisaCom
For example, <installed folder> will be as follows.
C:\Program Files\Agilent\IO Libraries