
Troubleshooting guide
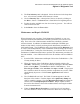


Lab Exercise: Overview and Diagnostics for the Agilent-SL Series
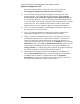
Agilent LC Diagnostic Tool
68
part of the repair procedure. For practice, select the procedure for
Exchanging the Pump Seals and Seal Wear-in Procedure.
5) The instructions for this procedure will appear on the right side of the
program window. The information provided includes: When required,
Tools required, Parts required, Preparation and Completion Steps, and
the step by step directions. You can scroll down and read all the directions
or you can run the video clip by clicking the start button at the lower left side
of the video area. Once started, the start button becomes a pause button.
Buttons to stop the video clip and to adjust the volume are also present.
6) Note: You must have speakers or the headphones installed in order to use
the audio portion of the presentation.
7) Now try to find the procedure for changing the needle assembly in the
autosampler and play the video for this maintenance procedure.
8) NOTE: Some of the maintenance procedures will require you to use the
ChemStation software to move a part of the instrument. For instance, to
change the needle, the needle position must be moved up and down. In
order to perform this function, you must go to the Diagnosis view, select the
Maintenance menu, then ALS, and Maintenance Positions. When you are
ready to begin the maintenance procedure, you would select Start in the
Change Needle box. Changing the piston, changing the gripper and parking
the arm for transport are also performed from this window.
9) Other important information found on the Maintenance and Repair CD
includes Part and Materials, where you can find diagrams of instrument
assemblies and part numbers, and information such as Optimizing
Performance for each of the modules. Browse the contents of the CD as
time allows and familiarize yourself with its contents.