
Troubleshooting guide


Lab Exercise: Overview and Diagnostics for the Agilent-SL Series
Agilent LC Diagnostic Tool
66
this case you may want to set the flow rate to 2-3 mL/min so that the seal
wear counter will change more quickly.
6) Return to the Method and Run Control view. Notice that the check mark
on the EMF indicator is currently green. Under the Instrument menu, select
System On or turn the pump on at the System Diagram. In a few moments,
the EMF indicator will change from green to yellow, indicating that one of
the set limits has been exceeded (in this case the seal wear limit).
7) Note: Exceeding an EMF limit will not shut down your system or abort any
method or sequence. It simply changes the appearance of the EMF
indicator.
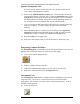
8) When the EMF indicator is yellow, the user should go to the Agilent LC
Diagnostic tool and examine the EMF counter to find out what preventive
maintenance is due by comparing the Value and the Limit values.
9) Reset the Limit to its original value.
10) Back out of the software until you are on the main LC Diagnostic page.
Diagnosing Common Problems
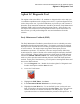
The Guided Diagnostic tool contains software to help you find the root cause of a
problem such as Unstable pressure or excessive pressure ripple.
1) Click on the Guided Diagnositc tool.
2) Select a symptom from the drop box.
3) Follow the troubleshooting guide to see how you can use this tool.
4) Back out to the main menu of the LC Diagnostic tool.
Instrument Tests
The LC Diagnsotic tool contains a complete selection of diagnostic tests such as
the pressure test. The tests are a convenient resource to track instrument
performance. For instance, users often want to test the lamp intensity. A test is
available for that purpose.
1) Select the Tests tool.