
Technical information


Thermo Scientific Agilent 1200 Series Getting Connected Guide iii
C
Preface . . . . . . . . . . . . . . . . . . . . . . . . . . . . . . . . . . . . . . . . . . . . . . . . . . . . . . . . . . . . . . .v
About This Guide. . . . . . . . . . . . . . . . . . . . . . . . . . . . . . . . . . . . . . . . . . . . . . . . v
Related Documentation . . . . . . . . . . . . . . . . . . . . . . . . . . . . . . . . . . . . . . . . . . . v
Safety and Special Notices . . . . . . . . . . . . . . . . . . . . . . . . . . . . . . . . . . . . . . . . .vi
Safety Precautions. . . . . . . . . . . . . . . . . . . . . . . . . . . . . . . . . . . . . . . . . . . . . . . .vi
Contacting Us . . . . . . . . . . . . . . . . . . . . . . . . . . . . . . . . . . . . . . . . . . . . . . . . . vii
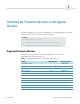
Chapter 1 Checking the Firmware Versions of the Agilent Devices . . . . . . . . . . . . . . . . . . . .1
Supported Firmware Versions . . . . . . . . . . . . . . . . . . . . . . . . . . . . . . . . . . . . . . . 1
Checking the Firmware Versions with the Agilent Instant Pilot. . . . . . . . . . . . . . 2
Checking the Firmware Versions from the Xcalibur Data System . . . . . . . . . . . . 3
Chapter 2 Setting Up the LAN Interface . . . . . . . . . . . . . . . . . . . . . . . . . . . . . . . . . . . . . . . . . . . .5
Step 1: Determining the Type and Location of the LAN Interface . . . . . . . . . . . 5
Step 2: Setting Up the LAN Interface for a Telnet Session . . . . . . . . . . . . . . . . . 7
Step 3: Setting the Stored TCP/IP Address with a Telnet Session . . . . . . . . . . . . 9
Step 4: Setting Up the LAN Interface to Use a Stored IP Address . . . . . . . . . . . 14
Chapter 3 Setting Up the Xcalibur Instrument Configuration . . . . . . . . . . . . . . . . . . . . . . . . .15
The Agilent 1200 Series LC System IP Address. . . . . . . . . . . . . . . . . . . . . . . . . 15
The Contact Closure Board. . . . . . . . . . . . . . . . . . . . . . . . . . . . . . . . . . . . . . . . 16
Specifying the Configuration Options for the Agilent LC System . . . . . . . . . . . 16
Step 1: Opening the Xcalibur Instrument Configuration Program . . . . . . . . 16
Step 2: Adding Devices to the Instrument Configuration . . . . . . . . . . . . . . . 16
Step 3: Specifying the Configuration Options for the Devices . . . . . . . . . . . . 17
Step 4: Closing the Xcalibur Instrument Configuration Program . . . . . . . . . 24
Chapter 4 Installing the External Contact Interface Board . . . . . . . . . . . . . . . . . . . . . . . . . . .25
Chapter 5 Connecting the Ethernet and Trigger Cables . . . . . . . . . . . . . . . . . . . . . . . . . . . . . .27
Ethernet Communication Kit . . . . . . . . . . . . . . . . . . . . . . . . . . . . . . . . . . . . . . 27
Connecting the Ethernet Cables . . . . . . . . . . . . . . . . . . . . . . . . . . . . . . . . . . . . 28
Connecting the External Contact Trigger Cable . . . . . . . . . . . . . . . . . . . . . . . . 29
Contents