
Technical data


4-19
Replacing Instrument Assemblies
To Remove the A7 Front Panel Keyboard
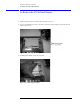
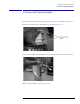
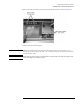
6 Remove the eight screws that secure the keyboard to the front panel, as shown in Figure 4-25.
Figure 4-25. Removing the Keyboard Panel Screws
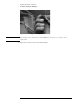
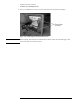
7 Lift the board out of the front panel.
NOTE During reassembly, when replacing the keyboard be sure that all of the buttons come
through the front panel properly. If they are not aligned properly, the buttons may remain
stuck behind the panel.
CAUTION When replacing the front panel, be careful that the two ribbon cables, the front panel trigger cable,
and the Cal cable do not become pinched.