Agilent 82357B USB/GPIB Interface User’s Guide Agilent Technologies
Notices © Agilent Technologies, Inc. 2006–2014 Warranty No part of this manual may be reproduced in any form or by any means (including electronic storage and retrieval or translation into a foreign language) without prior agreement and written consent from Agilent Technologies, Inc. as governed by United States and international copyright laws. The material contained in this document is provided “as is,” and is subject to being changed, without notice, in future editions.
U.S. Government Restricted Rights The Software and Documentation have been developed entirely at private expense. They are delivered and licensed as “commercial computer software” as defined in DFARS 252.227- 7013 (Oct 1988), DFARS 252.211-7015 (May 1991) or DFARS 252.227-7014 (Jun 1995), as a “commercial item” as defined in FAR 2.101(a), or as “Restricted computer software” as defined in FAR 52.227-19 (Jun 1987) (or any equivalent agency regulation or contract clause), whichever is applicable.
Limitation of Warranty The foregoing warranty shall not apply to defects resulting from improper or inadequate maintenance by the Buyer, Buyer-supplied products or interfacing, unauthorized modification or misuse, operation outside of the environmental specifications for the product, or improper site preparation or maintenance. The design and implementation of any circuit on this product is the sole responsibility of the Buyer.
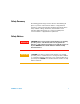
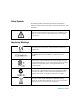
Safety Summary The following general safety precautions must be observed during all phases of operation of this instrument. Failure to comply with these precautions or with specific warnings elsewhere in this manual violates safety standards of design, manufacture, and intended use of the instrument. Agilent Technologies, Inc. assumes no liability for the customer’s failure to comply with these requirements. Safety Notices WA R N I N G A WARNING notice denotes a hazard.
Safety Symbols The following symbol on the instrument and in the documentation indicates precautions that must be taken to maintain safe operation of the instrument. The Instruction Documentation Symbol. The product is marked with this symbol when it is necessary for the user to refer to the instructions in the supplied documentation. Regulatory Markings The CE mark shows that the product complies with all the relevant European Legal Directives.
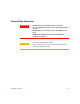
General Safety Information WA R N I N G CAUTION 82357B User’s Guide • DO NOT use the device if it appears damaged or defective. • Observe all markings on the device before connecting any wiring to the device. • DO NOT operate the device in the presence of flammable gases or fumes. • DO NOT install substitute parts or perform any unauthorized modification to the device. • Use the device with the cables provided.
Waste Electrical and Electronic Equipment (WEEE) Directive 2002/96/EC This instrument complies with the WEEE Directive (2002/96/EC) marking requirement. This affixed product label indicates that you must not discard this electrical/electronic product in domestic household waste. Product Category: With reference to the equipment types in the WEEE directive Annex 1, this instrument is classified as a “Monitoring and Control Instrument” product.
Environmental Conditions This instrument is designed for indoor use only. The table below shows the general environmental requirements for the product.
Declaration of Conformity (DoC) The Declaration of Conformity (DoC) for this instrument is available on the Agilent Web site. You can search the DoC by its product model or description at the Web address below. http://regulations.corporate.agilent.com/DoC/search.htm NOTE x If you are unable to search for the respective DoC, please contact your local Agilent representative.
Table of Contents 1 Installing the Agilent 82357B Step 1: Checking Your Shipment 2 Step 2: Installing Agilent IO Libraries Suite 3 Step 3: Connecting the 82357B 5 82357B hardware description 5 Connecting the 82357B to your PC 6 Connecting the 82357B to a USB hub 7 Step 4: Connecting GPIB Instruments 9 Connecting a single GPIB instrument 9 Connecting multiple GPIB instruments 10 Step 5: Programming via the 82357B 11 Establishing instrument communication 11 Programming GPIB instruments 13 2 Using the Agile
Observe the LED states 28 Hardware Checks 30 Check USB cables, USB interface, host PC 30 Check Device Manager 31 Software Installation Checks 32 Check suspend/resume operation 32 Verify Agilent IO Libraries Suite installation 32 Software Configuration Checks 35 Checking IO Control operation 35 Check USB scanner 36 Service and Support Information 37 Contacting Agilent 37 4 Product Specifications Technical Specifications 40 Supplementary Information 43 xii 82357B User’s Guide
Agilent 82357B USB/GPIB Interface User’s Guide 1 Installing the Agilent 82357B This chapter shows a suggested five- step process to install the 82357B and the Agilent IO Libraries Suite, to connect the 82357B to your PC and to program GPIB instruments via the 82357B.
1 Installing the Agilent 82357B Step 1: Checking Your Shipment Your 82357B USB/GPIB Interface shipment should include the items shown in Figure 1- 1. If any item is missing or damaged, keep the shipping materials and contact Agilent Technologies. See “Contacting Agilent” on page 37 later in this guide for addresses and telephone numbers.
Installing the Agilent 82357B 1 Step 2: Installing Agilent IO Libraries Suite NOTE You must have Administrator privileges to install Agilent IO Libraries Suite Connection Expert. This section describes how to install the Agilent IO Libraries Suite on your PC. The Agilent IO Libraries Suite is a collection of libraries and utilities that gives you the ability to use your instruments from instrument control software.
1 Installing the Agilent 82357B • Custom - Select the Custom installation to: a Install the IO Libraries Suite in another directory (for 32- bit operating systems only). b Save disk space by not installing interface manuals. c Use Agilent 32- bit VISA with another vendor's VISA on the same PC in side- by- side mode. Details on side- by- side mode are available at www.agilent.com/find/side- by- side- install or in the IO Libraries Suite help.
Installing the Agilent 82357B 1 Step 3: Connecting the 82357B After the Agilent IO Libraries Suite software has been installed, you can connect the 82357B to any USB port on your PC or you can connect the 82357B via standard USB hubs. NOTE If the Agilent IO Libraries Suite software have not been installed on your PC, STOP. Install the libraries (see Step 2: Installing Agilent IO Libraries Suite).
1 Installing the Agilent 82357B Connecting the 82357B to your PC This section shows steps to connect the 82357B to a USB port on your PC or to your PC via a USB Hub. 1 Connect to a USB Port. Make sure the PC is ON and plug the 82357B USB cable into any available USB port on your PC. Do not connect the 82357B to GPIB instruments at this time. Figure 1-4 Connecting the 82357B to Your PC 2 Observe the LEDs. Observe the LEDs on the 82357B for at least 10 seconds.
Installing the Agilent 82357B 1 Connecting the 82357B to a USB hub This section shows steps to connect the 82357B to a USB port on your PC via a standard USB hub. NOTE Any USB hub used with the 82357B MUST be self-powered (must not be bus-powered or powered from the USB bus). Also, be sure to check the applicable USB hub documentation for hub operating parameters, such as power requirements and maximum length of USB cables. 1 Plug the power adapter into the hub and into an electrical outlet.
1 Installing the Agilent 82357B 4 Observe the LEDs on the 82357B for at least 10 seconds. See Chapter 2, “Using the Agilent 82357B” for a description of the normal LED sequence during an initial installation of the 82357B. a Initially, only the red FAIL LED should be ON. After a few seconds, all three LEDs should be ON. When all three LEDs are ON, this shows that the 82357B has been successfully installed.
Installing the Agilent 82357B 1 Step 4: Connecting GPIB Instruments After the 82357B has been installed, the next step is to connect GPIB instruments to the 82357B. This step includes: • Connecting a Single GPIB instrument OR ... • Connecting Multiple GPIB Instruments CAUTION To avoid damage to the connectors, only finger-tighten the connectors. Connecting a single GPIB instrument Figure 1- 6 shows connection from a single GPIB instrument to the GPIB port on an 82357B.
1 Installing the Agilent 82357B Connecting multiple GPIB instruments Figure 1- 7 shows a typical way to connect three GPIB instruments to an 82357B. When you have made the connections for your system, go to Step 5: Programming via the 82357B. You may want to record the primary GPIB address of each attached instrument for future programming use. NOTE Although Figure 1-7 shows the connection from 82357B to GPIB Instrument 1, the connection can be to any GPIB instrument in the system.
Installing the Agilent 82357B 1 Step 5: Programming via the 82357B After you have connected your GPIB instrument(s) to the 82357B, the next step is to establish communication between your PC and the instruments using Interactive IO. After communication has been established, you can begin programming the instruments using VISA, VISA COM, or SICL. Establishing instrument communication When the Agilent IO Libraries Suite is installed on your PC, an IO utility called Interactive IO is also installed.
1 Installing the Agilent 82357B 4 To send other commands, click Commands> to select from a list of common commands, or type a command into the Command: field. If you experience timeout errors for some commands, click Options to change the timeout value. Figure 1-8 Agilent Interactive IO 5 When communication has been established to each GPIB instrument, you can begin to program the instruments using VISA, VISA COM, or SICL. See the next section, Programming GPIB instruments.
Installing the Agilent 82357B 1 Programming GPIB instruments This section provides an introduction to programming GPIB instruments via the 82357B USB/GPIB interface using the Agilent VISA, VISA COM, and SICL IO Libraries. You can program in various languages/applications, including Visual Basic, Visual C++, Agilent VEE, and National Instruments LabVIEW. See the applicable user’s guide(s), such as the Visual Basic User’s Guide, for programming guidelines.
1 Installing the Agilent 82357B Introduction to IO interface configuration An IO interface consists of a hardware interface and a software interface. The Connection Expert utility is used to associate a unique software interface ID with a hardware interface. The Agilent IO Libraries Suite uses an Interface ID or Logical Unit (LU) Number to identify an interface.
Installing the Agilent 82357B 1 Figure 1-9 Typical System Installation - 82357B USB/GPIB Interface 82357B User’s Guide 15
1 Installing the Agilent 82357B THIS PAGE HAS BEEN INTENTIONALLY LEFT BLANK.
Agilent 82357B USB/GPIB Interface User’s Guide 2 Using the Agilent 82357B This chapter describes normal operating states and modes for the 82357B and provides the guidelines to use the 82357B, including: • Initial 82357B operating states • Introduction to 82357B operating modes • Single 82357B operation • Multiple 82357B operation • SRQ operation Agilent Technologies 17
2 Using the Agilent 82357B Initial 82357B Operating States Figure 2- 1 shows the sequence of initial operating states when the 82357B is first connected to a USB port on a PC or on a USB hub.
Using the Agilent 82357B 2 Introduction to 82357B operating modes The 82357B has two modes of operation. When only one 82357B is connected to a USB port within a system, we define the feature as the Single Mode Features. When up to four 82357Bs are connected at the same time to USB ports within a system, we define the feature as the Multiple Mode Features.
2 Using the Agilent 82357B Single 82357B operation When an 82357B is first installed, a default VISA Interface ID, SICL Interface ID, Logical Unit (LU) number and GPIB Address are automatically assigned to the serial number associated with this specific 82357B. For example, assume an 82357B with serial number MY12345678.
Using the Agilent 82357B 2 If you disconnect this 82357B and plug in another 82357B (with a different serial number), or if you re- plug the same 82357B, the new 82357B will assume the same VISA Interface ID, SICL Interface ID, LU number, and GPIB Address as the previous 82357B. Multiple 82357B operation When two or more 82357Bs are attached to a system at the same time, we define the mode as the multiple mode of operation.
2 Using the Agilent 82357B NOTE • You can change the parameter values of the 82357B as required. See “Changing configuration parameters” on page 23 for details. • You can also convert from multiple mode operation to single mode operation. See “Changing modes of operation” on page 24 for details.
Using the Agilent 82357B 2 Setting Configuration Parameters This section gives guidelines to change or set various configuration parameters for the 82357B, including: • Changing Configuration Parameters • Changing Modes of Operation • Setting Timeout Floor Value • Setting High- Performance Operation Changing configuration parameters To change the VISA or SICL Interface ID, the LU or GPIB Address, or if you want to check the values of these configuration parameters, highlight the USB/GPIB interface in the
2 Using the Agilent 82357B Figure 2-2 Agilent 82357B (High Speed) Interface - USB/GPIB Changing modes of operation If your system has multiple 82357Bs configured (multiple mode operation), the only way to change from multiple mode of operation to single mode operation is to perform the following: 1 Unplug all 82357Bs from the system. 2 Run Connection Expert (click the IO icon, then click Agilent Connection Expert).
Using the Agilent 82357B 2 Setting timeout floor values The 82357B has a default timeout “floor” value that is an internal requirement to ensure reliable USB communication. The 82357B will not allow timeouts less than the floor value. (By default, VISA/SICL timeouts are set to infinite time). To programmatically determine the timeout floor, you can set the timeout to a very small value, such as 1 ms, then query for the actual timeout floor value.
2 Using the Agilent 82357B Setting 82357B high-performance operation NOTE Changing the T1 delay as described in this section is an advanced feature and also requires attention to cable lengths and other system features. Introduction The GPIB transfer rate for 82357B writes using large (>1000 bytes) buffer size is affected by the Data Available (T1) delay time. (The transfer rates are not noticeably affected when the buffer size is <1000 bytes). The default delay time used by the 82357B is 800 ns.
Agilent 82357B USB/GPIB Interface User’s Guide 3 Troubleshooting the Agilent 82357B This chapter provides troubleshooting guidelines of the 82357B including hardware and software checks and also the service and support information for the 82357B.
3 Troubleshooting the Agilent 82357B Troubleshooting Flowchart Figure 3- 1 shows a suggested sequence of steps to diagnose and troubleshoot 82357B problems, based on the LED states. You can use the LED states to help diagnose and troubleshoot the 82357B whenever the LED states do not match expected normal states. See Chapter 2, “Using the Agilent 82357B” for the normal LED sequence when the 82357B is initially connected to a USB port.
Troubleshooting the Agilent 82357B 3 START All LEDs OFF READY FAIL Red Fail LED ON ACCESS READY FAIL ALL LEDs ON ACCESS READY FAIL ACCESS Typical Cause Typical Cause Typical Cause No power on USB bus or device turned off by Windows Plug and Play Manager. Agilent IO Libraries not installed or 82357B USB drivers not installed. Improper Agilent IOLibraries configuration.
3 Troubleshooting the Agilent 82357B Hardware Checks If all LEDs are still off for 10 or more seconds after plugging the 82357B USB cable into a USB port, and all Windows Plug- and- Play Manager activity and the Connection Expert refreshes have ceased, start your troubleshooting sequence by performing hardware checks. If any action taken results in a change in the LED status, go to Software Installation Checks or Software Configuration Checks.
Troubleshooting the Agilent 82357B 3 Check Device Manager You can use the Windows Device Manager to reinstall the 82357B, as required. Go to Device Manager by selecting Start > Control Panel > System > Hardware > Device Manager. For Windows 8, right- click the bottom- left corner of the Desktop and select Device Manager. From the Device Manager, select 82357 and then Properties. Tab to Driver and click Reinstall Driver.
3 Troubleshooting the Agilent 82357B Software Installation Checks When only the red FAIL LED is still on after 10 seconds, the 82357B has been detected by the host computer. Check suspend/resume operation Some Windows operating systems support Power Management which can suspend the PC while the 82357B is in operation. After a Suspend/Resume cycle, the 82357B may not properly resume operation. In this case, you may need to unplug/replug the USB cable to restore 82357B operation.
Troubleshooting the Agilent 82357B 3 Figure 3-2 IO icon on the Windows taskbar notification area a If the IO icon is displayed, click the icon and select About Agilent IO Control to display the version. The version must be 15.0 or greater. b If the IO icon is not displayed, a version of the IO Libraries Suite may still be installed. To verify this, check for Agilent Connection Expert in the Start menu, or the Start Screen (Windows 8).
3 Troubleshooting the Agilent 82357B 2 Install Agilent IO Libraries (as required). If Version 15.0 or greater of the Agilent IO Libraries Suite is not installed on your PC, perform this step. a Remove the 82357B USB cable from the USB port. b Insert the Automation- Ready CD into your CD- ROM drive and follow the instructions in Chapter 1, “Installing the Agilent 82357B” to install the libraries. If you do not have the Automation- Ready CD, you can download the Agilent IO Libraries Suite from www.agilent.
Troubleshooting the Agilent 82357B 3 Software Configuration Checks If all three LEDs remain on for more than 10 seconds after the 82357B is connected to a USB port, the 82357B has been installed. Start your troubleshooting sequence by checking IO Control operation. If any action taken results in a change in the LED status, go to Software Installation Checks or Hardware Checks, where applicable. Checking IO Control operation When the Agilent IO Libraries Suite is installed, an IO Control is created.
3 Troubleshooting the Agilent 82357B If any of these symptoms occur: 1 Unplug/Replug the 82357B. If unplugging then replugging the 82357B causes the Agilent 82357B USB/GPIB Interface Detected dialog box to appear or the Connection Expert window to refresh, the problem is solved. If not, go to Step 2. 2 Shut down and restart IO Control. Take these steps to shut down and then restart the IO Control. Taking these actions should initialize all attached 82357Bs and display only the green Ready LED.
Troubleshooting the Agilent 82357B 3 Service and Support Information There are no user- serviceable parts for the Agilent 82357B USB/GPIB interface. If you suspect a hardware failure for the 82357B, contact Agilent for instructions to return the unit. See the following Contacting Agilent section for telephone numbers/Web site address.
3 Troubleshooting the Agilent 82357B THIS PAGE HAS BEEN INTENTIONALLY LEFT BLANK.
Agilent 82357B USB/GPIB Interface User’s Guide 4 Product Specifications This chapter lists the 82357B technical specifications and supplementary information.
4 Product Specifications Technical Specifications GENERAL REQUIREMENTS Minimum system requirements Windows XP Service Pack 3 • 600 MHz or higher required (800 MHz recommended) • 256 MB RAM (1 GB or greater is recommended) • Hard Disk Space - 1.0 GB available for Microsoft .NET Framework 3.5, SP1 - 100 MB for Agilent IO Libraries Suite • Video - Super VGA (800x600) 256 colors or more • Browser - Microsoft Internet Explorer 6.
Product Specifications 4 Windows Server 2008 R2 (with or without SP1) (64-bit) Standard and Enterprise • 1.4 GHz (x64 processor) or 1.3GHz (Dual Core), no support for Itanium64 • 1GB minimum • Hard Disk Space - 1.0 GB available for Microsoft .NET Framework 3.
4 Product Specifications ENVIRONMENTAL SPECIFICATIONS Operating environment 0 °C to 55 °C Storage environment –40 °C to +70 °C Operating humidity Up to 90 % at 40 °C non-condensing Storage humidity Up to 90 % at 65 °C non-condensing ORDERING INFORMATION Interface 82357B USB/GPIB Interface Options Opt 0B1 - Add manual set Accessories None 42 82357B User’s Guide
Product Specifications 4 Supplementary Information This section provides supplementary information on the 82357B performance, including supported GPIB modes.The 82357B is defined as a controller as it can be (and is required to be) the system controller. GPIB Modes of Operation Supported The 82357B supports standard GPIB modes of operation, except for: • Passing of Active Controller • Non- system Controller mode which prevents using SICL Commander sessions or VISA Servant sessions IEEE-488.
4 Product Specifications THIS PAGE HAS BEEN INTENTIONALLY LEFT BLANK.
Index Index A H Agilent IO Libraries Suite, verify installation, 32 Agilent telephone number, 37 Agilent Web site, 37 Hardware Checks, 30 Hardware Description, 5 High-Performance Operation, setting, 26 B Before You Install, 2 C Changing Configuration Parameters, 23 changing configuration parameters, 23 Changing Modes of Operation, 24 changing modes of operation, 24 check device manager, 31 Check IO Control Operation, 35 Check PC, 30 Check Shipment, 2 Check USB Cables, 30 Check USB Interface, 30 Check
Index THIS PAGE HAS BEEN INTENTIONALLY LEFT BLANK.
www.agilent.