
User`s guide


Installing the Instrument 2-1
2 Installing the Instrument
Objectives
In order to meet this chapter’s goals, you should be able to complete the installation of the
Monitor with a Server and an Extension including all of the following tasks:
• Install the Instrument.
• Configure the hardware.
• Perform post-installation checks.
• Connect a printer.
• Comply with safety requirements.
As well, you should be able to perform site preparation and assemble any of the following
mounting options:
• Table Mount.
• Universal Bed Hanger.
• Wall Rail.
• Tilt/Swivel Mount.
• Universal Pole Clamp.
• Measurement Server Mounting Plate.
• Infrared Printer Connector.
The appropriate installation procedures are described in this chapter.
Concepts
The following section contains information that you need to understand before attempting an
installation of an M3046A Monitor, an M3000A Measurement Server and, where present,
M3015A/M3016A Measurement Server Extensions.
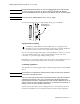
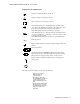
,QVWUXPHQW
*URXQGLQJ
The detachable three-wire power cable grounds the Instrument to the power
line ground when plugged into an appropriate three-wire receptacle. This
cable protects both the patient and the hospital staff. Do not use any other
power cable.
/LQH9ROWDJH
6HOHFWLRQ
Switch-mode power supply automatically selects the necessary line voltage
for the system.
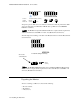
0RXQWLQJ6XU
IDFH$QDO\VLV
The mounting surface frequently dictates the type of screw to be used when
mounting the equipment. Ability to analyse the mounting surface protects
both the patient and the hospital staff. Do not mount equipment unless the
screws are adequate and safe for the purpose.