
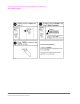
Technical data


87
S:\hp11807a\OPT001\USRGUIDE\BOOK\chapters\softbw14.fb
Chapter 3, Using the Software/HP 8920A FW Rev. Below A.14.00
Customizing Testing
Changing Test Execution Conditions
Test Execution Conditions define how your testing program starts and
where and when test output occurs. You may decide to:
• Start the program automatically when the Test System is powered on. (Autostart)
• Stop testing when a measurement fails or continue through all of the tests without
stopping. (On UUT Failure)
• Display (or print) only measurements that fail, or display (or print) all measurements
that pass or fail. (Output Results)
• Pause between each measurement, or run through the entire test sequence. (Run
Mode)
• Display output on CRT only, or display on CRT and print hardcopy. (Output
Destination)
NOTE: If printing test results is desired, after selecting Printer additional steps are necessary to
connect and configure the printer. See "Printing," in chapter 5, on page 212.
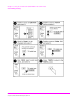
• Enter a title for an output heading for the displayed or printed results. (Output
Heading). Select the field with the knob and enter the output heading by selecting the
appropriate letters and the select Done.
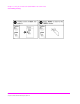
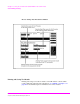
Test Execution Conditions
is located on the TESTS screen. Press TESTS to
display them. To change a default setting, position the cursor to the desired field.
Pressing the knob (”selecting”) will toggle the underlined selection.
Test Execution Conditions settings (except for Autostart) are not
retained after a power-down/ power-up cycle, and will return to their default
settings. They are not stored on the memory card when a test procedure is saved.