
Technical data

Performance Tests and Calibration 1
Adjustments
34450A Service Guide 39
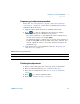
Frequency gain adjustment procedure
Review the “Test Considerations” on page 5 and “Gain adjustment
considerations” on page 29 sections before beginning this procedure.
Calibration Mode: Frequency
1 Apply the input signal shown in the Calibration Point Box.
2 Press to start the adjustment. The Status box displays
CALIBRATING indicates the calibration is in progress.
• Successful completion of each adjustment value is indicated by a
message in the Status box showing PASS.
• An adjustment failure is indicated by a message in the Status box
briefly showing FAIL. Check the input value, range, function, and
entered adjustment value to correct the problem and repeat the
adjustment step.
3 Verify the Frequency gain adjustments using the “Frequency gain
verification test” on page 16.
Finishing the adjustments
1 Remove all shorting plugs and connections from the instrument.
2 Reset the Calibration Message (see “Calibration Message”).
3 Record the new Calibration Count (see “To read the calibration
count”).
4 Press to exit the Calibration Mode.
5 Reset the “Calibration Security” on page 23
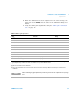
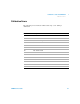
Table 1-17 Frequency gain adjustment
Input Frequency Function Range
1 Vrms 1 kHz Frequency 1 V, 1 kHz