Technical data
Table Of Contents
- Agilent 3000 Series Oscilloscopes-At a Glance
- In This Book
- Contents
- Figures
- Tables
- Getting Started
- Step 1. Inspect the package contents
- Step 2. Turn on the oscilloscope
- Step 3. Load the default oscilloscope setup
- Step 4. Input a waveform
- Step 5. Become familiar with the Front Panel Controls
- Step 6. Become familiar with the oscilloscope display
- Step 7. Use Auto-Scale
- Step 8. Compensate probes
- Step 9. Use the Run Control buttons
- Displaying Data
- Capturing Data
- Making Measurements
- Saving, Recalling, and Printing Data
- Oscilloscope Utility Settings
- Specifications and Characteristics
- Service
- Safety Notices
- Index

3Capturing Data
74 Agilent 3000 Series Oscilloscopes User’s Guide
To select the Average acquisition mode:
1 Press Acquire
.
2 In the Acquire menu, press Acquisition until “Average” is selected.
3 Press Averages to select the desired number (2, 4, 8, 16, 32, 64, 128, or
256).
To select the Peak Detect acquisition mode
In Normal or Average acquisition modes, at longer horizontal time/div
settings, the oscilloscope’s analog- to- digital converter samples at a rate
that yields more samples than can be stored in a limited amount of
oscilloscope memory. Consequently, samples are thrown away (decimated),
and you can miss narrow excursions on a signal.
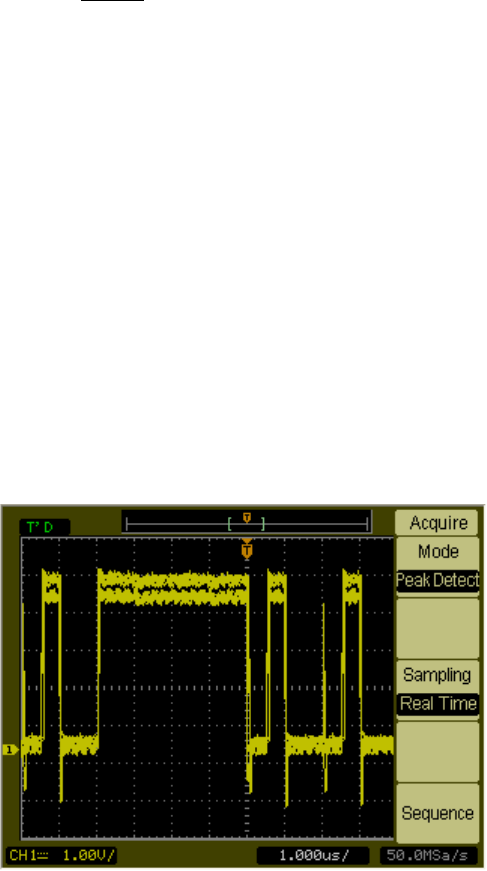
However, in the Peak Detect acquisition mode, acquisitions are made at
the fastest sample rate, and the minimum and maximum values for the
period associated with the actual sample rate are stored. This way, you
can capture narrow excursions on a signal at longer horizontal time/div
settings.
Figure 35 Peak Detect Waveform


